Lexus NX: Disassembly
Lexus NX Service Manual / Vehicle Exterior / Exterior Panels / Trim / Rear Door Outside Moulding / Disassembly
DISASSEMBLY
CAUTION / NOTICE / HINT
HINT:
- Use the same procedure for the RH and LH sides.
- The procedure listed below is for the LH side.
PROCEDURE
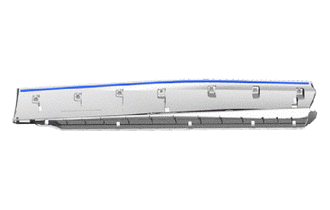
1. REMOVE REAR DOOR UPPER OUTSIDE MOULDING PAD
| (a) Remove the rear door upper outside moulding pad. |
|
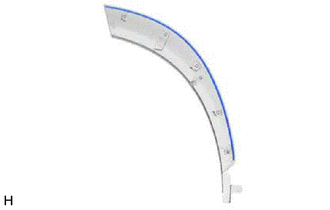
2. REMOVE REAR DOOR NO. 1 MOULDING PAD
| (a) Remove the rear door No. 1 moulding pad. |
|
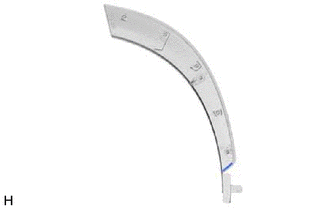
3. REMOVE REAR DOOR REAR OUTSIDE MOULDING PAD
| (a) Remove the rear door rear outside moulding pad. |
|
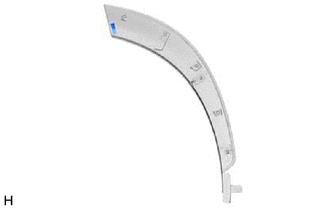
4. REMOVE NO. 2 MOULDING TAPE
| (a) Remove the No. 2 moulding tape. |
|
READ NEXT:
 Reassembly
REASSEMBLY CAUTION / NOTICE / HINT HINT:
Use the same procedure for the RH and LH sides.
The procedure listed below is for the LH side.
PROCEDURE 1. INSTALL NO. 2 MOULDING TAPE (a) When using
Components
COMPONENTS ILLUSTRATION *1 DECK FLOOR BOX LH *2 NO. 3 DECK BOARD SUB-ASSEMBLY *3 REAR DECK FLOOR BOX *4 NEGATIVE AUXILIARY BATTERY TERMINAL N*m (kgf*cm, ft.*lbf): Specified
SEE MORE:
Installation
INSTALLATION CAUTION / NOTICE / HINT NOTICE: When replacing the combination meter assembly, make sure to replace it with a new one. PROCEDURE 1. INSTALL COMBINATION METER ASSEMBLY (a) Connect the connectors and attach the clamp. *a Screw (b) Install the combination meter a
Installation
INSTALLATION PROCEDURE 1. INSTALL TIRE PRESSURE MONITOR INITIATOR DRIVER (a) Attach the 2 claws to install the tire pressure monitor initiator driver. 2. INSTALL ECU INTEGRATION BOX RH (a) Install the ECU integration box RH with the 2 nuts and bolt. Torque: 5.5 N·m {56 kgf·cm, 49 in·lbf} (b) Con
© 2016-2024 Copyright www.lexunx.com
