Lexus NX: Rear Wiper Rubber
Components
COMPONENTS
ILLUSTRATION
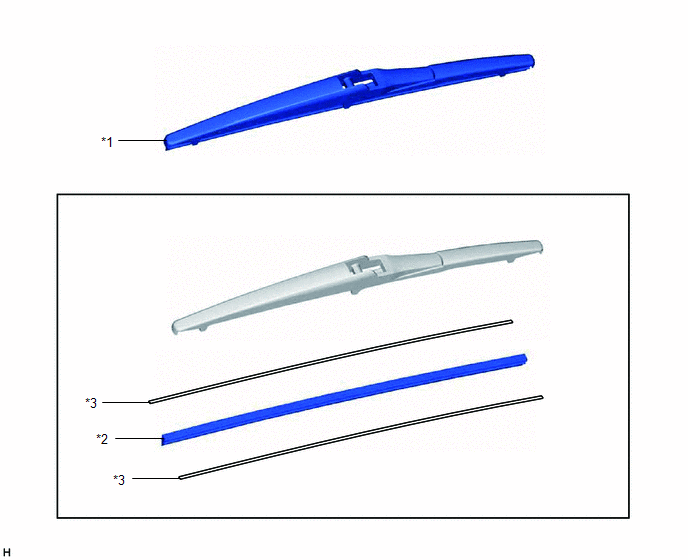
| *1 | REAR WIPER BLADE | *2 | REAR WIPER RUBBER |
| *3 | REAR WIPER BACKING PLATE | - | - |
Replacement
REPLACEMENT
PROCEDURE
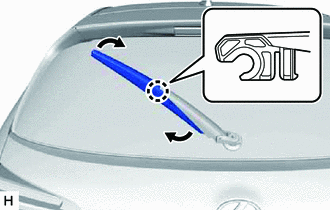
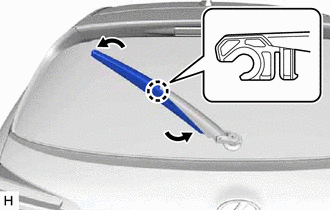
1. REMOVE REAR WIPER BLADE
(a) Move the rear wiper arm.
| (b) Move the rear wiper blade until a "click" sound can be heard and the claw detaches. NOTICE: Do not damage the claw. |
|
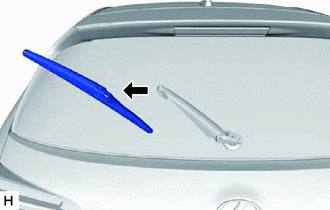
| (c) Remove the rear wiper blade as shown in the illustration. NOTICE: Place a cloth, etc., between the back door glass and rear wiper arm to prevent damage to the back door glass. |
|
2. REMOVE REAR WIPER RUBBER
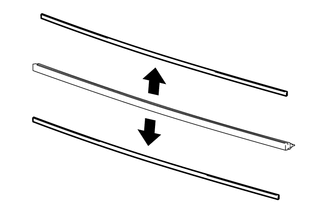
| (a) Pull out the rear wiper rubber together with the 2 rear wiper rubber backing plates from the rear end of the rear wiper blade stopper as shown in the illustration. NOTICE: Do not use excessive force when pulling out the rear wiper rubber in order to prevent deformation of the rear wiper rubber backing plate and damage to the rear wiper blade claw. HINT: Lightly pressing (gripping) the center of the rear wiper blade can make it easier to lift up and pull out the rear wiper rubber. |
|
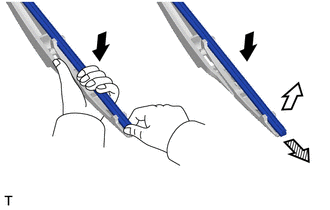
| (b) Remove the 2 rear wiper rubber backing plates from the rear wiper rubber. |
|
3. INSTALL REAR WIPER RUBBER
| (a) Install the 2 rear wiper rubber backing plates to the rear wiper rubber. NOTICE: Install the backing plates so that they are facing in the correct direction. |
|
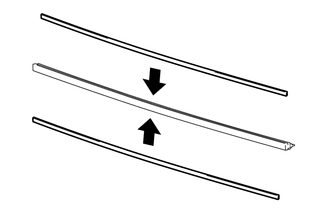
| (b) Install the rear wiper rubber together with the rear wiper rubber backing plate to the rear wiper blade from the claw in the center of the rear wiper blade. |
|
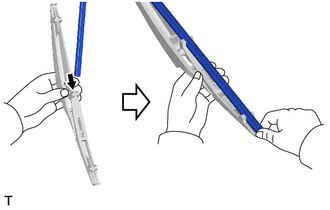
| (c) After passing the rear wiper rubber together with the 2 rear wiper rubber backing plates through the claw of the rear wiper blade, pull them through the stopper and then through the claw on the opposite side to install them. HINT:
|
|

4. INSTALL REAR WIPER BLADE
| (a) Attach the claw to install the rear wiper blade. |
|
(b) Lower the rear wiper blade.
READ NEXT:
 Components
COMPONENTS ILLUSTRATION *1 FRONT FENDER FRONT SPLASH SHIELD RH *2 FRONT FENDER LINER RH *3 FRONT FENDER MOULDING SUB-ASSEMBLY RH *4 LEVEL WARNING SWITCH ASSEMBLY *5 NO. 1 MOU
Removal
REMOVAL PROCEDURE 1. REMOVE FRONT WHEEL RH Click here 2. REMOVE FRONT FENDER MOULDING SUB-ASSEMBLY RH HINT: Use the same procedure described for the LH side. Click here 3. REMOVE NO. 1 MOULDING TA
SEE MORE:
Transmission system (P3147-239,P3147-241)
DESCRIPTION The hybrid vehicle transaxle assembly consists of the planetary gear unit, generator (MG1) and motor (MG2). The planetary gear unit uses a planetary gear to split the engine output into mechanical power and electrical power in accordance with driving requests when the vehicle is being dr
Removal
REMOVAL PROCEDURE 1. PRECAUTION NOTICE: After turning the power switch off, there may be a waiting time before disconnecting the negative (-) auxiliary battery terminal. Click here 2. REMOVE DECK BOARD ASSEMBLY Click here 3. REMOVE NO. 3 DECK BOARD SUB-ASSEMBLY Click here 4. REMOVE REAR DECK F
