Lexus NX: Removal
REMOVAL
PROCEDURE
1. REMOVE CONSOLE ARMREST ASSEMBLY
Click here .gif)
2. REMOVE UPPER REAR CONSOLE PANEL
Click here
3. REMOVE UPPER NO. 2 CONSOLE PANEL GARNISH
Click here
4. REMOVE INSTRUMENT SIDE PANEL LH
Click here
5. REMOVE NO. 1 INSTRUMENT PANEL SAFETY PAD SUB-ASSEMBLY
Click here
6. REMOVE NO. 1 SWITCH HOLE BASE
Click here
7. REMOVE NO. 1 INSTRUMENT PANEL UNDER COVER SUB-ASSEMBLY
Click here
8. REMOVE LOWER NO. 1 INSTRUMENT PANEL FINISH PANEL
Click here
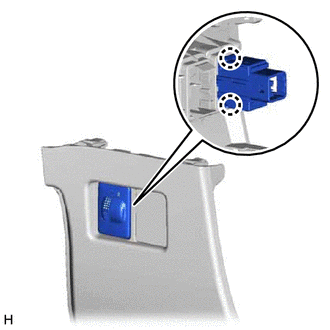
9. REMOVE VEHICLE SOUND SWITCH
| (a) Detach the 2 claws and remove the vehicle sound switch. |
|
READ NEXT:
 Inspection
INSPECTION PROCEDURE 1. INSPECT VEHICLE SOUND SWITCH (a) Check the vehicle sound switch on/off operation (1) Measure the resistance according to the value(s) in the table below. Standard Resistance
Installation
INSTALLATION PROCEDURE 1. INSTALL VEHICLE SOUND SWITCH (a) Attach the 2 claws to install the vehicle sound switch. 2. INSTALL LOWER NO. 1 INSTRUMENT PANEL FINISH PANEL Click here 3. INSTALL NO. 1
SEE MORE:
Diagnostic Trouble Code Chart
DIAGNOSTIC TROUBLE CODE CHART Navigation System DTC No. Detection Item Link B1323 Lost Communication with Haptic Device B1324 Lost Communication with Meter B1325 Lost Communication with HUD B1326 Lost Communication with Clock Device (Local-CAN)
HD Radio Tuner Malfunction (B1551,B15A0,B15B3,B15B5,B15B7,B15BA,B15F9)
DESCRIPTION These DTCs are stored when a malfunction occurs in the radio receiver assembly DTC No. Detection Item DTC Detection Condition Trouble Area B1551 HD Radio Tuner Malfunction When one of the conditions below is met:
"HD Radio" tuner decoder malfunction
"HD Radio" tuner
© 2016-2024 Copyright www.lexunx.com
