Lexus NX: Components
COMPONENTS
ILLUSTRATION
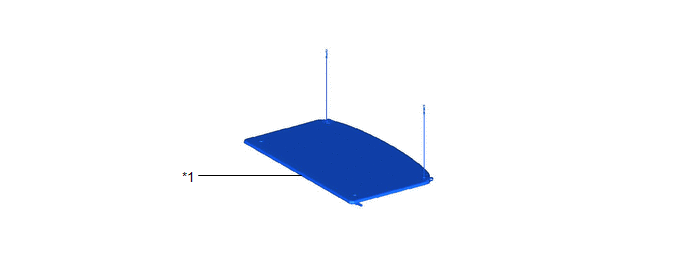
| *1 | TONNEAU COVER ASSEMBLY | - | - |
ILLUSTRATION
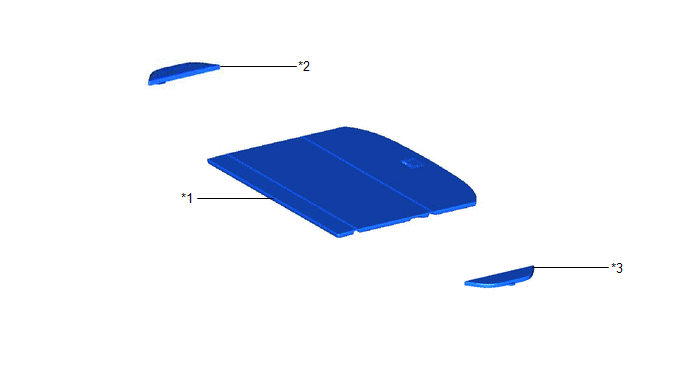
| *1 | DECK BOARD ASSEMBLY | *2 | DECK FLOOR BOX LH |
| *3 | DECK FLOOR BOX RH | - | - |
ILLUSTRATION
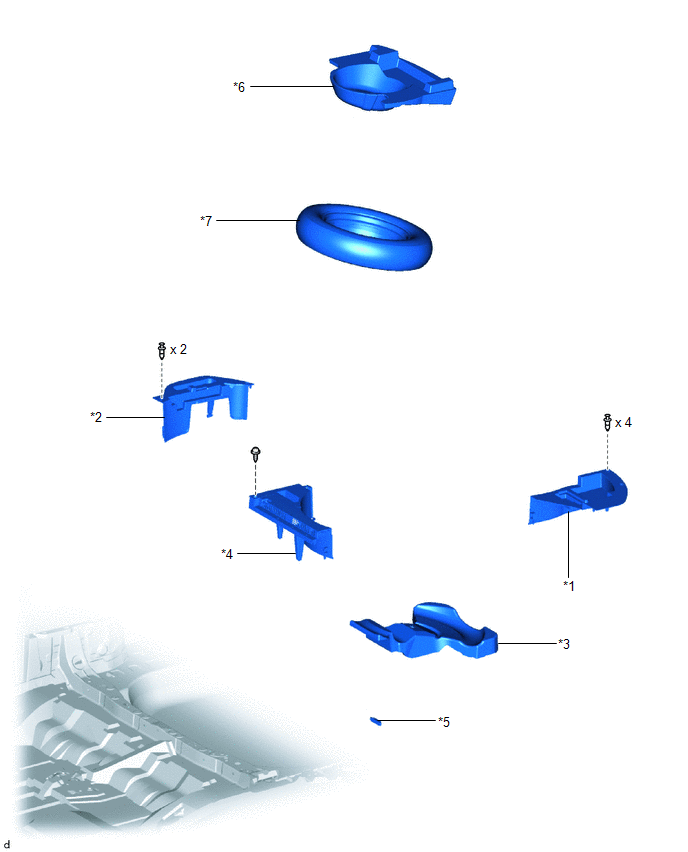
| *1 | DECK FLOOR BOX LH | *2 | DECK FLOOR BOX RH |
| *3 | NO. 1 SPARE WHEEL CARRIER | *4 | NO. 1 TOOL BOX SUB-ASSEMBLY |
| *5 | NO. 3 INDOOR ELECTRICAL KEY ANTENNA ASSEMBLY | *6 | REAR DECK FLOOR BOX |
| *7 | SPARE TIRE | - | - |
READ NEXT:
 Installation
INSTALLATION PROCEDURE 1. INSTALL NO. 3 INDOOR ELECTRICAL KEY ANTENNA ASSEMBLY NOTICE: Do not reuse dropped or damaged parts. (a) Connect the connector. (b) Attach the clamp to install the No. 3 indoo
Removal
REMOVAL PROCEDURE 1. REMOVE REAR SEAT ASSEMBLY (for Power Seat) Click here 2. REMOVE REAR SEAT ASSEMBLY (for Manual Seat) Click here 3. REMOVE TONNEAU COVER ASSEMBLY Click here 4. REMOVE DE
SEE MORE:
Inspection
INSPECTION PROCEDURE 1. INSPECT TIRES (a) Check the tires for wear and proper inflation pressure. Specified Pressure (When Tire is Cool): Tire Size Front kPa (kgf/cm2, psi) Rear kPa (kgf/cm2, psi) 225/65R17 102H 240 (2.4, 35)*1 250 (2.5, 36)*2 240 (2.4, 35)*1 250 (2.5, 36)*2 225/
Installation
INSTALLATION CAUTION / NOTICE / HINT HINT: A bolt without a torque specification is shown in the standard bolt chart. Click here PROCEDURE 1. INSTALL CONSOLE BOX ASSEMBLY (a) Attach the 4 guides to install the console box assembly. (b) Install the 6 bolts. (c) Connect the connectors and attach the
© 2016-2024 Copyright www.lexunx.com
