Lexus NX: Front Blower Motor
Components
COMPONENTS
ILLUSTRATION
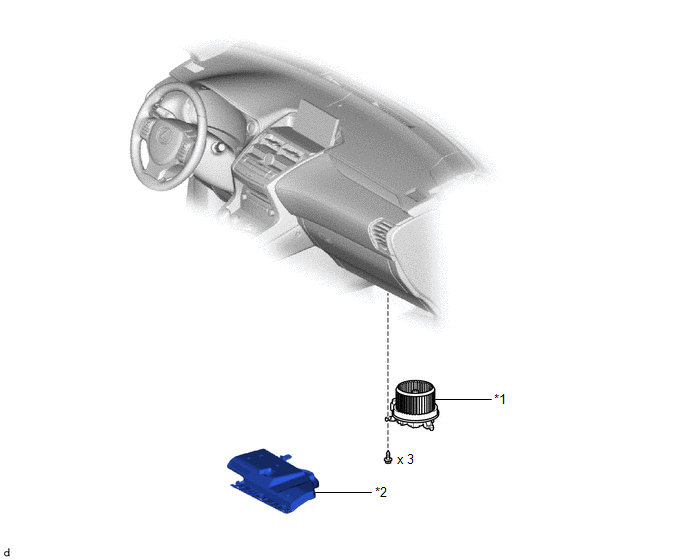
| *1 | BLOWER WITH FAN MOTOR SUB-ASSEMBLY | *2 | NO. 2 INSTRUMENT PANEL UNDER COVER SUB-ASSEMBLY |
Removal
REMOVAL
PROCEDURE
1. REMOVE NO. 2 INSTRUMENT PANEL UNDER COVER SUB-ASSEMBLY
Click here .gif)
2. REMOVE BLOWER WITH FAN MOTOR SUB-ASSEMBLY
(a) Detach the clamp.
| (b) Disconnect the connector. |
|
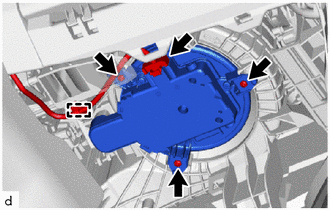
(c) Remove the 3 screws and the blower with fan motor sub-assembly.
Installation
INSTALLATION
PROCEDURE
1. INSTALL BLOWER WITH FAN MOTOR SUB-ASSEMBLY
(a) Install the blower with fan motor sub-assembly with the 3 screws.
(b) Connect the connector.
(c) Attach the clamp.
2. INSTALL NO. 2 INSTRUMENT PANEL UNDER COVER SUB-ASSEMBLY
Click here .gif)
READ NEXT:
 Components
COMPONENTS ILLUSTRATION *1 COOLER EXPANSION VALVE *2 NO. 1 COOLER EVAPORATOR SUB-ASSEMBLY *3 NO. 1 COOLER THERMISTOR *4 UPPER HEATER CASE *5 LOWER HEATER CASE *6 O-RING
Removal
REMOVAL PROCEDURE 1. REMOVE AIR CONDITIONING RADIATOR ASSEMBLY Click here 2. REMOVE QUICK HEATER ASSEMBLY Click here 3. REMOVE COOLER EXPANSION VALVE Click here 4. REMOVE NO. 1 COOLER EVAPORA
SEE MORE:
Removal
REMOVAL PROCEDURE 1. REMOVE CENTER BACK DOOR GARNISH Click here 2. REMOVE BACK DOOR SIDE GARNISH LH Click here 3. REMOVE BACK DOOR SIDE GARNISH RH Click here 4. REMOVE BACK DOOR FINISH COVER LH (w/o Power Back Door) Click here 5. REMOVE BACK DOOR FINISH COVER RH (w/o Power Back Door) Cli
Hybrid Transaxle System
On-vehicle InspectionON-VEHICLE INSPECTION PROCEDURE 1. INSPECT FLUID PRESSURE OF OIL PUMP (a) Remove the rear engine under cover LH. Click here (b) Remove the fluid pump cover plug and O-ring from the hybrid vehicle transaxle assembly. (c) Install SST to the hybrid vehicle tr
© 2016-2024 Copyright www.lexunx.com
