Lexus NX: Removal
REMOVAL
CAUTION / NOTICE / HINT
HINT:
- Use the same procedure for the RH and LH sides.
- The procedures listed below are for the LH side.
PROCEDURE
1. REMOVE REAR DOOR LOWER OUTSIDE MOULDING SUB-ASSEMBLY LH
HINT:
When removing the rear door lower outside moulding sub-assembly LH, heat the rear door panel and rear door lower outside moulding sub-assembly LH using a heat light.
Standard:
| Item | Temperature |
|---|---|
| Rear Door Panel | 40 to 60°C (104 to 140°F) |
| Rear Door Lower Outside moulding Sub-assembly LH | 20 to 30°C (68 to 86°F) |
NOTICE:
Do not heat the rear door panel and rear door lower outside moulding sub-assembly LH excessively.
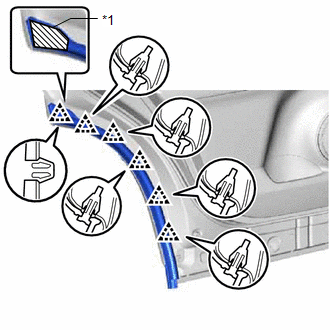
(a) Put protective tape around the rear door lower outside moulding sub-assembly LH.
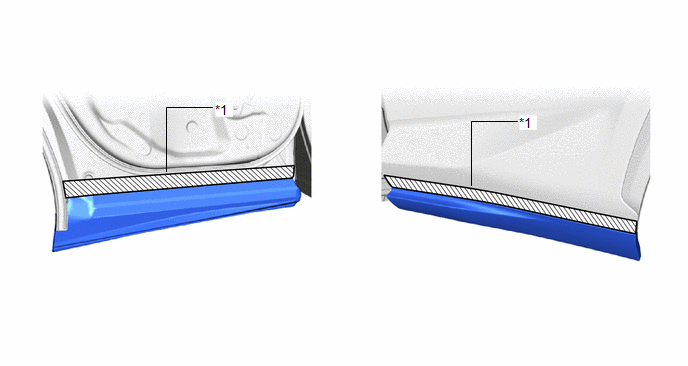
| *1 | Protective Tape | - | - |
| (b) Using moulding remover D, detach the 5 claws. |
|
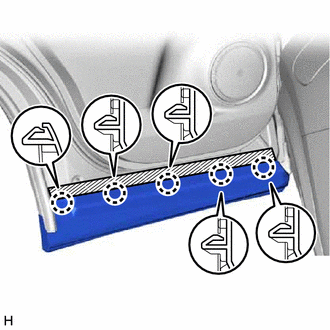
| (c) Remove the hole cover. |
|
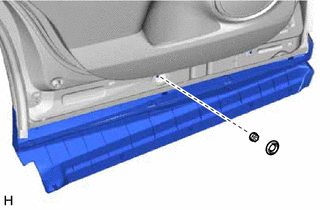
(d) Remove the nut.
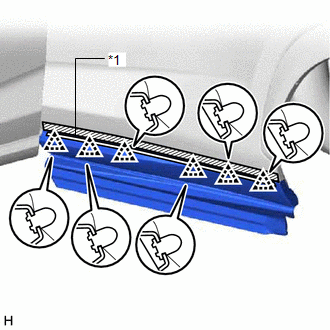
| (e) Using moulding remover D, detach the 6 clips and remove the rear door lower outside moulding sub-assembly LH. |
|
2. REMOVE REAR DOOR NO. 2 WEATHERSTRIP LH
| (a) Detach the 6 clips and remove the rear door No. 2 weatherstrip LH. |
|
3. REMOVE REAR DOOR REAR UPPER OUTSIDE MOULDING LH
HINT:
When removing the rear door rear upper outside moulding LH, heat the rear door panel and rear door lower outside moulding LH using a heat light.
Standard:
| Item | Temperature |
|---|---|
| Rear Door Panel | 40 to 60°C (104 to 140°F) |
| Rear Door Rear Upper Outside Moulding LH | 20 to 30°C (68 to 86°F) |
NOTICE:
Do not heat the rear door panel and rear door rear upper outside moulding LH excessively.
(a) Remove the clip.
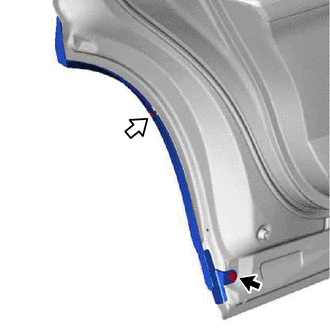
.png) | Bolt |
.png) | Clip |
(b) Remove the bolt.
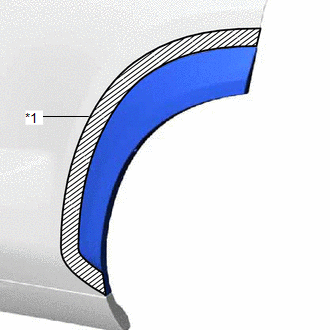
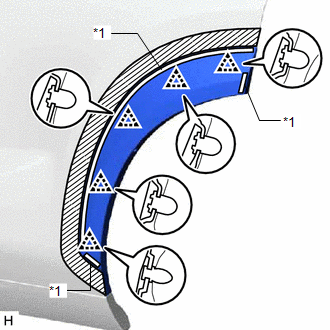
| (c) Put protective tape around the rear door rear upper outside moulding LH. |
|
| (d) Detach the 5 clips and remove the rear door rear upper outside moulding LH |
|
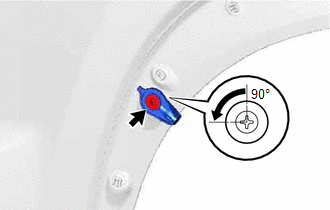
4. REMOVE OUTSIDE MOULDING RETAINER
| (a) Turn the clip 90° and remove the clip. |
|
(b) Detach the claw and remove the outside moulding retainer.
READ NEXT:
 Disassembly
DISASSEMBLY CAUTION / NOTICE / HINT HINT:
Use the same procedure for the RH and LH sides.
The procedure listed below is for the LH side.
PROCEDURE 1. REMOVE REAR DOOR UPPER OUTSIDE MOULDING PA
Reassembly
REASSEMBLY CAUTION / NOTICE / HINT HINT:
Use the same procedure for the RH and LH sides.
The procedure listed below is for the LH side.
PROCEDURE 1. INSTALL NO. 2 MOULDING TAPE (a) When using
SEE MORE:
Washer Fluid Level Warning Switch Circuit
DESCRIPTION When the volume of washer fluid decreases to below a certain level (when the level warning switch assembly is turned on), the multi-information display warns the driver by displaying a message. WIRING DIAGRAM CAUTION / NOTICE / HINT NOTICE: When replacing the combination meter assembly,
Components
COMPONENTS ILLUSTRATION *1 DECK FLOOR BOX LH *2 NO. 3 DECK BOARD SUB-ASSEMBLY *3 REAR DECK FLOOR BOX *4 NEGATIVE AUXILIARY BATTERY TERMINAL N*m (kgf*cm, ft.*lbf): Specified torque - - ILLUSTRATION *1 AIR CLEANER CASE SUB-ASSEMBLY *2 HEATER ACCESSORY ASSEMB
