Lexus NX: Vanity Light Bulb
Replacement
REPLACEMENT
CAUTION / NOTICE / HINT
HINT:
- Use the same procedure for the RH and LH sides.
- The procedure listed below is for the LH side.
PROCEDURE
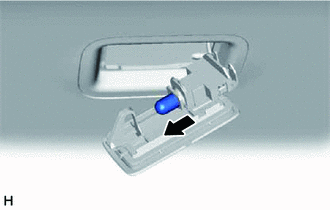
1. DISCONNECT VANITY LIGHT ASSEMBLY
| (a) Using a screwdriver, detach the claw and disconnect the vanity light assembly. HINT: Tape the screwdriver tip before use. |
|
.png)
2. REMOVE VANITY LIGHT BULB
| (a) Remove the vanity light bulb from the vanity light holder. |
|
3. INSTALL VANITY LIGHT BULB
| (a) Install the vanity light bulb to the vanity light holder. |
|
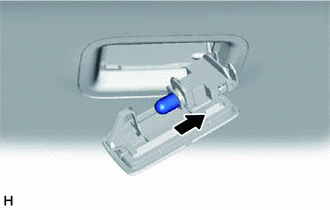
4. CONNECT VANITY LIGHT ASSEMBLY
| (a) Attach the claw to connect the vanity light assembly. |
|
.png)
READ NEXT:
 Components
COMPONENTS ILLUSTRATION *A for 8 Inch Display *B for 10.3 Inch Display *1 AIR CONDITIONING CONTROL ASSEMBLY *2 CENTER INSTRUMENT CLUSTER FINISH PANEL ASSEMBLY *3 CONSOLE ARMR
SEE MORE:
Inspection
INSPECTION PROCEDURE 1. INSPECT AUTOMATIC LIGHT CONTROL SENSOR (a) Disconnect the automatic light control sensor connector. *a Front view of wire harness connector (to Automatic Light Control Sensor) (b) Measure the voltage and resistance according to the value(s) in the t
A/C Inverter High Voltage Power Resource System Malfunction (B1471)
DESCRIPTION The hybrid vehicle control ECU monitors the voltage of the HV battery. The hybrid vehicle control ECU stops compressor control and stores this DTC when the monitored voltage is outside the specified range. This DTC will be stored as a history DTC. Compressor control may not resume unless
© 2016-2024 Copyright www.lexunx.com
