Lexus NX: Disassembly
DISASSEMBLY
PROCEDURE
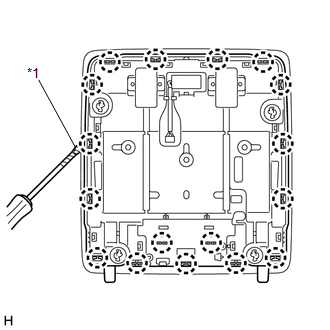
1. REMOVE MAP LIGHT SUB-ASSEMBLY
| (a) Using a screwdriver, detach the 17 claws and remove the map light sub-assembly. HINT: Tape the screwdriver tip before use. |
|
READ NEXT:
 Inspection
INSPECTION PROCEDURE 1. INSPECT MAP LIGHT ASSEMBLY (PERSONAL LIGHT) (a) Inspect the front map light. (1) Apply battery voltage to the connector and check the light illumination condition. OK: M
Reassembly
REASSEMBLY PROCEDURE 1. INSTALL MAP LIGHT SUB-ASSEMBLY (a) Attach the 17 claws to install the map light sub-assembly.
Installation
INSTALLATION PROCEDURE 1. INSTALL MAP LIGHT ASSEMBLY (PERSONAL LIGHT) (a) Connect the connectors. (b) Attach the 4 clips to install the map light assembly (personal light).
SEE MORE:
How To Proceed With Troubleshooting
CAUTION / NOTICE / HINT HINT:
Use these procedures to troubleshoot the lane tracing assist system.
*: Use the Techstream.
PROCEDURE 1. VEHICLE BROUGHT TO WORKSHOP
NEXT 2. INSPECT AUXILIARY BATTERY VOLTAGE (a) Measure the auxiliary battery voltage with the p
Diagnostic Trouble Code Chart
DIAGNOSTIC TROUBLE CODE CHART Power Back Door System DTC No. Detection Item Link B2205 Kick Sensor Circuit B2220 Back Door Motor Circuit B2226 PBD Unit Pulse Sensor LH Circuit B2227 PBD Unit Pulse Sensor RH Circuit B222A PBD Touch Sensor LH Ci
© 2016-2024 Copyright www.lexunx.com
