Lexus NX: Components
Lexus NX Service Manual / Vehicle Exterior / Exterior Panels / Trim / Back Door Outside Garnish / Components
COMPONENTS
ILLUSTRATION
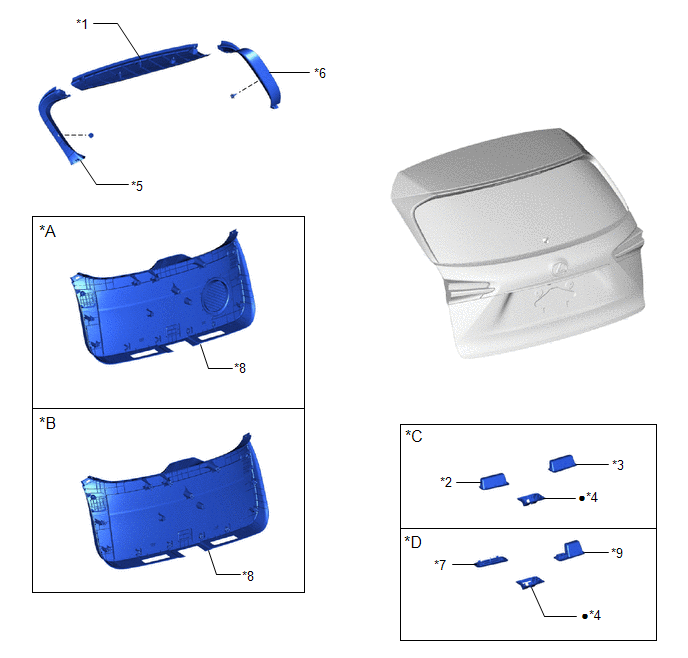
| *A | w/ Woofer | *B | w/o Woofer |
| *C | w/o Power Back Door | *D | w/ Power Back Door |
| *1 | BACK DOOR CENTER GARNISH | *2 | BACK DOOR FINISH COVER LH |
| *3 | BACK DOOR FINISH COVER RH | *4 | BACK DOOR LOCK COVER |
| *5 | BACK DOOR SIDE GARNISH LH | *6 | BACK DOOR SIDE GARNISH RH |
| *7 | BACK DOOR TRIM BASE | *8 | BACK DOOR TRIM BOARD ASSEMBLY |
| *9 | PULL HANDLE | - | - |
| ● | Non-reusable part | - | - |
ILLUSTRATION
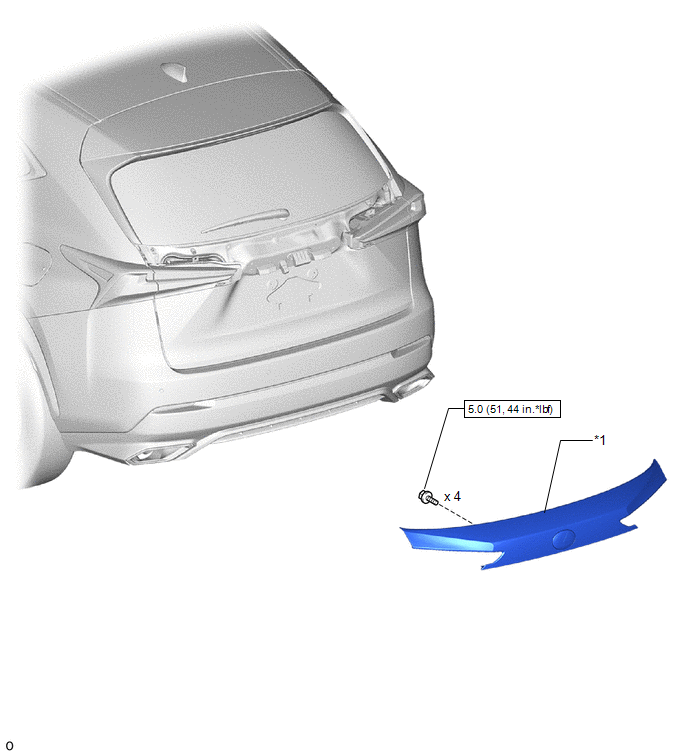
| *1 | BACK DOOR OUTSIDE GARNISH SUB-ASSEMBLY | - | - |
.png) | N*m (kgf*cm, ft.*lbf): Specified torque | - | - |
ILLUSTRATION
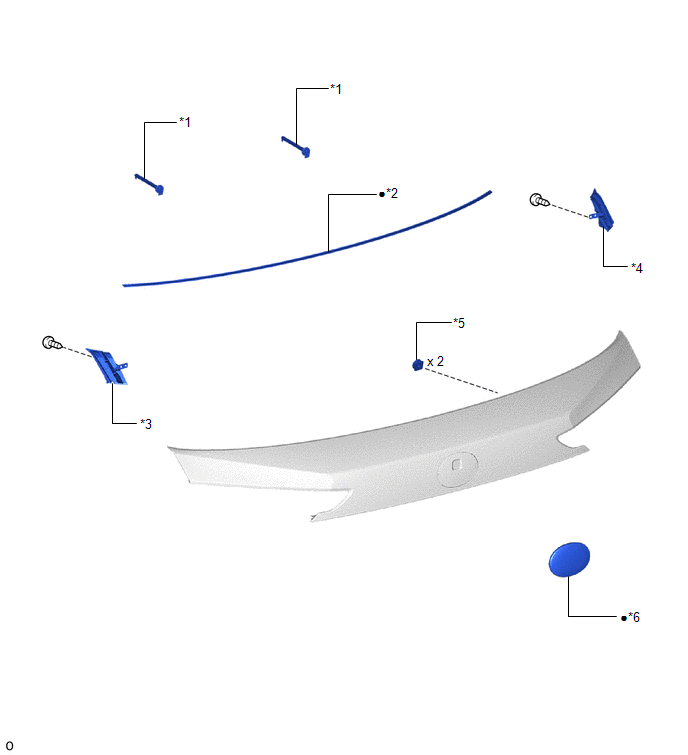
| *1 | BACK DOOR NO. 1 GARNISH RETAINER | *2 | BACK DOOR OUTSIDE GARNISH PROTECTOR |
| *3 | BACK DOOR UPPER OUTSIDE GARNISH LH | *4 | BACK DOOR UPPER OUTSIDE GARNISH RH |
| *5 | NUT | *6 | SYMBOL EMBLEM |
| ● | Non-reusable part | - | - |
READ NEXT:
 Removal
REMOVAL PROCEDURE 1. REMOVE BACK DOOR CENTER GARNISH Click here 2. REMOVE BACK DOOR SIDE GARNISH LH Click here 3. REMOVE BACK DOOR SIDE GARNISH RH Click here 4. REMOVE BACK DOOR TRIM BASE (w/ Po
Disassembly
DISASSEMBLY PROCEDURE 1. REMOVE BACK DOOR UPPER OUTSIDE GARNISH LH (a) Remove the screw and back door upper outside garnish LH. 2. REMOVE BACK DOOR UPPER OUTSIDE GARNISH RH HINT: Use th
Reassembly
REASSEMBLY PROCEDURE 1. INSTALL NUT (a) Install the 2 nuts. 2. INSTALL SYMBOL EMBLEM Click here 3. INSTALL BACK DOOR OUTSIDE GARNISH PROTECTOR (a) Clean the back door outside garnish surface. (1)
SEE MORE:
Parts Location
PARTS LOCATION ILLUSTRATION *1 INNER REAR VIEW MIRROR ASSEMBLY *2 OUTER REAR VIEW MIRROR ASSEMBLY LH *3 OUTER REAR VIEW MIRROR ASSEMBLY RH *4 OUTER MIRROR LH *5 OUTER MIRROR RH *6 OUTER MIRROR CONTROL ECU ASSEMBLY LH *7 OUTER MIRROR CONTROL ECU ASSEMBLY RH *8
Relay
On-vehicle InspectionON-VEHICLE INSPECTION PROCEDURE 1. INSPECT JUNCTION BLOCK *1 Main Body ECU - - *a Component without harness connected (Junction Block) *b Component without main body ECU connected (Junction Block) NOTICE: Before performing the relay inspections for the re
© 2016-2024 Copyright www.lexunx.com
