Lexus NX: Air conditioning filter
The air conditioning filter must be changed regularly to maintain air conditioning efficiency.
Removal method
1. Turn the power switch off.
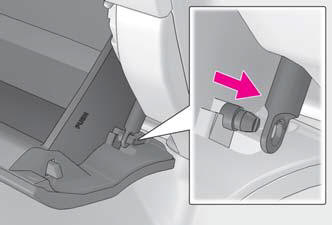
2. Open the glove box. Slide off the damper.
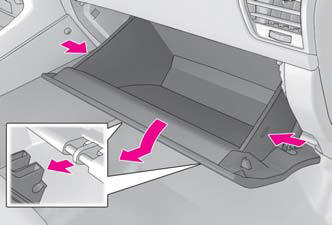
3. Push in the glove box on the vehicle's outer side to disconnect the claws. Then pull out the glove box and disconnect the lower claws.
4. Remove the filter cover.
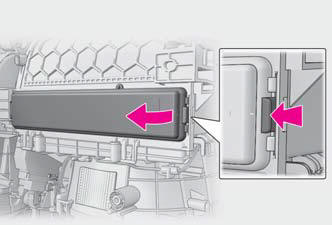
5. Remove the air conditioning filter and replace it with a new one.
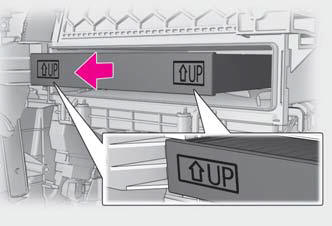
The " UP" marks shown on the filter
should be pointing up.
UP" marks shown on the filter
should be pointing up.
■Checking interval Inspect and replace the air conditioning filter according to the maintenance schedule.
In dusty areas or areas with heavy traffic flow, early replacement may be required.
(For scheduled maintenance information, please refer to the "Owner's Manual Supplement" or "Scheduled Maintenance".)
■If air flow from the vents decreases dramatically The filter may be clogged. Check the filter and replace if necessary.
■Air conditioning filter with deodorizing function When fragrances are placed in your vehicle, the deodorizing effect may become significantly weakened in a short period: When an air conditioning odor comes out continuously, replace the conditioning filter.
NOTICE
■When using the air conditioning system Make sure that a filter is always installed.
Using the air conditioning system without a filter may cause damage to the system.
READ NEXT:
 Electronic key battery
Replace the battery with a new one
if it is depleted.
■When the card key battery needs to be
replaced (if equipped)
The battery for the card key is available only
at Lexus dealers. Your Lexus d
Checking and replacing fuses
If any of the electrical components
do not operate, a fuse may have
blown. If this happens, check and
replace the fuses as necessary.
Checking and replacing fuses
1. Turn the power switch off.
Headlight aim
Vertical movement adjusting
bolts
Type A
Adjustment bolt A
Adjustment bolt B
Type B
Adjustment bolt A
Adjustment bolt B
Before checking the headlight
aim
Make sure the veh
SEE MORE:
Seat Heater Switch(for Rear Seat)
ComponentsCOMPONENTS ILLUSTRATION *1 CONSOLE BOX REGISTER ASSEMBLY *2 REAR CONSOLE END PANEL SUB-ASSEMBLY *3 REFRESHING SEAT SWITCH *4 DUCT RemovalREMOVAL PROCEDURE 1. REMOVE REAR CONSOLE END PANEL SUB-ASSEMBLY Click here 2. REMOVE CONSOLE BOX REGISTER ASSEMBLY Click here
Removal
REMOVAL PROCEDURE 1. PRECAUTION Click here 2. REMOVE SERVICE PLUG GRIP Click here 3. DRAIN COOLANT (for Inverter Coolant) Click here 4. DISCONNECT WIRE HARNESS (a) Disconnect the 4 wire harness clamps from the inverter reserve tank assembly and inverter with converter assembly.
