
Lexus NX: Removal
REMOVAL
PROCEDURE
1. REMOVE NO. 1 ENGINE UNDER COVER ASSEMBLY
Click here .gif)
2. DISCONNECT TRANSMISSION CONTROL CABLE ASSEMBLY
| (a) Remove the nut and disconnect the transmission control cable assembly from the control shaft lever. |
|
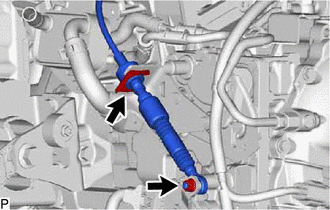
(b) Remove the clip from the transmission control cable assembly.
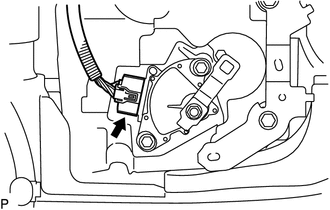
3. REMOVE SHIFT LEVER POSITION SENSOR
| (a) Disconnect the shift lever position sensor connector. |
|
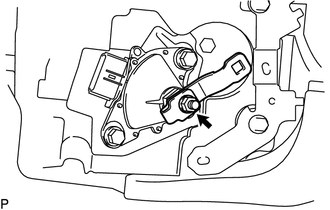
| (b) Remove the nut, washer, and control shaft lever from the manual valve shaft. |
|
| (c) Using a screwdriver with its tip wrapped with protective tape, pry the tabs of the lock plate. |
|
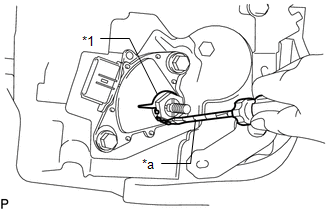
| (d) Remove the lock nut and lock plate from the manual valve shaft. |
|
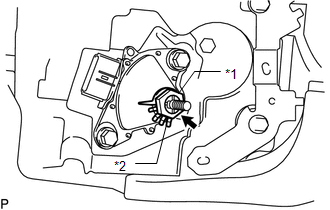
| (e) Remove the 2 bolts and pull out the shift lever position sensor from the manual valve shaft. |
|
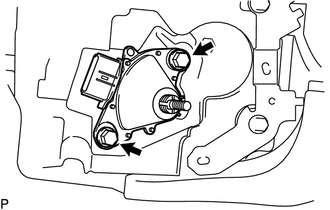
READ NEXT:
 Inspection
INSPECTION PROCEDURE 1. INSPECT SHIFT LEVER POSITION SENSOR (a) Measure the resistance according to the value(s) in the table below. Standard Resistance: Tester Connection Condition Specifi
Adjustment
ADJUSTMENT PROCEDURE 1. INSPECT SHIFT LEVER POSITION SENSOR POSITION (a) Apply the parking brake. (b) Lock the wheels with chocks to secure the vehicle. (c) Turn the power switch on (READY). (d) Move
Installation
INSTALLATION PROCEDURE 1. INSTALL SHIFT LEVER POSITION SENSOR (a) Install the shift lever position sensor to the manual valve shaft. (b) Temporarily install the 2 bolts. (c) Install the lock plate and
SEE MORE:
Removal
REMOVAL PROCEDURE 1. REMOVE FRONT DOOR TRIM COVER LH Click here 2. REMOVE FRONT DOOR INSIDE HANDLE BEZEL PLUG LH Click here 3. REMOVE POWER WINDOW REGULATOR MASTER SWITCH ASSEMBLY WITH FRONT DOOR ARMREST BASE PANEL Click here 4. REMOVE FRONT DOOR TRIM BOARD SUB-ASSEMBLY LH Click here 5.
Cold Start Idle Air Control System Performance (P050A)
MONITOR DESCRIPTION This monitor will run when the engine is started at an engine coolant temperature of -10 to 50°C (14 to 122°F). The DTC will be stored after the engine idles for 13 seconds (2 trip detection logic). The DTC is designed to monitor the idle air control at cold start. When the eng
