Lexus NX: CD/DVD Sound Skips
CAUTION / NOTICE / HINT
NOTICE:
When replacing the radio receiver assembly, always replace it with a new one.
If a radio receiver assembly which was installed to another vehicle is used, the following may occur:
- A communication malfunction DTC may be stored.
- The radio receiver assembly may not operate normally.
HINT:
Depending on the parts that are replaced during vehicle inspection or maintenance, performing initialization, registration or calibration may be needed. Refer to Precaution for Audio and Visual System.
Click here .gif)
PROCEDURE
| 1. | CHECK DISC |
| (a) Check that the disc is not deformed or cracked. OK: No deformation or cracks on the disc |
|
| NG | .gif) | END (DISC IS DEFECTIVE) |
|
.gif)
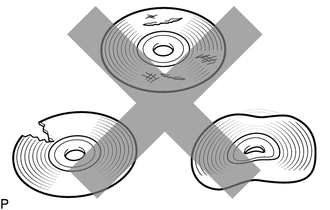
| 2. | CHECK DISC |
| (a) Check the disc. OK: The disc is clean. NOTICE: Do not use a conventional record cleaner or anti-static preservative. HINT: If dirt is on the disc surface, wipe it clean with a soft cloth from the inside to the outside in a radial direction. |
|
.png)
| NG | | CLEAN DISC |
|
| 3. | REPLACE DISC AND RECHECK |
(a) Replace the disc with a known good one and check that the malfunction disappears.
OK:
Malfunction disappears.
| OK | | END (DISC IS DEFECTIVE) |
|
| 4. | CHECK RADIO RECEIVER ASSEMBLY |
(a) Check the radio receiver assembly installation condition.
(1) Check that the radio receiver assembly is properly installed.
OK:
The radio receiver assembly is properly installed.
| OK | | REPLACE RADIO RECEIVER ASSEMBLY |
| NG | | REINSTALL RADIO RECEIVER ASSEMBLY |
READ NEXT:
 Radio Broadcast cannot be Received or Poor Reception
WIRING DIAGRAM CAUTION / NOTICE / HINT NOTICE: When replacing the radio receiver assembly, always replace it with a new one. If a radio receiver assembly which was installed to another vehicle is use
Illumination for Panel Switch does not Come on with Tail Switch ON
CAUTION / NOTICE / HINT NOTICE: When replacing the radio receiver assembly, always replace it with a new one. If a radio receiver assembly which was installed to another vehicle is used, the following
Display does not Dim when Light Control Switch is Turned ON
DESCRIPTION If the audio and visual system is turned on with the light control switch in the tail or head position, before AVC-LAN communication is established, the multi-display assembly dims accordi
SEE MORE:
Internal Control Module Software Incompatibility Invalid/Incompatible Software Component (U030057)
DESCRIPTION If the vehicle information stored in the forward recognition camera does not match the vehicle information sent from the hybrid vehicle control ECU, the forward recognition camera stores DTC U030057. DTC No. Detection Item DTC Detection Condition Trouble Area DTC Output from
ECU Malfunction (C1611)
DESCRIPTION This DTC is stored if the rear television camera assembly judges that there is an internal malfunction as a result of its self check. HINT: The rear television camera assembly stores different types of information during initialization. If the rear television camera assembly cannot read
