Lexus NX: Components
COMPONENTS
ILLUSTRATION
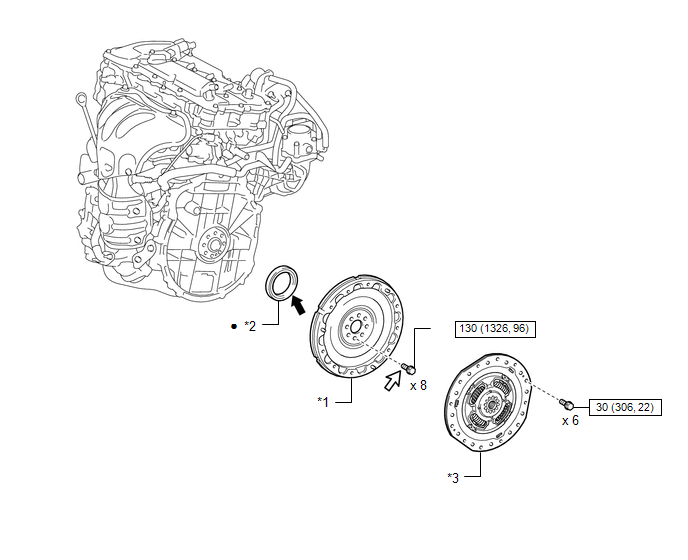
| *1 | FLYWHEEL SUB-ASSEMBLY | *2 | REAR ENGINE OIL SEAL |
| *3 | TRANSMISSION INPUT DAMPER ASSEMBLY | - | - |
.png) | N*m (kgf*cm, ft.*lbf): Specified torque | ● | Non-reusable part |
.png) | MP grease | .png) | Toyota Genuine Adhesive 1324, Three Bond 1324 or equivalent |
| ★ | Precoated part | - | - |
READ NEXT:
 Removal
REMOVAL PROCEDURE 1. REMOVE HYBRID VEHICLE TRANSAXLE ASSEMBLY Click here 2. REMOVE TRANSMISSION INPUT DAMPER ASSEMBLY (a) Using SST, hold the crankshaft pulley assembly. SST: 09213-54015 SST: 09
Installation
INSTALLATION PROCEDURE 1. INSTALL REAR ENGINE OIL SEAL (a) Apply MP grease to the lip of a new rear engine oil seal. NOTICE:
Do not allow foreign matter to contact the lip of the rear engine oil se
SEE MORE:
Automatic air conditioning system
Air outlets and fan speed are automatically adjusted according to the
temperature
setting.
Press the "MENU" button on the Remote Touch, then select
to display the
air conditioning control screen.
The air conditioning system can be displayed and operated on the side display.
Air conditi
Crankshaft Position Sensor "A" Circuit (P0335)
DESCRIPTION The crankshaft position sensor system consists of a crank angle sensor plate (crankshaft) and a pickup coil. The crank angle sensor plate has 34 teeth at 10° intervals (2 teeth are missing for detecting top dead center), and is installed on the crankshaft. The crankshaft position sensor
© 2016-2026 Copyright www.lexunx.com
