Lexus NX: Components
COMPONENTS
ILLUSTRATION
.png)
| *1 | DECK FLOOR BOX LH | *2 | NO. 3 DECK BOARD SUB-ASSEMBLY |
| *3 | REAR DECK FLOOR BOX | *4 | NEGATIVE AUXILIARY BATTERY TERMINAL |
.png) | N*m (kgf*cm, ft.*lbf): Specified torque | - | - |
ILLUSTRATION
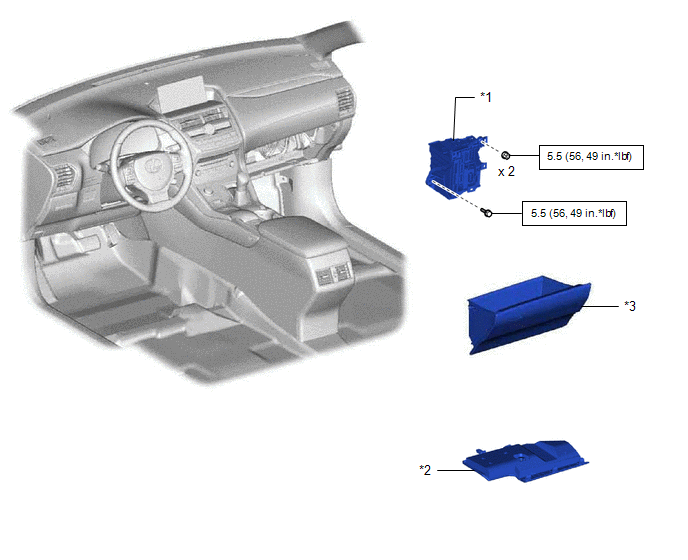
| *1 | ECU INTEGRATION BOX RH | *2 | GLOVE COMPARTMENT DOOR ASSEMBLY |
| *3 | NO. 2 INSTRUMENT PANEL UNDER COVER SUB-ASSEMBLY | - | - |
| | N*m (kgf*cm, ft.*lbf): Specified torque | - | - |
ILLUSTRATION
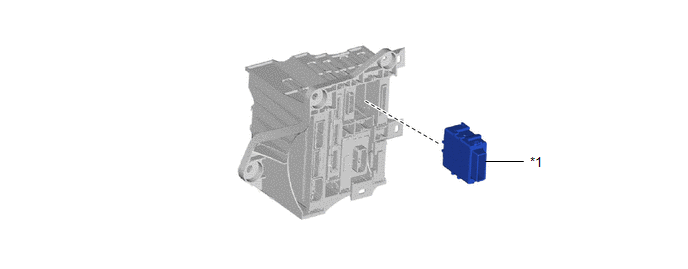
| *1 | WINDSHIELD WIPER RELAY ASSEMBLY | - | - |
READ NEXT:
 Removal
REMOVAL PROCEDURE 1. PRECAUTION CAUTION: Be sure to read Precoution thoroughly before serving. Click here NOTICE: After the power switch is turned off, there may be a waiting time before disconnecti
Installation
INSTALLATION PROCEDURE 1. INSTALL WINDSHIELD WIPER RELAY ASSEMBLY (a) Attach the 2 claws to install the windshield wiper relay assembly. 2. INSTALL ECU INTEGRATION BOX RH Click here 3. INSTALL NO. 2
SEE MORE:
Open or Short Circuit in Back Camera Signal (C1622)
DESCRIPTION This DTC is stored if the parking assist ECU judges as a result of its self check that the signals or signal lines between the parking assist ECU and the rear television camera assembly are not normal. DTC No. Detection Item DTC Detection Condition Trouble Area C1622 Open
How To Proceed With Troubleshooting
CAUTION / NOTICE / HINT HINT: *: Use the Techstream. PROCEDURE 1. VEHICLE BROUGHT TO WORKSHOP
NEXT 2. INSPECT AUXILIARY BATTERY VOLTAGE Standard voltage: 11 to 14 V If the voltage is below 11 V, recharge or replace the auxiliary battery before proceeding.
NE
© 2016-2026 Copyright www.lexunx.com
