Lexus NX: Components
COMPONENTS
ILLUSTRATION
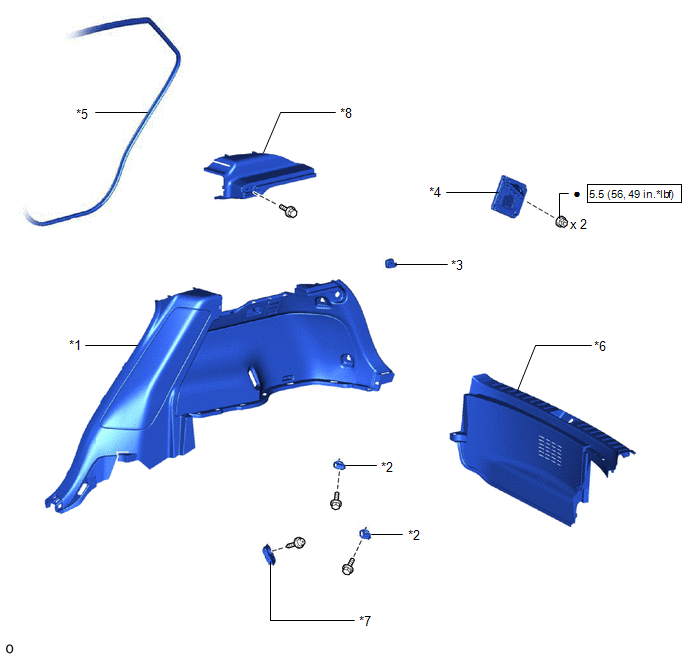
| *1 | DECK TRIM SIDE PANEL ASSEMBLY RH | *2 | LUGGAGE HOLD BELT STRIKER ASSEMBLY |
| *3 | NO. 1 LUGGAGE COMPARTMENT TRIM HOOK | *4 | PARKING ASSIST ECU |
| *5 | REAR DOOR OPENING TRIM WEATHERSTRIP RH | *6 | REAR FLOOR FINISH PLATE |
| *7 | ROPE HOOK ASSEMBLY | *8 | UPPER DECK TRIM SIDE BOARD RH |
.png) | N*m (kgf*cm, ft.*lbf): Specified torque | ● | Non-reusable part |
READ NEXT:
 Removal
REMOVAL PROCEDURE 1. REMOVE REAR SEAT ASSEMBLY (a) for Manual Seat: Click here (b) for Power Seat: Click here 2. REMOVE REAR FLOOR FINISH PLATE Click here 3. DISCONNECT REAR DOOR OPENING TRIM W
Installation
INSTALLATION PROCEDURE 1. INSTALL PARKING ASSIST ECU (a) Temporarily install a new nut (A) so that the nut cannot fall, but do not tighten it. *a Nut A *b Nut B Connector (b) Con
SEE MORE:
ECU Malfunction (B1362)
DESCRIPTION This DTC is stored when the stereo component equalizer assembly detects an internal malfunction. DTC No. Detection Item DTC Detection Condition Trouble Area B1362 ECU Malfunction An internal malfunction occurs in the stereo component equalizer assembly Stereo component
Removal
REMOVAL PROCEDURE 1. PRECAUTION NOTICE:
Be sure to read Precaution thoroughly before servicing.
Click here
Handle components indoors as much as possible to prevent foreign matter from entering and adhering to headlight assembly components.
Do not reuse parts which have reduced fastening abi
© 2016-2026 Copyright www.lexunx.com
