
Lexus NX: Components
COMPONENTS
ILLUSTRATION
.png)
| *1 | NO. 1 ENGINE UNDER COVER ASSEMBLY | - | - |
ILLUSTRATION
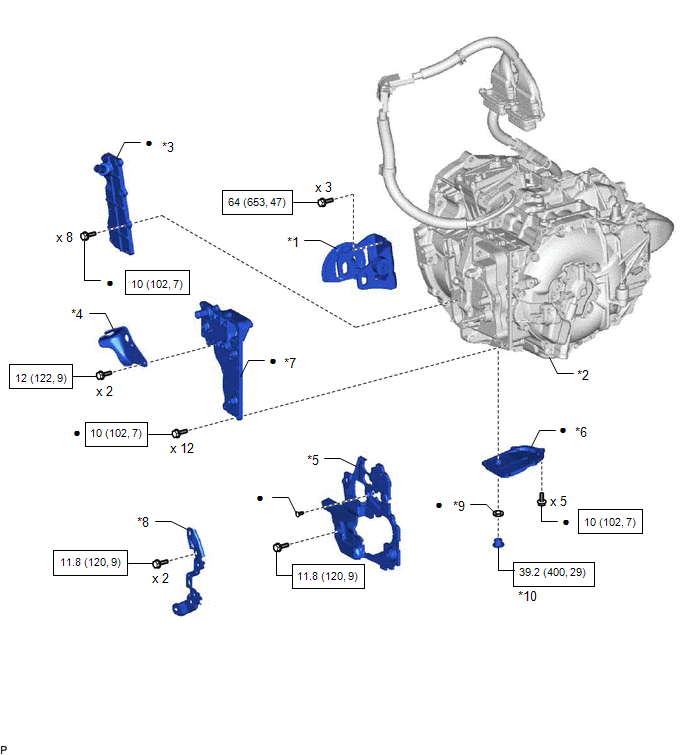
| *1 | FRONT ENGINE MOUNTING BRACKET | *2 | HYBRID VEHICLE TRANSAXLE ASSEMBLY |
| *3 | NO. 1 MOTOR WATER JACKET COVER ASSEMBLY | *4 | NO. 1 TRANSMISSION CONTROL CABLE BRACKET |
| *5 | NO. 2 AUTOMATIC TRANSMISSION CASE COVER | *6 | NO. 2 MOTOR WATER JACKET COVER ASSEMBLY |
| *7 | NO. 3 MOTOR WATER JACKET COVER ASSEMBLY | *8 | OIL COOLER TUBE CLAMP |
| *9 | GASKET | *10 | DRAIN PLUG |
.png) | N*m (kgf*cm, ft.*lbf): Specified torque | ● | Non-reusable part |
READ NEXT:
 Removal
REMOVAL PROCEDURE 1. REMOVE NO. 1 ENGINE UNDER COVER ASSEMBLY Click here 2. DRAIN COOLANT (for Inverter Coolant) Click here 3. REMOVE NO. 2 MOTOR WATER JACKET COVER ASSEMBLY (a) Remove the 5
Installation
INSTALLATION PROCEDURE 1. INSTALL NO. 3 MOTOR WATER JACKET COVER ASSEMBLY (a) Remove any remaining seal packing from the transaxle housing installation surface and bolt holes. NOTICE:
Clean and deg
SEE MORE:
Terminals Of Ecu
TERMINALS OF ECU TERMINAL INSPECTION *a Component without harness connected (Steering Lock ECU (Steering Lock Actuator Assembly)) - - (a) Measure the voltage and resistance according to the value(s) in the table below. Terminal No. (Symbol) Input/Output Wiring Color Terminal De
Installation
INSTALLATION PROCEDURE 1. INSTALL NO. 2 EXHAUST MANIFOLD HEAT INSULATOR (a) Install the No. 2 exhaust manifold heat insulator with the 2 bolts. Torque: 13.5 N·m {138 kgf·cm, 10 ft·lbf} 2. INSTALL EXHAUST MANIFOLD CONVERTER SUB-ASSEMBLY (a) Install a new exhaust manifold to head gasket to the cyl
© 2016-2026 Copyright www.lexunx.com
