Lexus NX: Removal
REMOVAL
PROCEDURE
1. REMOVE FRONT WHEEL RH
Click here .gif)
2. REMOVE FRONT FENDER MOULDING SUB-ASSEMBLY RH
HINT:
Use the same procedure described for the LH side.
Click here
3. REMOVE NO. 1 MOULDING TAPE
HINT:
Use the same procedure described for the LH side.
Click here
4. REMOVE NO. 2 MOULDING TAPE
HINT:
Use the same procedure described for the LH side.
Click here
5. REMOVE FRONT FENDER FRONT SPLASH SHIELD RH
HINT:
Use the same procedure described for the LH side.
Click here
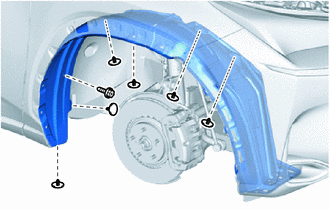
6. REMOVE FRONT FENDER LINER RH
| (a) Using a 4 mm hexagon wrench, remove the hexagon screw and the 2 grommets. |
|
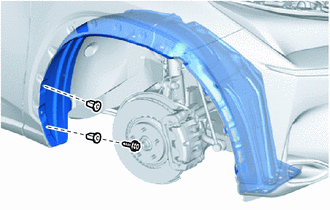
| (b) Remove the 6 clips, screw and front fender liner RH. |
|
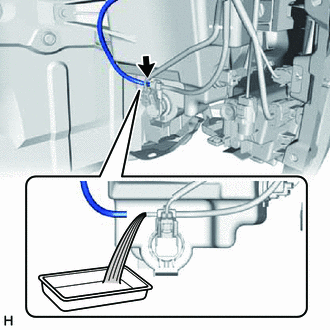
7. DRAIN WINDSHIELD WASHER FLUID
| (a) Disconnect the washer hose from the windshield washer motor and pump assembly, and drain the washer fluid. HINT: Use a container to collect the washer fluid. |
|
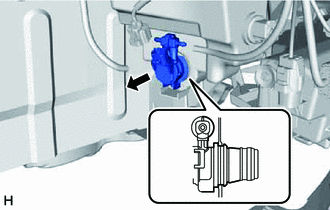
8. REMOVE WINDSHIELD WASHER MOTOR AND PUMP ASSEMBLY
| (a) Disconnect the connector and rear washer hose. |
|
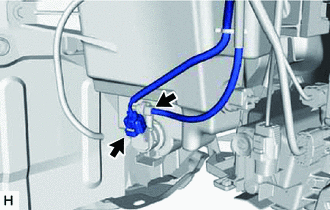
| (b) Pull out the windshield washer motor and pump assembly from the packing of the windshield washer jar assembly. |
|
9. REMOVE RADIATOR SUPPORT OPENING COVER
Click here
10. REMOVE RADIATOR GRILLE PROTECTOR
Click here
11. REMOVE FRONT FENDER MOULDING SUB-ASSEMBLY LH
Click here
12. REMOVE NO. 1 MOULDING TAPE
Click here
13. REMOVE NO. 2 MOULDING TAPE
Click here
14. REMOVE FRONT FENDER FRONT SPLASH SHIELD LH
Click here
15. REMOVE FRONT BUMPER COVER
(a) for Sport Package:
Click here
(b) except Sport Package:
Click here
16. REMOVE WASHER INLET SUB-ASSEMBLY
| (a) Remove the bolt. |
|
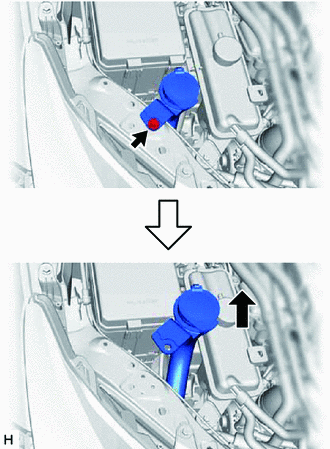
(b) Pull the washer inlet sub-assembly upward to remove it from the windshield washer jar assembly.
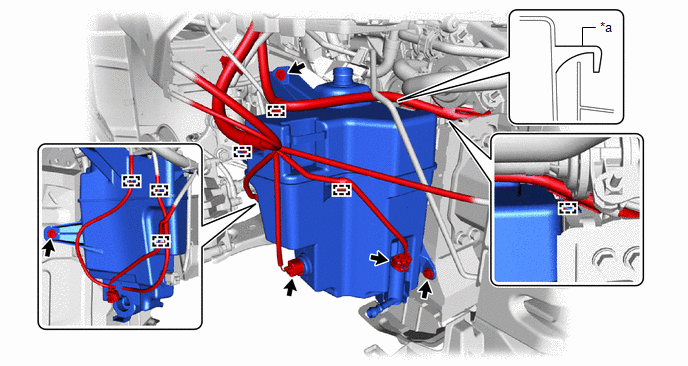
17. REMOVE WINDSHIELD WASHER JAR ASSEMBLY (w/o Headlight Cleaner System)
(a) Disconnect the connector and detach the 7 clamps.
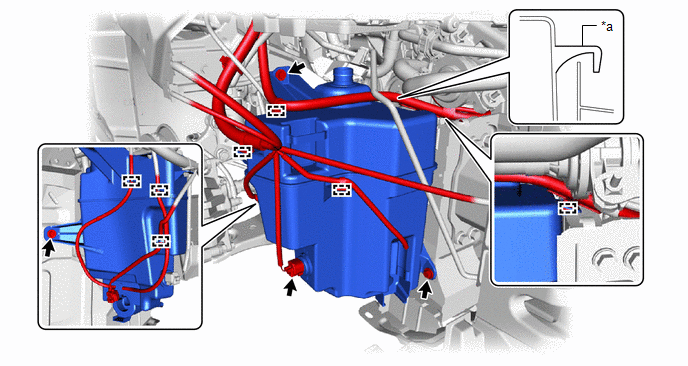
| *a | Guide A | - | - |
| (b) Remove the 3 bolts. Then detach guide A and remove the windshield washer jar and pump assembly. |
|
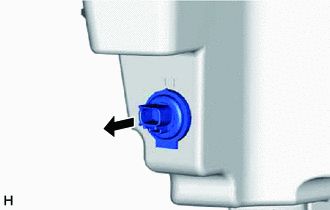
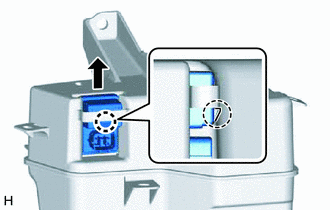
(c) Pull out the level warning switch assembly in the direction indicated by the arrow in the illustration to remove it.
18. REMOVE WINDSHIELD WASHER JAR ASSEMBLY (w/ Headlight Cleaner System)
(a) for Triple Beam Headlight:
(1) Disconnect the 2 connectors and detach the 7 clamps.
| *a | Guide A | - | - |
(2) Remove the 3 bolts. Then detach guide A and remove the windshield washer jar assembly.
(b) for Single Beam Headlight:
(1) Disconnect the 3 connectors and detach the 7 clamps.
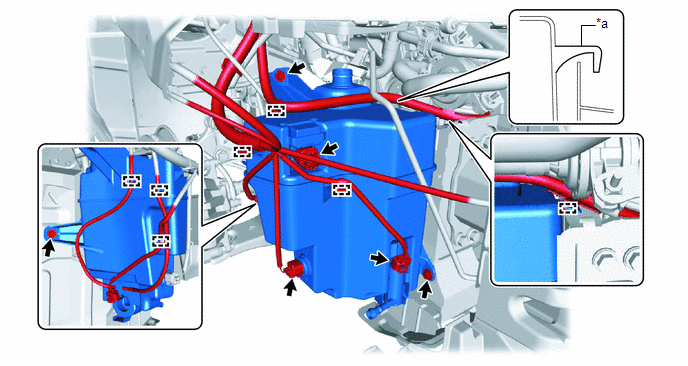
| *a | Guide A | - | - |
(2) Remove the 3 bolts. Then detach guide A and remove the windshield washer jar assembly.
| (3) Detach the claw and remove the headlight control relay. |
|
| (c) Remove the headlight cleaner motor and pump assembly. |
|
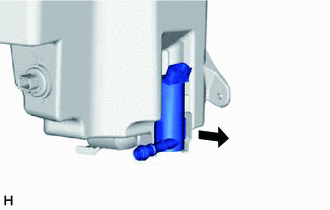
| (d) Pull out the level warning switch assembly in the direction indicated by the arrow in the illustration to remove it. |
|
READ NEXT:
 Inspection
INSPECTION PROCEDURE 1. INSPECT WINDSHIELD WASHER MOTOR AND PUMP ASSEMBLY (for Front Side) HINT: This check should be performed with the windshield washer motor and pump assembly installed to the wind
Installation
INSTALLATION PROCEDURE 1. INSTALL WINDSHIELD WASHER JAR ASSEMBLY (w/ Headlight Cleaner System) (a) Install the level warning switch assembly as shown in the illustration. NOTICE: Make sure that the
Washer Nozzle
ComponentsCOMPONENTS ILLUSTRATION *1 HOOD INSULATOR *2 WASHER NOZZLE SUB-ASSEMBLY *3 WASHER HOSE - - ● Non-reusable part - - On-vehicle InspectionON-VEHICLE INSPEC
SEE MORE:
Cruise SET Indicator Light Circuit
DESCRIPTION The hybrid vehicle control ECU illuminates the cruise SET indicator by sending request signals to the combination meter assembly via CAN communication. The cruise SET indicator illuminates when the dynamic radar cruise control system is controlling vehicle speed. If the cruise SET indica
Rear Power Window RH does not Operate with Rear Power Window Switch RH
DESCRIPTION When the power switch is on (IG), the rear power window regulator motor assembly RH is operated by the rear power window regulator switch assembly (for rear RH door). The rear power window regulator motor assembly RH has motor, regulator and ECU functions. WIRING DIAGRAM CAUTION / NOTIC
