Lexus NX: Disassembly
DISASSEMBLY
CAUTION / NOTICE / HINT
CAUTION:
Wear protective gloves. Sharp areas on the parts may injure your hands.
PROCEDURE
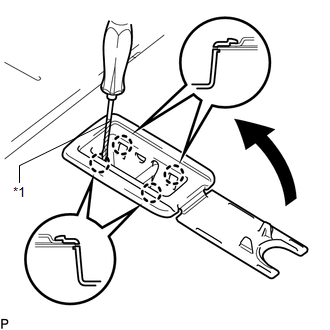
1. REMOVE REAR SEAT CUSHION LOCK HOOK
NOTICE:
- Perform the following only when replacing the rear seat cushion lock hook.
- Do not reuse the rear seat cushion lock hook after removing it.
HINT:
Use the same procedure for the other side.
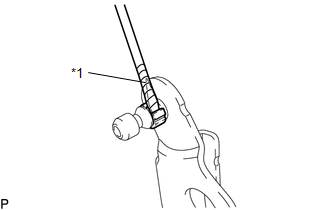
| (a) Insert 2 thin-bladed screwdrivers between the sleeve and body of the rear seat cushion lock hook. |
|
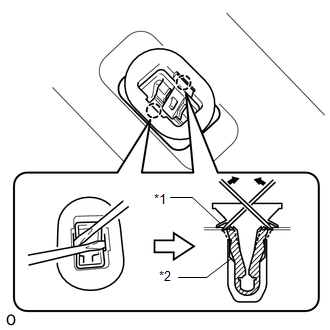
(b) Pull up the 2 thin-bladed screwdrivers to detach the 2 claws and remove the rear seat cushion lock hook.
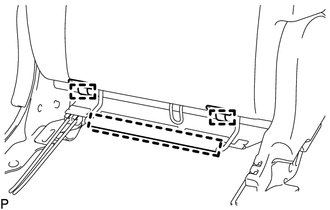
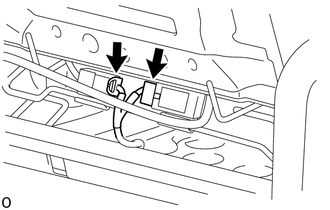
2. REMOVE REAR SEAT CUSHION EDGE PROTECTOR
| (a) Detach the claw to remove the rear seat cushion edge protector. |
|
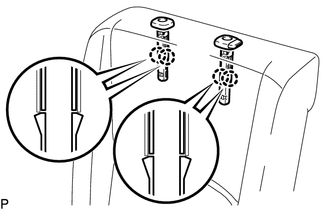
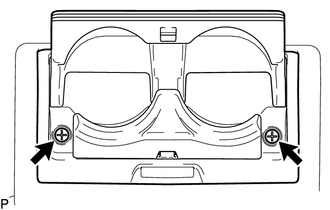
3. REMOVE SEAT ADJUSTER COVER CAP
| (a) Remove the 2 seat adjuster cover caps. |
|
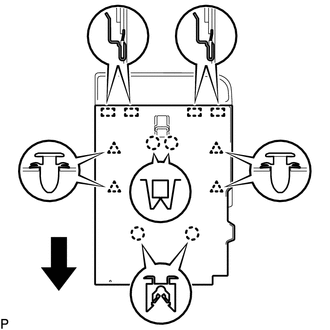
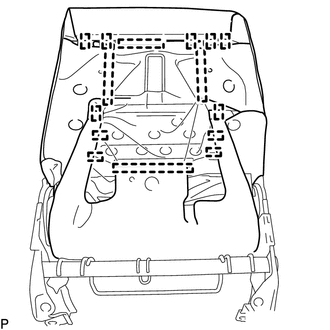
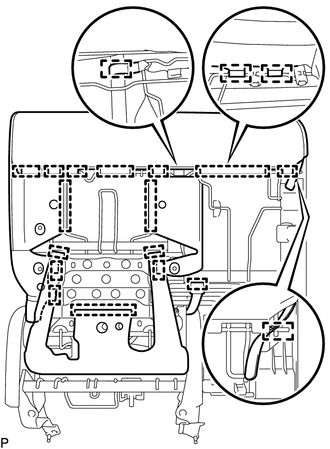
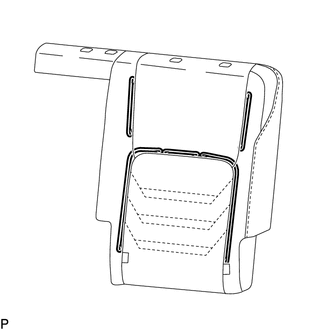
4. REMOVE BENCH TYPE REAR SEAT CUSHION COVER
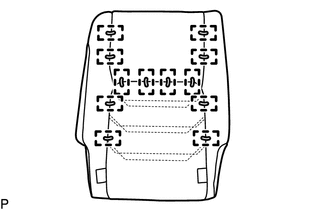
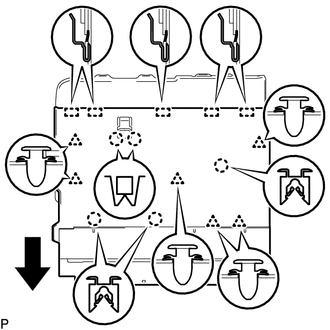
| (a) Remove the 6 hog rings. |
|
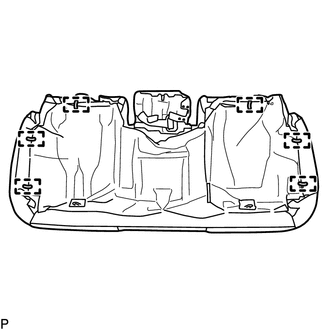
| (b) Remove the 39 hog rings. |
|
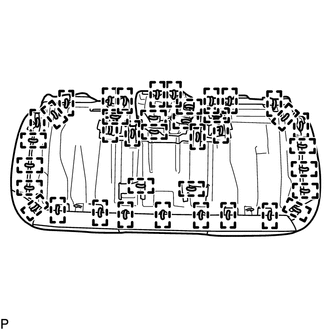
| (c) Remove the 28 hog rings to remove the bench type rear seat cushion cover. |
|
5. REMOVE SEAT COVER WIRE
(a) Remove the seat cover wire.
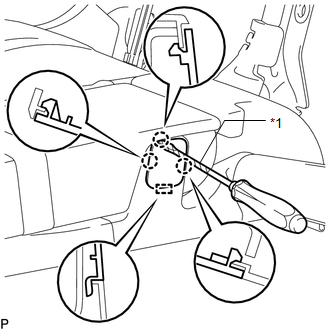
6. REMOVE SEAT ADJUSTER COVER CAP RH
| (a) Using a screwdriver, remove the seat adjuster cover cap RH. HINT:
|
|
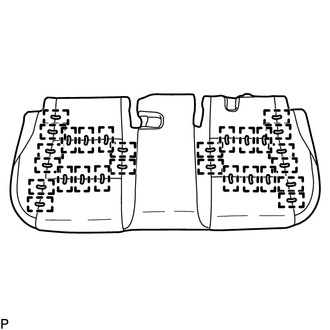
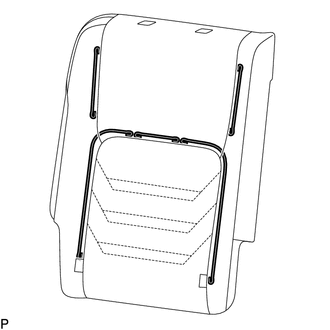
7. REMOVE REAR SEATBACK COVER
| (a) Using a screwdriver, detach the 4 claws to remove the rear seatback cover. HINT:
|
|
8. REMOVE REAR SEAT INNER WITH CENTER BELT ASSEMBLY RH (for RH Side)
Click here .gif)
9. REMOVE REAR SEAT HEADREST ASSEMBLY (for RH Side)
(a) Remove the rear seat headrest assembly.
10. REMOVE REAR SEATBACK BOARD CARPET ASSEMBLY RH (for RH Side)
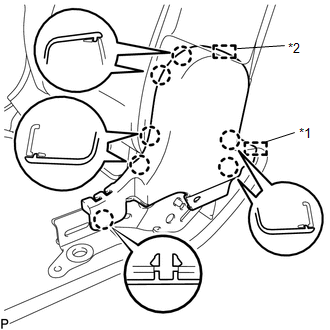
| (a) Detach the 3 hooks. |
|
| (b) Detach the 4 claws and 4 clips. |
|
(c) Move the rear seatback board carpet assembly RH in the direction of the arrow to detach the 4 guides, and remove the rear seatback board carpet assembly RH.
11. REMOVE REAR SEAT CUSHION MOULDING RH (for RH Side)
| (a) Detach the 7 claws and guide to remove the rear seat cushion moulding RH. |
|
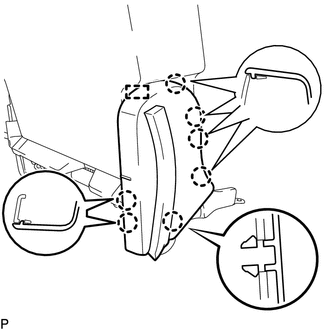
12. REMOVE REAR SEAT CUSHION MOULDING RH (for RH Side)
| (a) Detach the clamp to disconnect the connector. |
|
(b) Detach the 7 claws and guide to remove the rear seat cushion moulding RH.
13. REMOVE REAR NO. 1 SEAT HEADREST SUPPORT ASSEMBLY (for RH Side)
| (a) Detach the 15 hooks. |
|
| (b) Detach the 4 claws to remove the 2 rear No. 1 seat headrest support assemblies. |
|
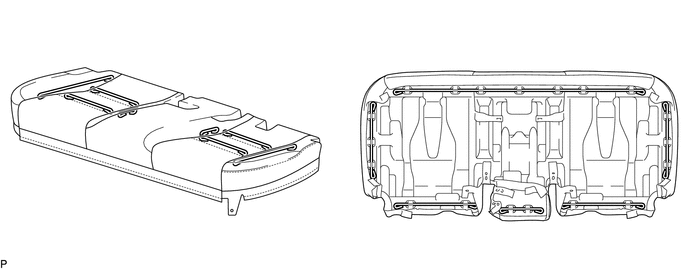
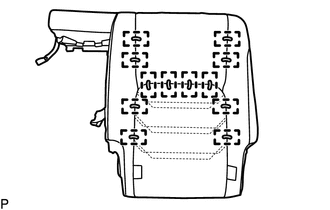
14. REMOVE SEPARATE TYPE REAR SEATBACK COVER WITH PAD (for RH Side)
| (a) w/ Seat Heater System: (1) Disconnect the 2 connectors. |
|
(b) Remove the separate type rear seatback cover with pad from the rear seatback frame sub-assembly RH.
(c) Remove the rear seatback protector RH.
15. REMOVE SEPARATE TYPE REAR SEATBACK COVER RH (for RH Side)
| (a) Remove the 12 hog rings to remove the separate type rear seatback cover RH from the separate type rear seatback pad RH. |
|
16. REMOVE SEAT COVER WIRE (for RH Side)
| (a) Remove the seat cover wire. |
|
17. REMOVE SEAT HEATER CONTROL SUB-ASSEMBLY (for RH Side, w/ Seat Heater System)
Click here
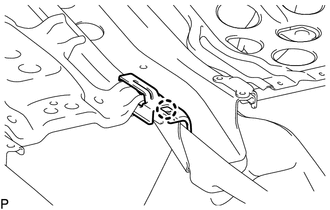
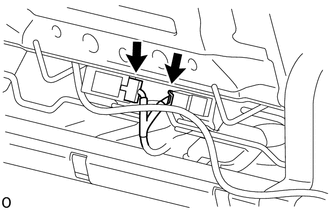
18. REMOVE CLAMP(REAR SEAT) (for RH Side, w/ Seat Heater System)
| (a) Detach the clamp. |
|

(b) Detach the 3 hooks and remove the clamp (rear seat).
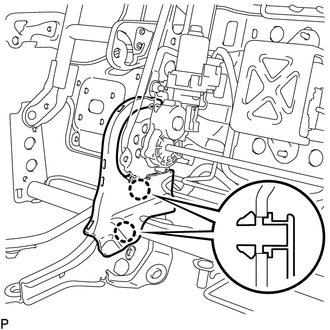
19. REMOVE RECLINING ADJUSTER INSIDE COVER RH (for RH Side)
| (a) Detach the 2 claws to remove the reclining adjuster inside cover RH. |
|
20. REMOVE RECLINING ADJUSTER INSIDE COVER RH (for RH Side)
| (a) Detach the 2 claws to remove the reclining adjuster inside cover RH. |
|
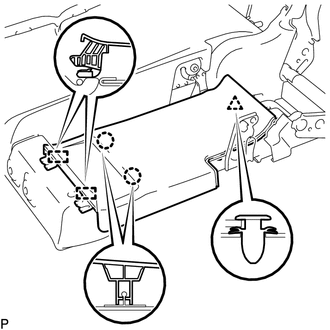
21. REMOVE REAR SEATBACK PROTECTOR (for RH Side)
| (a) Remove the 2 nuts to remove the rear seatback protector. |
|
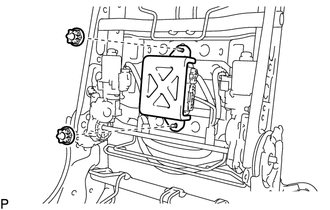
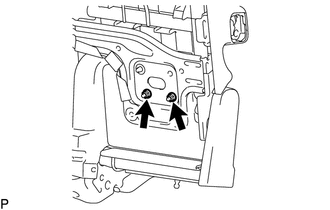
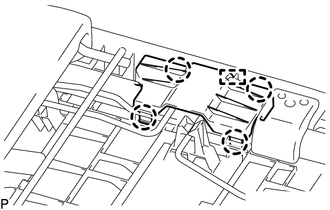
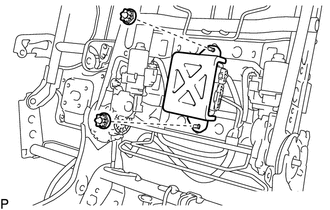
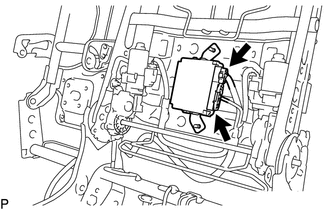
22. REMOVE FOLD SEAT CONTROL ECU (for RH Side)
| (a) Disconnect the 2 connectors. |
|
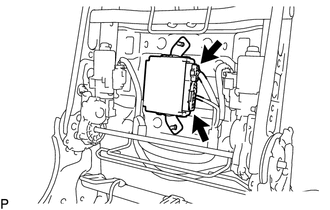
(b) Remove the fold seat control ECU.
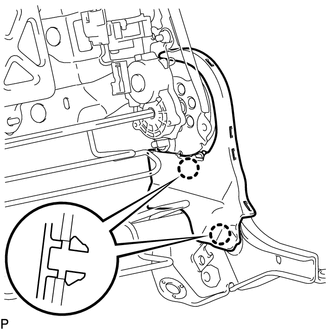
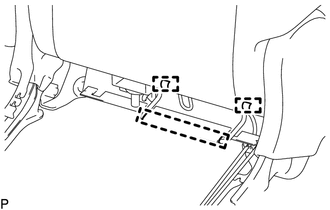
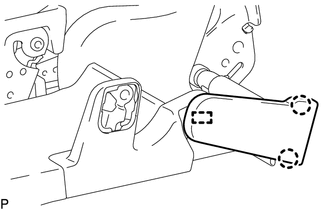
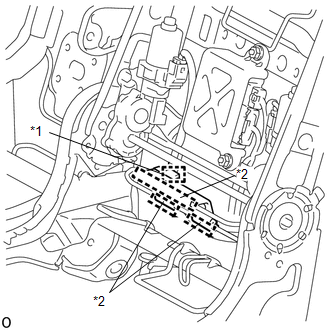
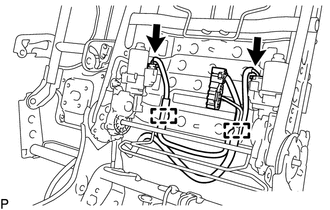
23. REMOVE REAR SEAT WIRE RH (for RH Side)
| (a) Disconnect the 2 connectors. |
|
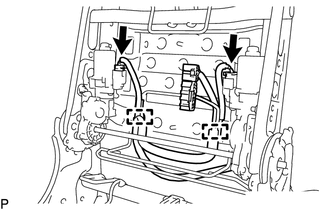
(b) Detach the 2 clamps to remove the rear seat wire RH.
24. REMOVE REAR SEAT INNER BELT ASSEMBLY LH (for LH Side)
Click here
25. REMOVE REAR SEAT CENTER LAP TYPE BELT ASSEMBLY LH (for LH Side)
Click here
26. REMOVE REAR SEAT HEADREST ASSEMBLY (for LH Side)
(a) Remove the rear seat headrest assembly.
27. REMOVE REAR SEAT CENTER HEADREST ASSEMBLY (for LH Side)
(a) Remove the rear seat center headrest assembly.
28. REMOVE REAR SEATBACK BOARD CARPET ASSEMBLY LH (for LH Side)
| (a) Detach the 3 hooks. |
|
| (b) Detach the 5 claws and 6 clips. |
|
(c) Move the rear seatback board carpet assembly LH in the direction of the arrow to detach the 5 guides, and remove the rear seatback board carpet assembly LH.
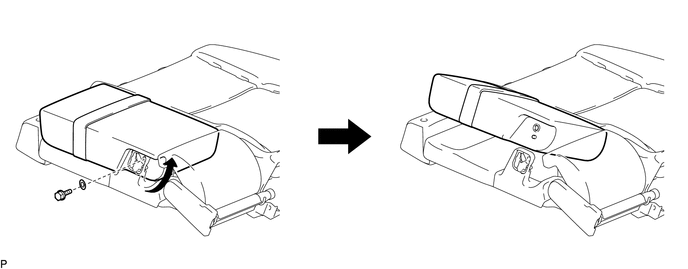
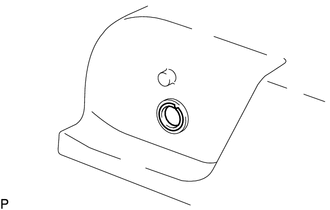
29. REMOVE REAR SEAT ARMREST HOLE COVER (for LH Side)
| (a) Using a screwdriver, detach the 3 claws and guide to remove the rear seat armrest hole cover. HINT: Tape the screwdriver tip before use. |
|
30. REMOVE REAR SEAT CENTER ARMREST ASSEMBLY (for LH Side)
(a) Remove the bolt and washer.
(b) Rotate the rear seat center armrest assembly as shown in the illustration and remove the 2 pins to remove the rear seat center armrest assembly.
| (c) Remove the rear seatback protector shaft bush from the rear seat center armrest assembly. |
|
31. REMOVE REAR SEAT CENTER ARMREST COVER (for LH Side)
| (a) Remove the 2 rear seat center armrest covers. |
|

32. REMOVE CUP HOLDER ASSEMBLY (for LH Side)
| (a) Remove the 2 screws to remove the cup holder assembly. |
|
33. REMOVE NO. 1 SEAT ARMREST ASSEMBLY (for LH Side)
| (a) Remove the 2 nuts to remove the No. 1 seat armrest assembly. |
|
34. REMOVE CENTER SEAT HINGE COVER (for LH Side)
| (a) Detach the 2 claws and guide to remove the center seat hinge cover. |
|
35. REMOVE CENTER ARMREST HINGE COVER (for LH Side)
| (a) Detach the 5 claws and 3 guides to remove the center armrest hinge cover. |
|
36. REMOVE NO. 1 SEATBACK COVER (for LH Side)
| (a) Detach the 4 claws and guide to remove the No. 1 seatback cover. |
|
37. REMOVE NO. 1 SEATBACK COVER (for LH Side)
| (a) Detach the clip and 2 claws. |
|
(b) Detach the 2 guides to remove the No. 1 seatback cover.
38. REMOVE REAR NO. 1 SEAT CENTER ARMREST PLATE (for LH Side)
| (a) Remove the rear No. 1 seat center armrest plate from the rear seatback frame sub-assembly LH. |
|

39. REMOVE REAR SEAT CUSHION MOULDING LH (for LH Side)
| (a) Detach the 7 claws and guide to remove the rear seat cushion moulding LH. |
|
40. REMOVE REAR SEAT CUSHION MOULDING LH (for LH Side)
| (a) Detach the clamp to disconnect the connector. |
|
(b) Detach the 7 claws and guide to remove the rear seat cushion moulding LH.
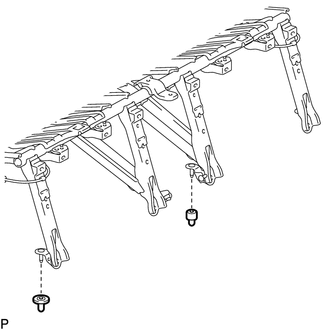
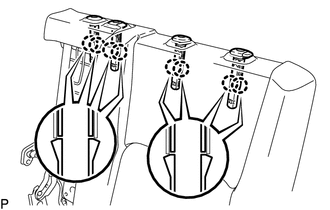
41. REMOVE REAR NO. 1 SEAT HEADREST SUPPORT ASSEMBLY (for LH Side)
| (a) Detach the 20 hooks. |
|
| (b) Detach the 8 claws to remove the 4 rear No. 1 seat headrest support assemblies. |
|
42. REMOVE SEPARATE TYPE REAR SEATBACK COVER WITH PAD (for LH Side)
| (a) w/ Seat Heater System: (1) Disconnect the 2 connectors. |
|
(b) Remove the separate type rear seatback cover with pad from the rear seatback frame sub-assembly LH.
(c) Remove the rear seatback protector LH.
43. REMOVE SEPARATE TYPE REAR SEATBACK COVER LH (for LH Side)
| (a) Remove the 12 hog rings to remove the separate type rear seatback cover LH from the separate type rear seatback pad LH. |
|
44. REMOVE SEAT COVER WIRE (for LH Side)
| (a) Remove the seat cover wire. |
|
45. REMOVE SEAT HEATER CONTROL SUB-ASSEMBLY (for LH Side, w/ Seat Heater System)
Click here
46. REMOVE CLAMP(REAR SEAT) (for LH Side, w/ Seat Heater System)
| (a) Detach the clamp. |
|
(b) Detach the 3 hooks and remove the clamp (rear seat).
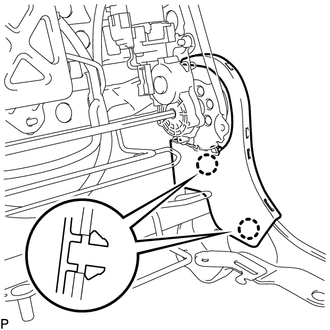
47. REMOVE RECLINING ADJUSTER INSIDE COVER LH (for LH Side)
| (a) Detach the 2 claws to remove the reclining adjuster inside cover LH. |
|
48. REMOVE RECLINING ADJUSTER INSIDE COVER LH (for LH Side)
| (a) Detach the 2 claws to remove the reclining adjuster inside cover LH. |
|
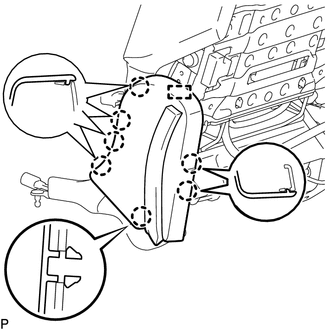
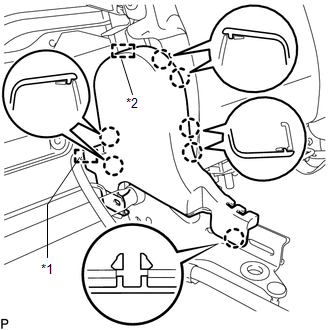
49. REMOVE REAR SEATBACK HOLDER (for LH Side)
| (a) Detach the 3 hooks to remove the rear seatback holder. |
|

50. REMOVE REAR SEATBACK PROTECTOR (for LH Side)
| (a) Remove the 2 nuts to rear seatback protector. |
|
51. REMOVE FOLD SEAT CONTROL ECU (for LH Side)
| (a) Disconnect the 2 connectors. |
|
(b) Remove the fold seat control ECU.
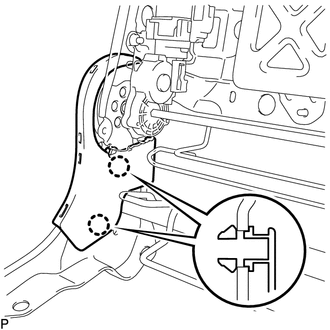
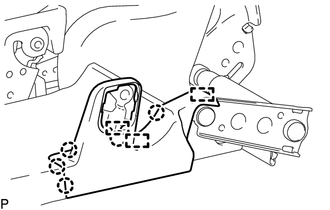
52. REMOVE REAR SEAT WIRE LH (for LH Side)
| (a) Disconnect the 2 connectors. |
|
(b) Detach the 2 clamps to remove the rear seat wire LH.
READ NEXT:
 Inspection
INSPECTION PROCEDURE 1. PRECAUTION NOTICE: After performing the following check, initialize the fold seat control ECU (initial position reset and initial position memorization). Click here 2. INSPEC
Reassembly
REASSEMBLY CAUTION / NOTICE / HINT CAUTION: Wear protective gloves. Sharp areas on the parts may injure your hands. PROCEDURE 1. INSTALL REAR SEAT WIRE LH (for LH Side) (a) Attach the 2 clamps to i
Installation
INSTALLATION CAUTION / NOTICE / HINT CAUTION: Wear protective gloves. Sharp areas on the parts may injure your hands. PROCEDURE 1. INSTALL NO. 1 SEAT LEG ASSEMBLY (a) Attach the 2 guides to tempora
SEE MORE:
Data List / Active Test
DATA LIST / ACTIVE TEST DATA LIST HINT: Using the Techstream to read the Data List allows the values or states of switches, sensors, actuators and other items to be read without removing any parts. This non-intrusive inspection can be very useful because intermittent conditions or signals may be dis
System Description
SYSTEM DESCRIPTION AUTOMATIC HIGH BEAM SYSTEM (a) General The automatic high beam system enhances the illumination of the area in front of the vehicle to improve visibility for the driver. It works by detecting light from the front of the vehicle, using the forward recognition camera, and turns the
