Lexus NX: Front Blower Motor
Components
COMPONENTS
ILLUSTRATION
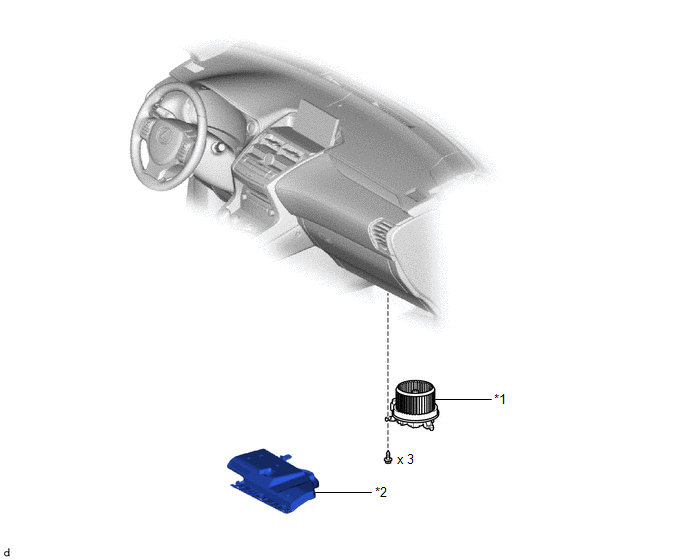
| *1 | BLOWER WITH FAN MOTOR SUB-ASSEMBLY | *2 | NO. 2 INSTRUMENT PANEL UNDER COVER SUB-ASSEMBLY |
Removal
REMOVAL
PROCEDURE
1. REMOVE NO. 2 INSTRUMENT PANEL UNDER COVER SUB-ASSEMBLY
Click here .gif)
2. REMOVE BLOWER WITH FAN MOTOR SUB-ASSEMBLY
(a) Detach the clamp.
| (b) Disconnect the connector. |
|
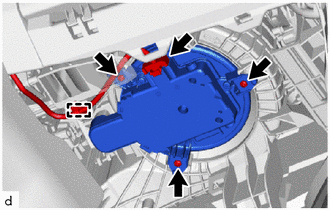
(c) Remove the 3 screws and the blower with fan motor sub-assembly.
Installation
INSTALLATION
PROCEDURE
1. INSTALL BLOWER WITH FAN MOTOR SUB-ASSEMBLY
(a) Install the blower with fan motor sub-assembly with the 3 screws.
(b) Connect the connector.
(c) Attach the clamp.
2. INSTALL NO. 2 INSTRUMENT PANEL UNDER COVER SUB-ASSEMBLY
Click here .gif)
READ NEXT:
 Components
COMPONENTS ILLUSTRATION *1 COOLER EXPANSION VALVE *2 NO. 1 COOLER EVAPORATOR SUB-ASSEMBLY *3 NO. 1 COOLER THERMISTOR *4 UPPER HEATER CASE *5 LOWER HEATER CASE *6 O-RING
Removal
REMOVAL PROCEDURE 1. REMOVE AIR CONDITIONING RADIATOR ASSEMBLY Click here 2. REMOVE QUICK HEATER ASSEMBLY Click here 3. REMOVE COOLER EXPANSION VALVE Click here 4. REMOVE NO. 1 COOLER EVAPORA
SEE MORE:
Generator Control Module (P0A1A-517,P0A1A-809)
DTC SUMMARY MALFUNCTION DESCRIPTION These DTCs indicate that a large current flowed in the inverter for the generator. The cause of this malfunction may be one of the following: Internal inverter malfunction
Internal circuit malfunction in the inverter for the generator
Malfunction in ECU that
Drive Belt
ComponentsCOMPONENTS ILLUSTRATION *1 FAN AND GENERATOR V BELT *2 REAR ENGINE UNDER COVER RH On-vehicle InspectionON-VEHICLE INSPECTION PROCEDURE 1. INSPECT FAN AND GENERATOR V BELT (a) Check the fan and generator V belt for wear, cracks or other signs of damage. If any of the follo
© 2016-2026 Copyright www.lexunx.com
