Lexus NX: Components
COMPONENTS
ILLUSTRATION
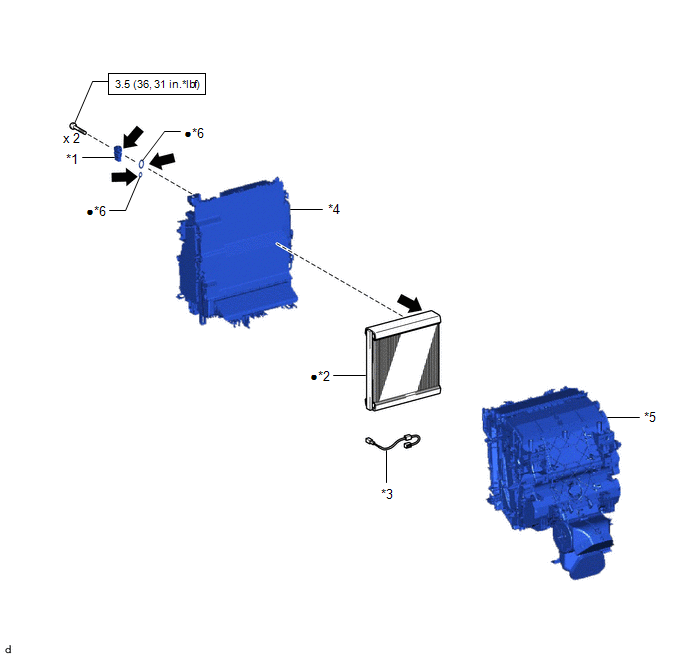
| *1 | COOLER EXPANSION VALVE | *2 | NO. 1 COOLER EVAPORATOR SUB-ASSEMBLY |
| *3 | NO. 1 COOLER THERMISTOR | *4 | UPPER HEATER CASE |
| *5 | LOWER HEATER CASE | *6 | O-RING |
.png) | N*m (kgf*cm, ft.*lbf): Specified torque | ● | Non-reusable part |
.png) | Compressor oil ND-OIL 11 or equivalent | - | - |
READ NEXT:
 Removal
REMOVAL PROCEDURE 1. REMOVE AIR CONDITIONING RADIATOR ASSEMBLY Click here 2. REMOVE QUICK HEATER ASSEMBLY Click here 3. REMOVE COOLER EXPANSION VALVE Click here 4. REMOVE NO. 1 COOLER EVAPORA
Installation
INSTALLATION PROCEDURE 1. INSTALL NO. 1 COOLER THERMISTOR (a) Install the No. 1 cooler thermistor as shown in the illustration. NOTICE:
Be sure to insert the thermistor only once because reins
SEE MORE:
Operation Check
OPERATION CHECK NOTICE WHEN CHECKING FOLLOWING (a) Wireless door lock/unlock function: This wireless door lock control function operates only when the following 3 conditions are met: (1) The power switch is off. (2) All doors are closed. (3) The power door lock control system is operating properly.
Automatic High Beam
The Automatic High Beam uses an
in-vehicle camera sensor to assess
the brightness of streetlights, the
lights of oncoming and preceding
vehicles, etc., and automatically
turns high beam on or off as necessary.
WARNING
■Limitations of the Automatic High
Beam
Do not rely on the Automatic Hi
© 2016-2026 Copyright www.lexunx.com
