Lexus NX: Front Door Opening Trim Weatherstrip
Components
COMPONENTS
ILLUSTRATION
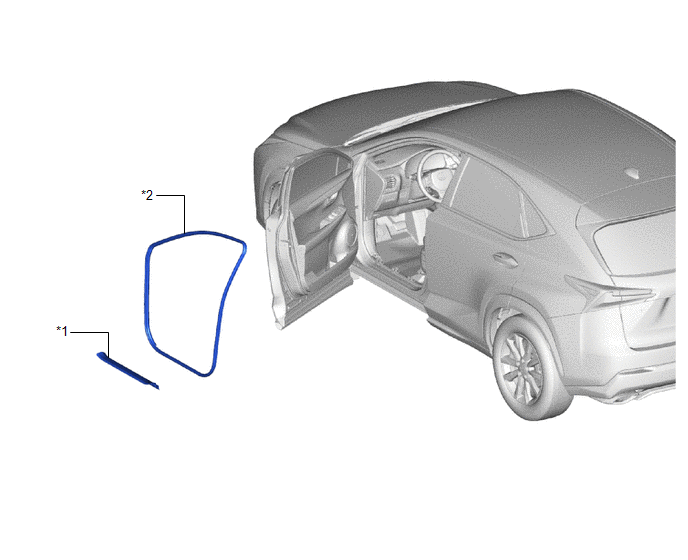
| *1 | DOOR SCUFF PLATE ASSEMBLY LH | *2 | FRONT DOOR OPENING TRIM WEATHERSTRIP LH |
Removal
REMOVAL
CAUTION / NOTICE / HINT
HINT:
- Use the same procedure for the RH and LH side.
- The procedure listed below is for the LH side.
PROCEDURE
1. REMOVE DOOR SCUFF PLATE ASSEMBLY LH
Click here .gif)
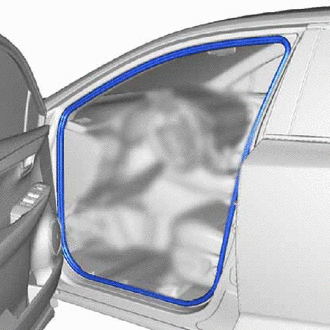
2. REMOVE FRONT DOOR OPENING TRIM WEATHERSTRIP LH
| (a) Remove the front door opening trim weatherstrip LH. |
|
Installation
INSTALLATION
CAUTION / NOTICE / HINT
HINT:
- Use the same procedure for the RH and LH side.
- The procedure listed below is for the LH side.
PROCEDURE
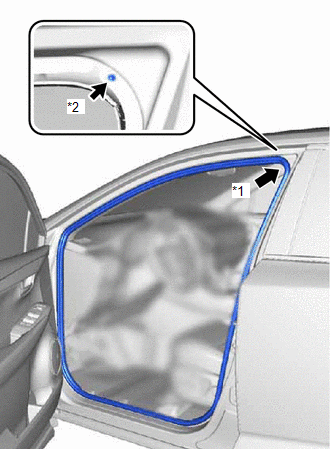
1. INSTALL FRONT DOOR OPENING TRIM WEATHERSTRIP LH
| (a) Align the paint mark on the front door opening trim weatherstrip LH with the mark position on the vehicle and install the front door opening trim weatherstrip LH as shown in the illustration. |
|
2. INSTALL DOOR SCUFF PLATE ASSEMBLY LH
Click here .gif)
READ NEXT:
 Components
COMPONENTS ILLUSTRATION *1 DECK TRIM SIDE PANEL ASSEMBLY LH *2 FUEL FILLER OPENING LID LOCK RETAINER *3 FUEL LID WITH MOTOR LOCK ASSEMBLY *4 LUGGAGE HOLD BELT STRIKER ASSEMBLY
Removal
REMOVAL PROCEDURE 1. REMOVE REAR SEAT ASSEMBLY (a) for Power Seat: Click here (b) for Manual Seat: Click here 2. REMOVE REAR FLOOR FINISH PLATE Click here 3. DISCONNECT REAR DOOR OPENING TR
SEE MORE:
On-vehicle Inspection
ON-VEHICLE INSPECTION CAUTION / NOTICE / HINT CAUTION: Be sure to follow the correct removal and installation procedures of the seat position airbag sensor. PROCEDURE 1. INSPECT SEAT POSITION AIRBAG SENSOR (for Vehicle not Involved in Collision) (a) Perform a diagnostic system check. Click here 2
Installation
INSTALLATION PROCEDURE 1. INSTALL NO. 2 COOLING FAN MOTOR (a) Attach the 2 clamps and install the No. 2 cooling fan motor with the 3 screws. Torque: 3.9 N·m {40 kgf·cm, 35 in·lbf} (b) Install the cooling fan motor insulator to the fan shroud with the 2 screws. Torque: 2.6 N·m {27 kgf·cm, 23 i
© 2016-2026 Copyright www.lexunx.com
