Lexus NX: Installation
INSTALLATION
PROCEDURE
1. INSTALL GLOVE BOX LIGHT ASSEMBLY
| (a) Attach the 2 claws to install the glove box light assembly. |
|
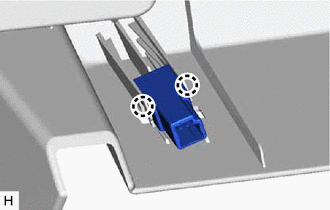
2. INSTALL LOWER INSTRUMENT PANEL SUB-ASSEMBLY
Click here .gif)
3. CONNECT CABLE TO NEGATIVE AUXILIARY BATTERY TERMINAL
4. INITIALIZATION AFTER RECONNECTING AUXILIARY BATTERY TERMINAL
Click here
HINT:
When disconnecting and reconnecting the auxiliary battery, there is an automatic learning function that completes learning when the respective system is used.
Click here
5. ENABLE AUTOAWAY/RETURN FUNCTION (for Power Tilt and Power Telescopic Steering Column)
(a) Restore the autoaway/return function setting to the previous condition by changing the customize parameter.
Click here
6. CHECK SRS WARNING LIGHT
Click here
7. INSTALL DECK FLOOR BOX LH
Click here
8. INSTALL REAR DECK FLOOR BOX
Click here
9. INSTALL NO. 3 DECK BOARD SUB-ASSEMBLY
Click here
READ NEXT:
 Parts Location
PARTS LOCATION ILLUSTRATION *1 MAP LIGHT ASSEMBLY *2 SPOT LIGHT ASSEMBLY *3 VISOR ASSEMBLY RH *4 VISOR ASSEMBLY LH *5 VANITY LIGHT ASSEMBLY RH *6 VANITY LIGHT ASSEMBLY LH
System Diagram
SYSTEM DIAGRAM
SEE MORE:
Steering Knuckle
ComponentsCOMPONENTS ILLUSTRATION *1 FRONT AXLE HUB SUB-ASSEMBLY LH *2 FRONT LOWER BALL JOINT ASSEMBLY LH *3 STEERING KNUCKLE LH *4 FRONT BRAKE DUST COVER N*m (kgf*cm, ft.*lbf): Specified torque ● Non-reusable part RemovalREMOVAL CAUTION / NOTICE / HINT HINT:
Initialization
INITIALIZATION INITIALIZE PANORAMIC VIEW MONITOR SYSTEM (a) When "!" mark is displayed on the multi-display assembly, correct the steering angle neutral point using the following method. (1) Fully turn the steering wheel to the left and right on flat ground. NOTICE: Memorizing the steering angle neu
