Lexus NX: Installation
INSTALLATION
PROCEDURE
1. INSTALL FRONT SEAT INNER BELT ASSEMBLY LH
(a) Install the front seat belt anchor plate.
| (b) Install the front seat inner belt assembly LH with the nut. Torque: 42 N·m {428 kgf·cm, 31 ft·lbf} NOTICE: Do not allow the anchor part of the front seat inner belt assembly LH to overlap the protruding part of the front seat adjuster. |
|

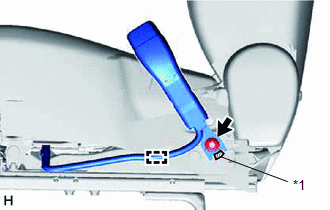
(c) Attach the clamp.
(d) Attach the 6 clamps.
(e) Connect the 2 connectors.
2. INSTALL FRONT SEAT INNER BELT ASSEMBLY RH
(a) Install the front seat belt anchor plate.
| (b) Install the front seat inner belt assembly RH with the nut. Torque: 42 N·m {428 kgf·cm, 31 ft·lbf} NOTICE: Do not allow the anchor part of the front seat inner belt assembly RH to overlap the protruding part of the front seat adjuster. |
|
(c) Attach the clamp.
(d) Attach the 3 clamps.
(e) Connect the connector.
3. INSTALL FRONT SEAT ASSEMBLY LH
Click here .gif)
4. INSTALL FRONT SEAT ASSEMBLY RH
HINT:
Use the same procedure as for the driver seat
READ NEXT:
 Precaution
PRECAUTION CAUTION: Replace any faulty parts of the seat belt systems (outer belt, inner belt, bolts, nuts, adjustable shoulder anchor, tether anchor hardware and other related parts). When inspecting
Components
COMPONENTS ILLUSTRATION *1 DECK FLOOR BOX LH *2 NO. 3 DECK BOARD SUB-ASSEMBLY *3 REAR DECK FLOOR BOX *4 NEGATIVE AUXILIARY BATTERY TERMINAL N*m (kgf*cm, ft.*lbf): Specified
SEE MORE:
Washer Nozzle
ComponentsCOMPONENTS ILLUSTRATION *1 HOOD INSULATOR *2 WASHER NOZZLE SUB-ASSEMBLY *3 WASHER HOSE - - ● Non-reusable part - - On-vehicle InspectionON-VEHICLE INSPECTION PROCEDURE 1. INSPECT WASHER NOZZLE SUB-ASSEMBLY (a) With the power switch turned on (IG), check
Power Source Mode does not Change to ON (ACC)
DESCRIPTION If the power switch is pressed with the electrical key transmitter sub-assembly in the cabin, the certification ECU (smart key ECU assembly) receives a signal and changes the power source mode. Related Data List and Active Test Items Problem Symptom Data List and Active Test Pow
