Lexus NX: Removal
REMOVAL
PROCEDURE
1. REMOVE NO. 2 FORWARD RECOGNITION COVER
Click here .gif)
2. REMOVE NO. 1 FORWARD RECOGNITION COVER
Click here
3. REMOVE INNER REAR VIEW MIRROR ASSEMBLY
| (a) Disconnect the connector. |
|
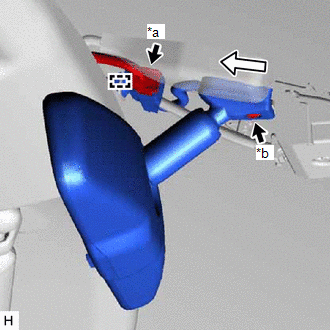
(b) Detach the clamp.
(c) Using a T20 "TORX" socket wrench, remove the screw.
(d) Slide the inner rear view mirror assembly in the direction indicated by the arrow shown in the illustration to remove the inner rear view mirror assembly.
READ NEXT:
 Inspection
INSPECTION PROCEDURE 1. INSPECT INNER REAR VIEW MIRROR ASSEMBLY (a) Inspect the operation of the electrochromic inner rear view mirror assembly. (1) Connect a positive (+) lead from the battery to ter
Installation
INSTALLATION PROCEDURE 1. INSTALL INNER REAR VIEW MIRROR ASSEMBLY (a) Slide the inner rear view mirror assembly in the direction indicated by the arrow shown in the illustration to install the inne
SEE MORE:
Installation
INSTALLATION PROCEDURE 1. INSTALL REAR NO. 3 SPEAKER ASSEMBLY NOTICE: Do not touch the cone of the speaker. (a) Temporarily install the speaker by attaching the clip of the speaker to the back door panel. (b) Install the rear speaker assembly with the 4 bolts. HINT: Tighten the bolts
Adjustment
ADJUSTMENT PROCEDURE 1. INSPECT SHIFT LEVER POSITION (a) While moving the shift lever from N to each position, check that the lever moves smoothly and that the shift position indicator comes on properly according to the shift lever position. (b) Put the vehicle into the READY-on state and check the
© 2016-2026 Copyright www.lexunx.com
