Lexus NX: Stereo Jack Adapter Assembly
Lexus NX Service Manual / Audio & Visual & Telematics / Audio / Video / Stereo Jack Adapter Assembly
Components
COMPONENTS
ILLUSTRATION
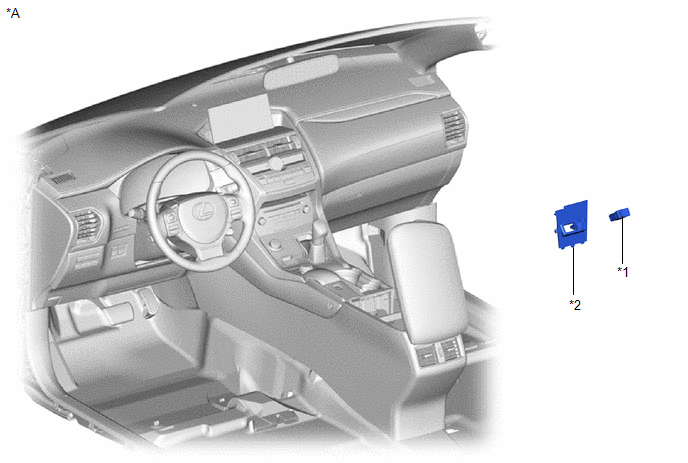
| *A | w/ Navigation System | - | - |
| *1 | NO. 1 STEREO JACK ADAPTER ASSEMBLY | *2 | NO. 3 BOX PANEL |
ILLUSTRATION
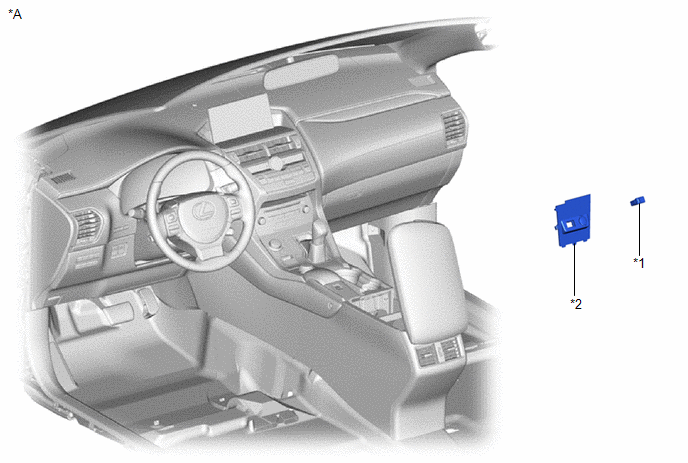
| *A | w/o Navigation System | - | - |
| *1 | NO. 1 STEREO JACK ADAPTER ASSEMBLY | *2 | NO. 3 BOX PANEL |
Installation
INSTALLATION
PROCEDURE
1. INSTALL NO. 1 STEREO JACK ADAPTER ASSEMBLY
(a) w/ Navigation System
(1) Attach the 2 claws to install the No. 1 stereo jack adapter assembly.
(b) w/o Navigation System
(1) Attach the 2 claws to install the No. 1 stereo jack adapter assembly.
2. INSTALL NO. 3 BOX PANEL
Click here .gif)
READ NEXT:
 Window Glass Antenna Wire
On-vehicle InspectionON-VEHICLE INSPECTION PROCEDURE 1. INSPECT WINDOW GLASS ANTENNA WIRE (a) Check for continuity of the antenna. HINT: Check for continuity at the center of each antenna wire as
Dcm(telematics Transceiver)
ComponentsCOMPONENTS ILLUSTRATION *1 DECK FLOOR BOX LH *2 NO. 3 DECK BOARD SUB-ASSEMBLY *3 REAR DECK FLOOR BOX *4 NEGATIVE AUXILIARY BATTERY TERMINAL N*m (kgf*cm, ft.*lbf):
SEE MORE:
Vehicle Speed Sensor (C1A45)
DESCRIPTION The blind spot monitor sensor receives vehicle speed signals from the skid control ECU via CAN communication. DTC No. Detection Item DTC Detection Condition Trouble Area Note C1A45 Vehicle Speed Sensor A fail flag is transmitted from the skid control ECU.
Electron
Installation
INSTALLATION PROCEDURE 1. INSTALL FRONT LUMBAR POWER SEAT SWITCH (a) Attach the 4 claws to install the front lumbar power seat switch. 2. INSTALL FRONT POWER SEAT SWITCH LH Click here 3. INSTALL FRONT SEAT CUSHION SHIELD LH Click here 4. INSTALL POWER SEAT SWITCH KNOB LH Click here 5. INSTALL
© 2016-2026 Copyright www.lexunx.com
