Lexus NX: Back Door Weatherstrip
Components
COMPONENTS
ILLUSTRATION
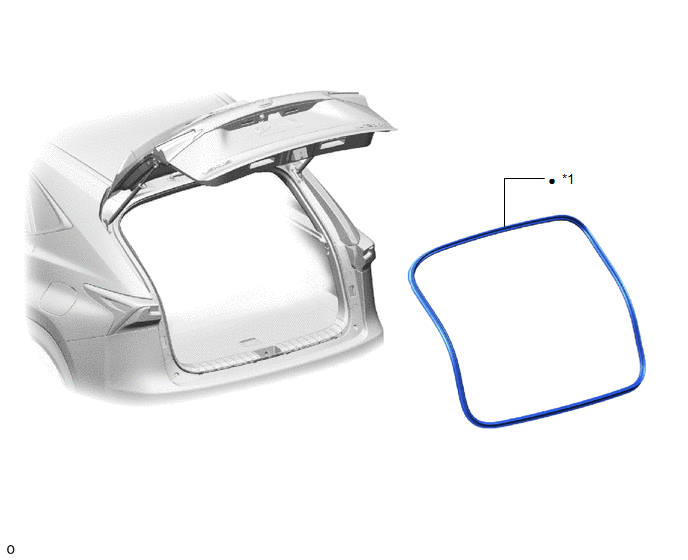
| *1 | BACK DOOR WEATHERSTRIP | - | - |
| ● | Non-reusable part | - | - |
Removal
REMOVAL
PROCEDURE
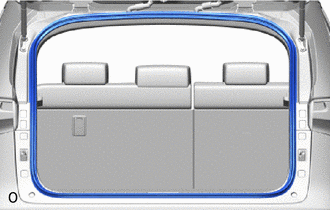
1. REMOVE BACK DOOR WEATHERSTRIP
| (a) Remove the back door weatherstrip. |
|
Installation
INSTALLATION
PROCEDURE
1. INSTALL BACK DOOR WEATHERSTRIP
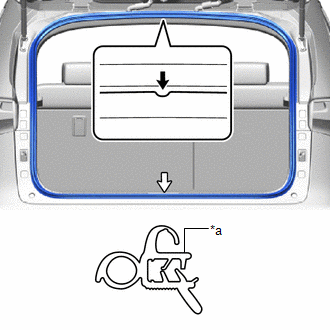
| *a | Paint Mark |
.png) | Marking Position |
.png) | Weatherstrip Joint |
(a) Remove any non-drying sealer on the body with non-residue solvent.
(b) Align the paint marks with the positions on the body flange and install a new back door weatherstrip.
NOTICE:
Always align the paint mark when installing the part. If the paint mark position is out of place, water leaks may occur.
HINT:
To easily install the weatherstrip, first install the area with the paint mark as shown in the illustration. Then install the part toward the corners and push any excess length into the corners.
READ NEXT:
 Components
COMPONENTS ILLUSTRATION *1 DECK FLOOR BOX LH *2 NO. 3 DECK BOARD SUB-ASSEMBLY *3 REAR DECK FLOOR BOX *4 NEGATIVE AUXILIARY BATTERY TERMINAL N*m (kgf*cm, ft.*lbf): Specified
Disassembly
DISASSEMBLY CAUTION / NOTICE / HINT HINT:
Use the same procedure for the RH and LH side.
The procedure listed below is for the LH side.
PROCEDURE 1. PRECAUTION CAUTION: Be sure to read Precaut
SEE MORE:
Problem Symptoms Table
PROBLEM SYMPTOMS TABLE NOTICE: If the headlight ECU sub-assembly LH has been replaced, it is necessary to synchronize the vehicle information and initialize the headlight ECU sub-assembly LH. Click here HINT: Use the table below to help determine the cause of problem symptoms. If multiple suspecte
Seat belts
Make sure that all occupants are
wearing their seat belts before driving
the vehicle.
WARNING
Observe the following precautions to
reduce the risk of injury in the event of
sudden braking, sudden swerving or an
accident.
Failure to do so may cause death or serious
injury.
■Wearing a se
