Lexus NX: Components
Lexus NX Service Manual / Engine & Hybrid System / 2ar-fxe (engine Control) / Throttle Body / Components
COMPONENTS
ILLUSTRATION
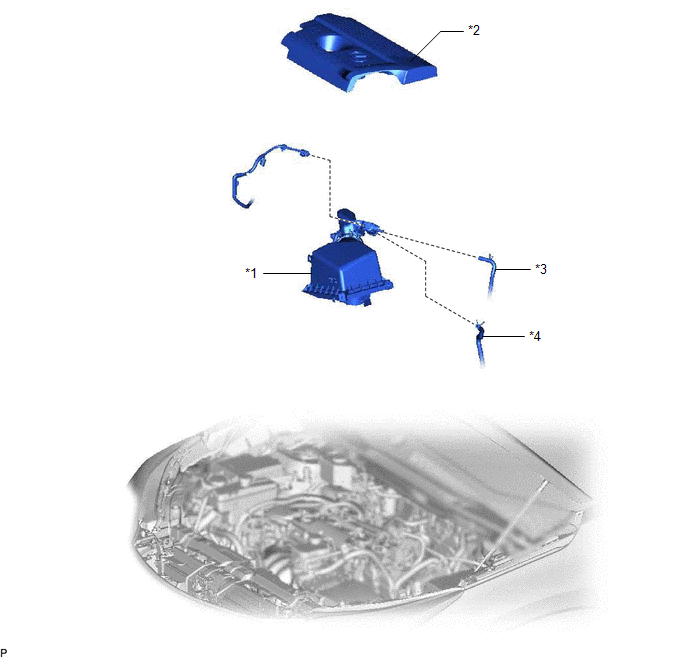
| *1 | AIR CLEANER CAP AND HOSE | *2 | NO. 1 ENGINE COVER SUB-ASSEMBLY |
| *3 | FUEL VAPOR FEED HOSE | *4 | NO. 2 FUEL VAPOR FEED HOSE |
ILLUSTRATION
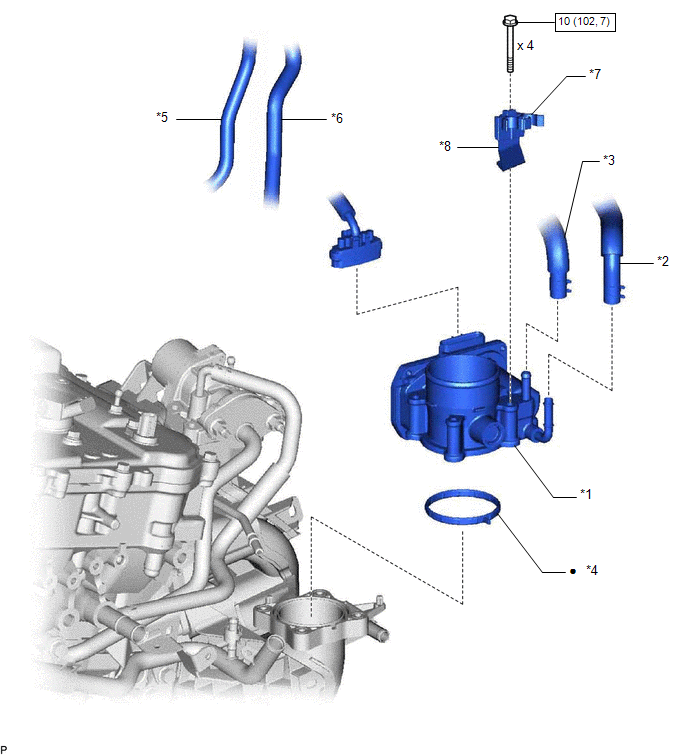
| *1 | THROTTLE WITH MOTOR BODY ASSEMBLY | *2 | NO. 2 WATER BY-PASS HOSE |
| *3 | NO. 3 WATER BY-PASS HOSE | *4 | GASKET |
| *5 | FUEL TUBE SUB-ASSEMBLY | *6 | NO. 2 FUEL VAPOR FEED HOSE |
| *7 | FUEL HOSE CLAMP | *8 | FUEL HOSE BRACKET |
.png) | N*m (kgf*cm, ft.*lbf): Specified torque | ● | Non-reusable part |
READ NEXT:
 On-vehicle Inspection
ON-VEHICLE INSPECTION PROCEDURE 1. INSPECT THROTTLE WITH MOTOR BODY ASSEMBLY (a) Put the engine in inspection mode (maintenance mode). Click here (b) Start the engine and check that the MIL is not i
Inspection
INSPECTION PROCEDURE 1. INSPECT THROTTLE WITH MOTOR BODY ASSEMBLY *a Component without harness connected (Throttle with Motor Body Assembly) (a) Check that the throttle valve opens and closes
Installation
INSTALLATION CAUTION / NOTICE / HINT HINT: Perform "Inspection After Repairs" after replacing the throttle with motor body assembly. Click here PROCEDURE 1. INSTALL THROTTLE WITH MOTOR BODY ASSEMBLY
SEE MORE:
Generator Temperature Sensor Circuit Low (P0A38-257,P0A39-259)
DESCRIPTION Refer to the description for DTC P0A37-260. Click here DTC No. Detection Item DTC Detection Condition Trouble Area MIL Warning Indicate P0A38-257 Generator Temperature Sensor Circuit Low Short to ground in the generator temperature sensor circuit (1 trip detection
Removal
REMOVAL PROCEDURE 1. PRECAUTION NOTICE: After the power switch is turned off, there may be a waiting time before disconnecting the negative (-) auxiliary battery terminal. Click here 2. REMOVE NO. 3 DECK BOARD SUB-ASSEMBLY Click here 3. REMOVE REAR DECK FLOOR BOX Click here 4. REMOVE DECK FLOO
© 2016-2026 Copyright www.lexunx.com
