Lexus NX: Components
COMPONENTS
ILLUSTRATION
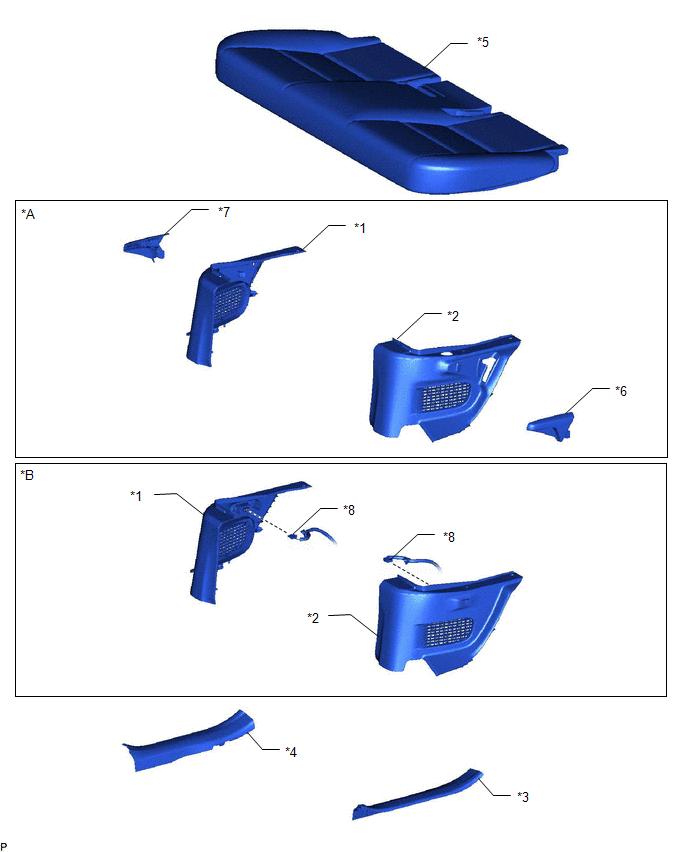
| *A | for Manual Seat | *B | for Power Seat |
| *1 | NO. 2 BATTERY SERVICE COVER BOARD | *2 | NO. 3 BATTERY SERVICE COVER BOARD |
| *3 | REAR DOOR SCUFF PLATE LH | *4 | REAR DOOR SCUFF PLATE RH |
| *5 | REAR SEAT CUSHION ASSEMBLY | *6 | RECLINING ADJUSTER RELEASE HANDLE LH |
| *7 | RECLINING ADJUSTER RELEASE HANDLE RH | *8 | POWER SEAT SWITCH CONNECTOR |
READ NEXT:
 Removal
REMOVAL PROCEDURE 1. REMOVE REAR SEAT CUSHION ASSEMBLY for Manual seat: Click here for Power seat: Click here 2. REMOVE REAR DOOR SCUFF PLATE LH Click here 3. REMOVE REAR DOOR SCUFF PLATE RH
Inspection
INSPECTION PROCEDURE 1. INSPECT NO. 3 BATTERY SERVICE COVER BOARD (a) Inspect the No. 3 battery service cover board. (1) Visually inspect the filter. Standard: No deformation or cracks. If the result
Installation
INSTALLATION PROCEDURE 1. INSTALL NO. 3 BATTERY SERVICE COVER BOARD (a) for Power Seat: Connect the wire harness clamp and power seat switch connector. (b) Attach the 2 claws and install the No. 3 bat
SEE MORE:
Operation Check
OPERATION CHECK AUTOMATIC HIGH BEAM SYSTEM OPERATION CHECK (a) Check the operation of the automatic high beam indicator light. *a Automatic High Beam Indicator Light NOTICE: If the forward recognition camera cannot correctly recognize the front due to bad weather (dense fog, etc.) or obstru
No Response from Steering Lock ECU (B2786)
DESCRIPTION This DTC is stored when LIN communication between the certification ECU (smart key ECU assembly) and steering lock actuator stops for 10 seconds or more. DTC No. Detection Item DTC Detection Condition Trouble Area B2786 No Response from Steering Lock ECU Communication be
© 2016-2026 Copyright www.lexunx.com
