
Lexus NX: Components
COMPONENTS
ILLUSTRATION
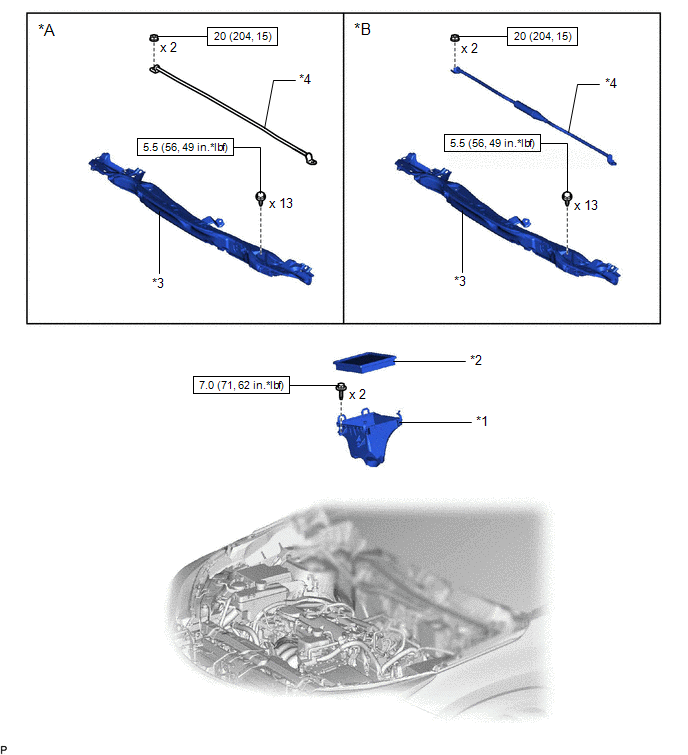
| *A | w/o Performance Damper | *B | w/ Performance Damper |
| *1 | AIR CLEANER CASE SUB-ASSEMBLY | *2 | AIR CLEANER FILTER ELEMENT SUB-ASSEMBLY |
| *3 | OUTER COWL TOP PANEL | *4 | SUSPENSION TOWER DAMPER |
.png) | N*m (kgf*cm, ft.*lbf): Specified torque | - | - |
ILLUSTRATION
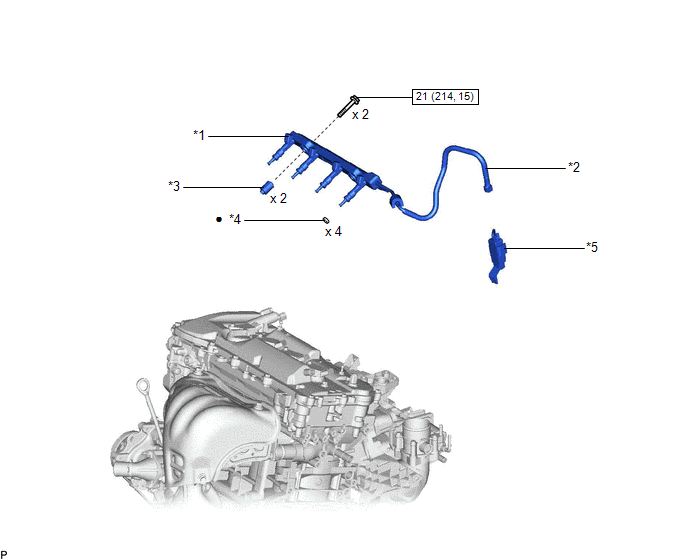
| *1 | FUEL DELIVERY PIPE | *2 | FUEL TUBE SUB-ASSEMBLY |
| *3 | NO. 1 FUEL DELIVERY PIPE SPACER | *4 | INJECTOR VIBRATION INSULATOR |
| *5 | FUEL HOSE CLAMP | - | - |
| | N*m (kgf*cm, ft.*lbf): Specified torque | ● | Non-reusable part |
ILLUSTRATION
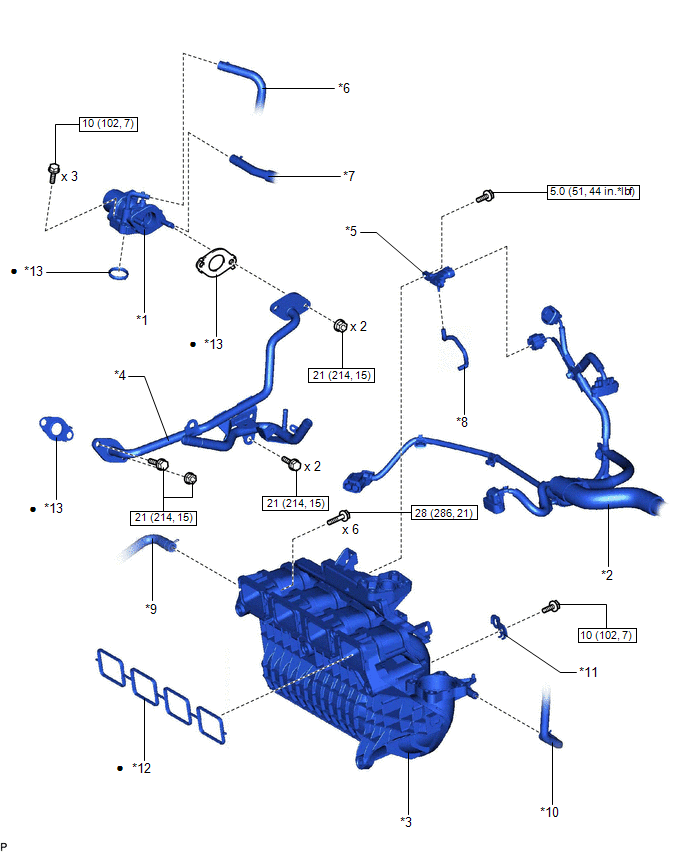
| *1 | EGR VALVE ASSEMBLY | *2 | ENGINE WIRE |
| *3 | INTAKE MANIFOLD | *4 | NO. 1 EGR PIPE |
| *5 | MANIFOLD ABSOLUTE PRESSURE SENSOR | *6 | NO. 1 WATER BY-PASS HOSE |
| *7 | NO. 2 WATER BY-PASS HOSE | *8 | VACUUM HOSE |
| *9 | NO. 2 PCV HOSE | *10 | PURGE LINE HOSE |
| *11 | WIRING HARNESS CLAMP BRACKET | *12 | NO. 1 INTAKE MANIFOLD TO HEAD GASKET |
| *13 | GASKET | - | - |
| | N*m (kgf*cm, ft.*lbf): Specified torque | ● | Non-reusable part |
READ NEXT:
 Removal
REMOVAL PROCEDURE 1. DISCHARGE FUEL SYSTEM PRESSURE Click here 2. PRECAUTION NOTICE: After turning the power switch off, waiting time may be required before disconnecting the cable from the auxiliar
Installation
INSTALLATION PROCEDURE 1. INSTALL INTAKE MANIFOLD (a) Connect the purge line hose to the intake manifold, and slide the clamp to secure the hose. HINT: Make sure the hose clamp is oriented as shown
Intake System
On-vehicle InspectionON-VEHICLE INSPECTION PROCEDURE 1. INSPECT INTAKE SYSTEM HINT: Perform "Inspection After Repair" after repairing air leaks in the intake system. Click here (a) Check that there
SEE MORE:
How To Proceed With Troubleshooting
CAUTION / NOTICE / HINT HINT:
Use these procedures to troubleshoot the pre-collision system.
*: Use the Techstream.
PROCEDURE 1. VEHICLE BROUGHT TO WORKSHOP
NEXT 2. INSPECT AUXILIARY BATTERY VOLTAGE (a) Measure the auxiliary battery voltage with the engine
Reassembly
REASSEMBLY CAUTION / NOTICE / HINT NOTICE:
When using a vise, place aluminum plates between the part and vise.
When using a vise, do not overtighten it.
PROCEDURE 1. INSTALL FRONT DRIVE SHAFT BEARING (for RH Side) (a) Using SST and a press, press in the front drive inboard joint assembly
