Lexus NX: Components
COMPONENTS
ILLUSTRATION
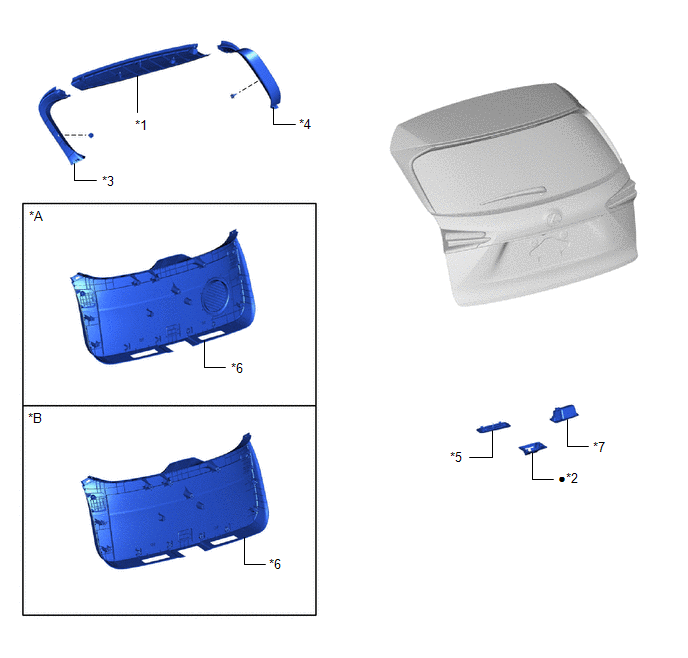
| *A | w/ Woofer | *B | w/o Woofer |
| *1 | BACK DOOR CENTER GARNISH | *2 | BACK DOOR LOCK COVER |
| *3 | BACK DOOR SIDE GARNISH LH | *4 | BACK DOOR SIDE GARNISH RH |
| *5 | BACK DOOR TRIM BASE | *6 | BACK DOOR TRIM BOARD ASSEMBLY |
| *7 | PULL HANDLE | - | - |
| ● | Non-reusable part | - | - |
ILLUSTRATION
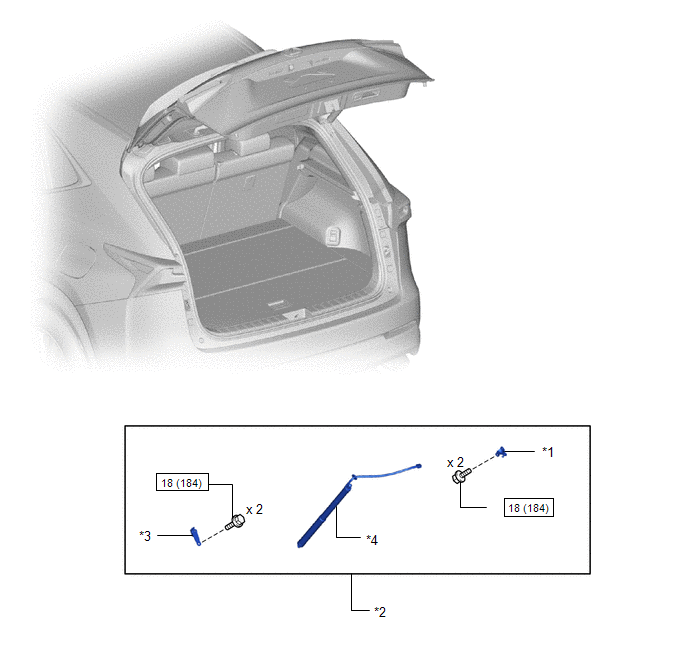
| *1 | BACK DOOR LOWER DAMPER STAY BRACKET LH | *2 | POWER BACK DOOR UNIT ASSEMBLY SET LH |
| *3 | BACK DOOR UPPER DAMPER STAY BRACKET LH | *4 | POWER BACK DOOR SPINDLE SUB-ASSMBLY LH |
.png) | N*m (kgf*cm, ft.*lbf): Specified torque | ★ | Precoated part |
READ NEXT:
 Removal
REMOVAL CAUTION / NOTICE / HINT HINT:
Use the same procedure for the RH and LH sides.
The procedure listed below is for the LH side.
PROCEDURE 1. REMOVE BACK DOOR CENTER GARNISH Click here
Installation
INSTALLATION CAUTION / NOTICE / HINT HINT:
Use the same procedure for the RH and LH sides.
The procedure listed below is for the LH side.
PROCEDURE 1. INSTALL BACK DOOR LOWER DAMPER STAY BRACK
Power Back Door Main Switch
InspectionINSPECTION PROCEDURE 1. INSPECT POWER BACK DOOR MAIN SWITCH (a) Check the resistance. (1) Measure the resistance according to the value(s) in the table below. Standard Resistance: Te
SEE MORE:
Inspection
INSPECTION PROCEDURE 1. INSPECT POWER WINDOW REGULATOR MOTOR ASSEMBLY LH NOTICE:
Do not apply voltage to any terminals except terminals 1 and 2 to avoid damaging the pulse sensor inside the motor.
Reset the power window regulator motor (initialize the pulse sensor) after installing the power wi
Steering Angle Sensor (C1A47)
DESCRIPTION The blind spot monitor sensor receives steering angle signals from the steering sensor via CAN communication. DTC No. Detection Item DTC Detection Condition Trouble Area Note C1A47 Steering Angle Sensor A fail flag is transmitted from the steering sensor
Steering
© 2016-2026 Copyright www.lexunx.com
