Lexus NX: Components
COMPONENTS
ILLUSTRATION
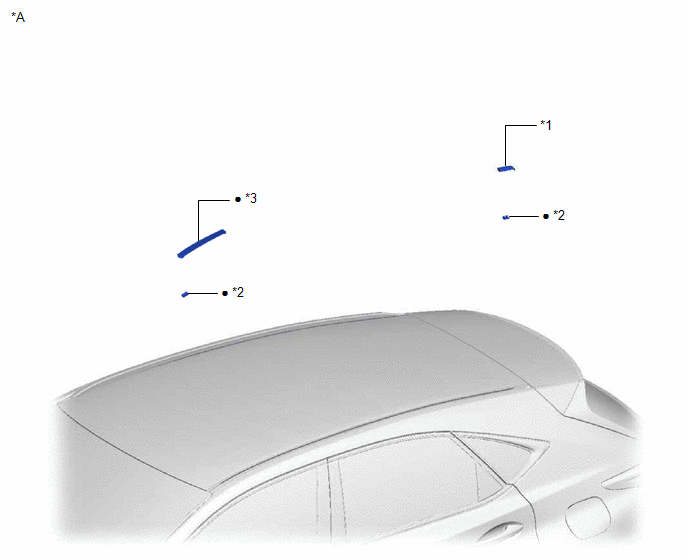
| *A | w/ Roof Rack | - | - |
| *1 | REAR ROOF DRIP SIDE FINISH MOULDING LH | *2 | ROOF DRIP SIDE FINISH MOULDING CLIP |
| *3 | ROOF DRIP SIDE FINISH MOULDING LH | - | - |
| ● | Non-reusable part | - | - |
ILLUSTRATION
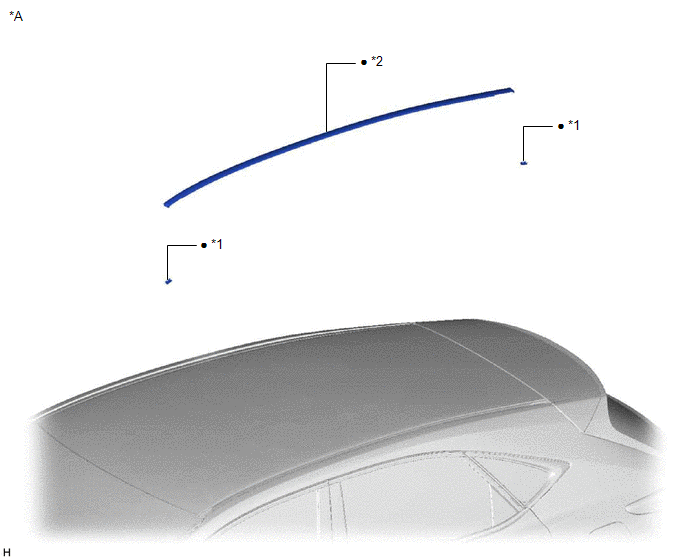
| *A | w/o Roof Rack, except Glass Roof | - | - |
| *1 | ROOF DRIP SIDE FINISH MOULDING CLIP | *2 | ROOF DRIP SIDE FINISH MOULDING LH |
| ● | Non-reusable part | - | - |
ILLUSTRATION
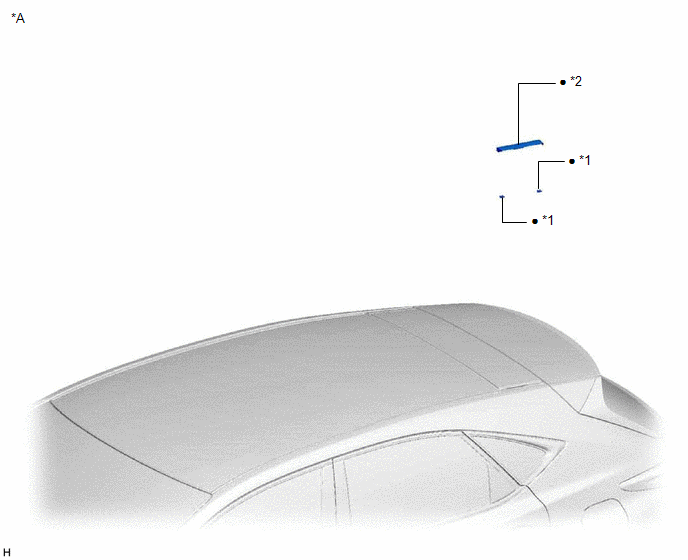
| *A | for Glass Roof | - | - |
| *1 | ROOF DRIP SIDE FINISH MOULDING CLIP | *2 | ROOF DRIP SIDE FINISH MOULDING LH |
| ● | Non-reusable part | - | - |
READ NEXT:
 Removal
REMOVAL CAUTION / NOTICE / HINT HINT:
Use the same procedure for the RH and LH sides.
The procedure listed below is for the LH side.
PROCEDURE 1. REMOVE ROOF RACK ASSEMBLY (w/ Roof Rack) Click
Installation
INSTALLATION CAUTION / NOTICE / HINT HINT:
Use the same procedure for the RH and LH sides.
The procedure listed below is for the LH side.
PROCEDURE 1. INSTALL ROOF DRIP SIDE FINISH MOULDING CL
SEE MORE:
Dtc Check / Clear
DTC CHECK / CLEAR CHECK FOR DTC (a) Connect the Techstream to the DLC3. (b) Turn the power switch on (IG). (c) Turn the Techstream on. (d) Enter the following menus: Body Electrical / Main body / Trouble Codes. Body Electrical > Main Body > Trouble Codes (e) Enter the following menus: Body Ele
Inspection
INSPECTION PROCEDURE 1. INSPECT CYLINDER HEAD SUB-ASSEMBLY (a) Using a precision straightedge and feeler gauge, measure the warpage of the contact surfaces where the cylinder head contacts the cylinder block and manifold. *a Cylinder Head Lower Side *b Intake Manifold Side *c Exhaust
© 2016-2026 Copyright www.lexunx.com
