Lexus NX: Components
COMPONENTS
ILLUSTRATION
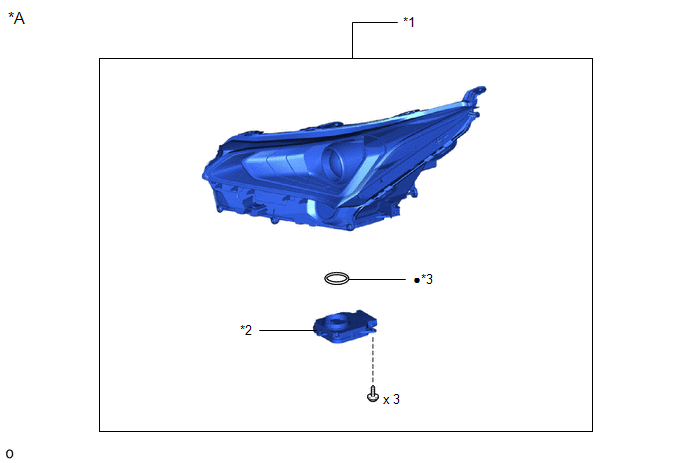
| *A | for Single Beam Headlight | - | - |
| *1 | HEADLIGHT ASSEMBLY LH | *2 | HEADLIGHT ECU SUB-ASSEMBLY LH |
| *3 | HEADLIGHT GASKET | - | - |
| ● | Non-reusable part | - | - |
ILLUSTRATION
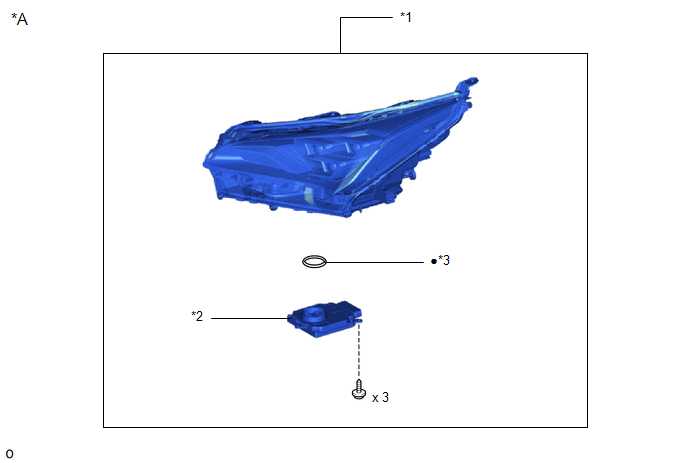
| *A | for Triple Beam Headlight | - | - |
| *1 | HEADLIGHT ASSEMBLY LH | *2 | HEADLIGHT ECU SUB-ASSEMBLY LH |
| *3 | HEADLIGHT GASKET | - | - |
| ● | Non-reusable part | - | - |
READ NEXT:
 Removal
REMOVAL PROCEDURE 1. PRECAUTION NOTICE:
Be sure to read Precaution thoroughly before servicing.
Click here
Handle components indoors as much as possible to prevent foreign matter from entering
Installation
INSTALLATION CAUTION / NOTICE / HINT NOTICE:
Handle components indoors as much as possible to prevent foreign matter from entering and adhering to headlight assembly components.
Do not reuse part
Height Control Sensor
ComponentsCOMPONENTS ILLUSTRATION *1 REAR HEIGHT CONTROL SENSOR SUB-ASSEMBLY - - RemovalREMOVAL PROCEDURE 1. REMOVE REAR HEIGHT CONTROL SENSOR SUB-ASSEMBLY (a) Disconnect the connect
SEE MORE:
Diagnosis System
DIAGNOSIS SYSTEM DESCRIPTION (a) The certification ECU (smart key ECU assembly) and hybrid vehicle control ECU control the vehicle immobiliser system functions. Immobiliser system data and Diagnostic Trouble Codes (DTCs) can be read through the vehicle Data Link Connector 3 (DLC3). In some cases, a
Key-off Operation Function Operates even if Operating Conditions are not Satisfied
DESCRIPTION According to the map light assembly (slide roof switch) operation, the sliding roof drive gear sub-assembly (sliding roof ECU) operates its built-in motor. Using the map light assembly (slide roof switch), if the roof glass can be operated normally when 43 seconds or more have elapsed af
© 2016-2026 Copyright www.lexunx.com
