Lexus NX: Components
Lexus NX Service Manual / Audio & Visual & Telematics / Audio / Video / Instrument Panel Speaker / Components
COMPONENTS
ILLUSTRATION
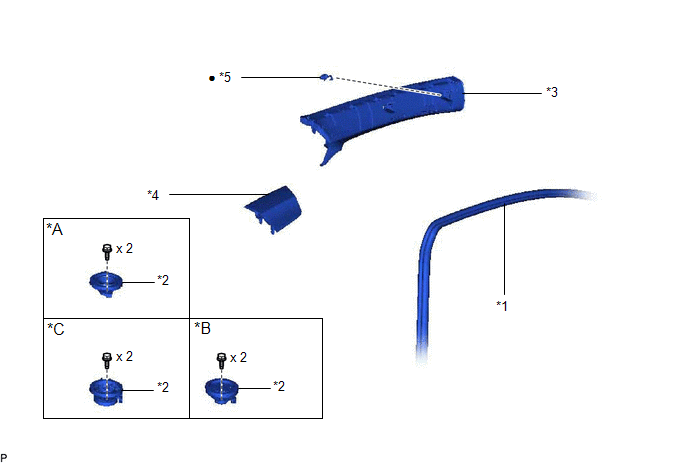
| *A | for 8 Speakers | *B | for 10 Speakers |
| *C | for 14 Speakers | - | - |
| *1 | FRONT DOOR OPENING TRIM WEATHERSTRIP LH | *2 | FRONT NO. 2 SPEAKER ASSEMBLY |
| *3 | FRONT PILLAR GARNISH ASSEMBLY LH | *4 | NO. 1 INSTRUMENT PANEL SPEAKER PANEL SUB-ASSEMBLY |
| *5 | FRONT PILLAR GARNISH CLIP | - | - |
| ● | Non-reusable part | - | - |
ILLUSTRATION
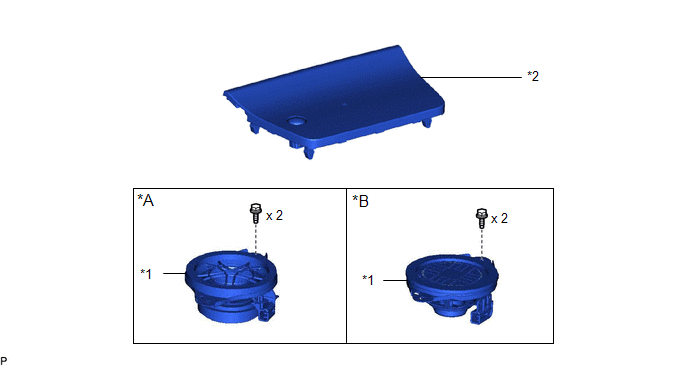
| *A | for 10 Speakers | *B | for 14 Speakers |
| *1 | FRONT NO. 3 SPEAKER ASSEMBLY | *2 | NO. 1 SPEAKER OPENING COVER ASSEMBLY |
READ NEXT:
 Removal
REMOVAL CAUTION / NOTICE / HINT HINT:
Use the same procedure for the RH and LH sides.
The procedure listed below is for the LH side.
PROCEDURE 1. REMOVE FRONT DOOR OPENING TRIM WEATHERSTRIP LH
Inspection
INSPECTION PROCEDURE 1. INSPECT FRONT NO. 2 SPEAKER ASSEMBLY (a) Measure the resistance according to the value(s) in the table below. Standard Resistance: for 8 Speakers Tester Connection Con
Installation
INSTALLATION CAUTION / NOTICE / HINT HINT:
Use the same procedure for the RH and LH sides.
The procedure listed below is for the LH side.
PROCEDURE 1. INSTALL FRONT NO. 3 SPEAKER ASSEMBLY NOTI
SEE MORE:
Problem Symptoms Table
PROBLEM SYMPTOMS TABLE NOTICE:
If no problem symptoms are found when a DTC is output in the DTC check on the lane tracing assist, check each symptom by checking the suspected areas in the order they are listed.
When replacing the combination meter assembly, always replace it with a new one. If
Side Camera LH Internal Circuit (C2A61)
DESCRIPTION This DTC is stored when the parking assist ECU detects a signal indicating a malfunction in the side television camera assembly LH via CAN communication. DTC No. Detection Item DTC Detection Condition Trouble Area C2A61 Side Camera LH Internal Circuit A signal indicating
© 2016-2026 Copyright www.lexunx.com
