Lexus NX: Components
COMPONENTS
ILLUSTRATION
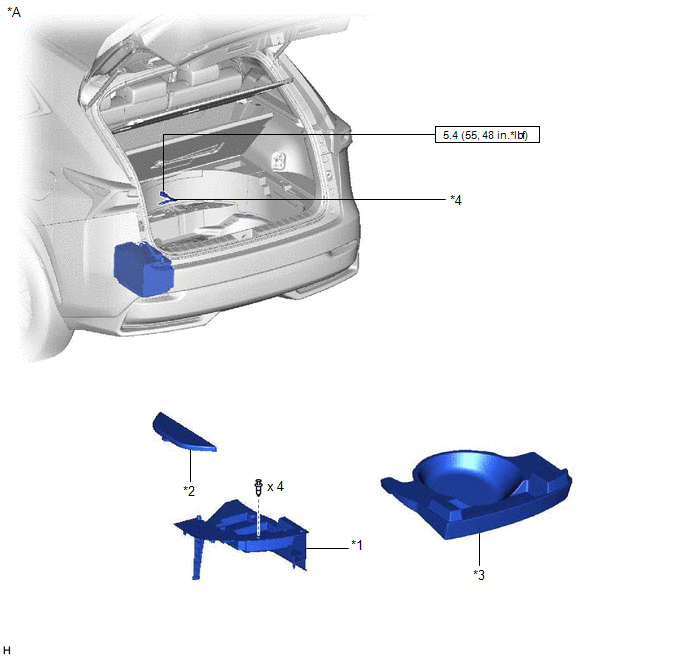
| *1 | DECK FLOOR BOX LH | *2 | NO. 3 DECK BOARD SUB-ASSEMBLY |
| *3 | REAR DECK FLOOR BOX | *4 | NEGATIVE AUXILIARY BATTERY TERMINAL |
.png) | N*m (kgf*cm, ft.*lbf): Specified torque | - | - |
ILLUSTRATION
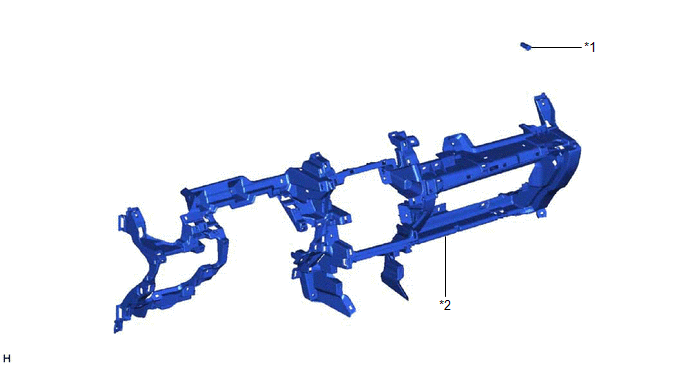
| *1 | GLOVE BOX LIGHT ASSEMBLY | *2 | LOWER INSTRUMENT PANEL SUB-ASSEMBLY |
READ NEXT:
 Removal
REMOVAL PROCEDURE 1. DISABLE AUTOAWAY/RETURN FUNCTION (for Power Tilt and Power Telescopic Steering Column) (a) Disable the autoaway/return function by changing the customize parameter. Click here C
Inspection
INSPECTION PROCEDURE 1. INSPECT GLOVE BOX LIGHT ASSEMBLY (a) Apply battery voltage to the connector and check the light illumination condition. OK: Measurement Condition Specified Condition
Installation
INSTALLATION PROCEDURE 1. INSTALL GLOVE BOX LIGHT ASSEMBLY (a) Attach the 2 claws to install the glove box light assembly. 2. INSTALL LOWER INSTRUMENT PANEL SUB-ASSEMBLY Click here 3.
SEE MORE:
Drive Motor "B" Control Module (P0A1C-710,P0A1C-797,P1C2C-706,P1CA8-708)
DESCRIPTION The MG ECU, which is built into the inverter with converter assembly, monitors its internal operation and will store DTCs if the system is malfunctioning. If any of the following DTCs are output, replace the inverter with converter assembly. DTC No. Detection Item DTC Detection Co
Installation
INSTALLATION PROCEDURE 1. INSTALL BACK DOOR LOCK ASSEMBLY (w/ Power Back Door) NOTICE:
When installing a new back door lock assembly, if there is any tape stuck to it, remove the tape.
When installing a new back door lock assembly, if there are any strings attached to it, cut the strings off.
© 2016-2026 Copyright www.lexunx.com
