Lexus NX: Components
COMPONENTS
ILLUSTRATION
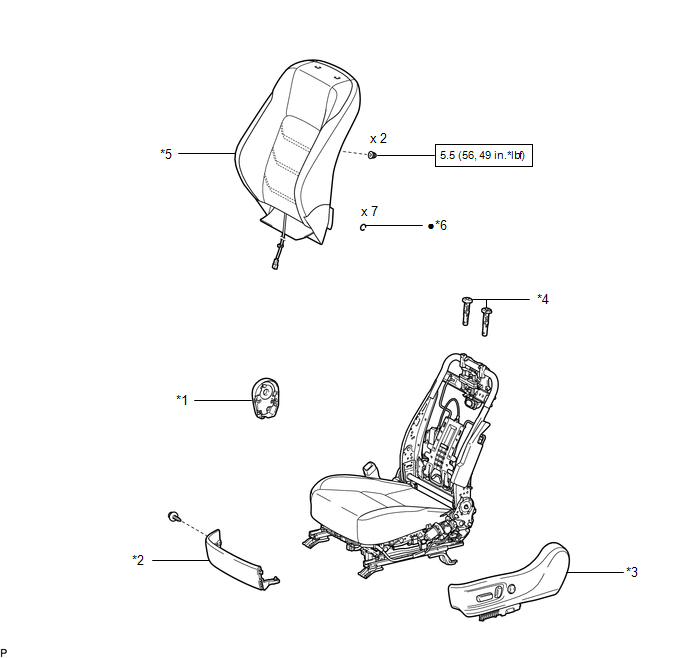
| *1 | FRONT INNER SEAT CUSHION SHIELD LH | *2 | FRONT LOWER SEAT CUSHION SHIELD |
| *3 | FRONT SEAT CUSHION SHIELD LH | *4 | FRONT SEAT HEADREST SUPPORT |
| *5 | SEPARATE TYPE FRONT SEATBACK COVER WITH PAD | *6 | HOG RING |
.png) | N*m (kgf*cm, ft.*lbf): Specified torque | ● | Non-reusable part |
ILLUSTRATION
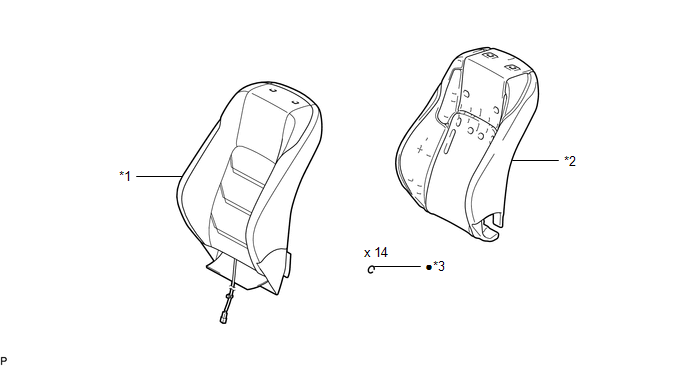
| *1 | SEPARATE TYPE FRONT SEATBACK COVER LH | *2 | SEPARATE TYPE FRONT SEATBACK PAD LH |
| *3 | HOG RING | - | - |
| ● | Non-reusable part | - | - |
READ NEXT:
 Removal
REMOVAL CAUTION / NOTICE / HINT CAUTION: Wear protective gloves. Sharp areas on the parts may injure your hands. HINT:
Use the same procedure for the RH and LH sides.
The procedure listed below i
Inspection
INSPECTION PROCEDURE 1. INSPECT SEPARATE TYPE FRONT SEATBACK COVER LH *a Component without harness connected (Separate Type Front Seatback Cover LH (Front Seatback Heater)) (a) Check the sepa
Installation
INSTALLATION CAUTION / NOTICE / HINT CAUTION: Wear protective gloves. Sharp areas on the parts may injure your hands. HINT:
Use the same procedure for the RH and LH sides.
The procedure listed be
SEE MORE:
How To Proceed With Troubleshooting
CAUTION / NOTICE / HINT HINT:
Use the following procedure to troubleshoot the power door lock control system.
*: Use the Techstream.
PROCEDURE 1. VEHICLE BROUGHT TO WORKSHOP
NEXT 2. CUSTOMER PROBLEM ANALYSIS CHECK HINT:
In troubleshooting, confirm that t
Disassembly
DISASSEMBLY CAUTION / NOTICE / HINT HINT:
Use the same procedure for the RH and LH sides.
The procedure listed below is for the LH side.
PROCEDURE 1. REMOVE REAR LIGHT GASKET LH (a) Remove the rear light gasket LH. NOTICE: The rear light gasket LH cannot be reused. 2. REMOVE R
© 2016-2026 Copyright www.lexunx.com
