Lexus NX: Components
COMPONENTS
ILLUSTRATION
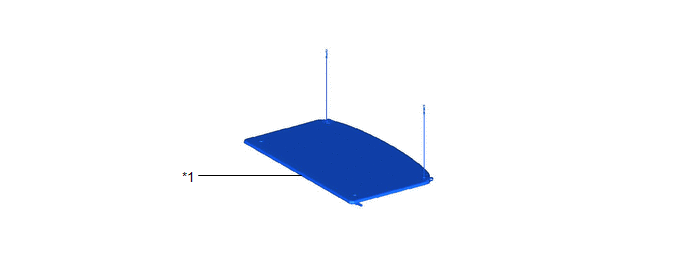
| *1 | TONNEAU COVER ASSEMBLY | - | - |
ILLUSTRATION
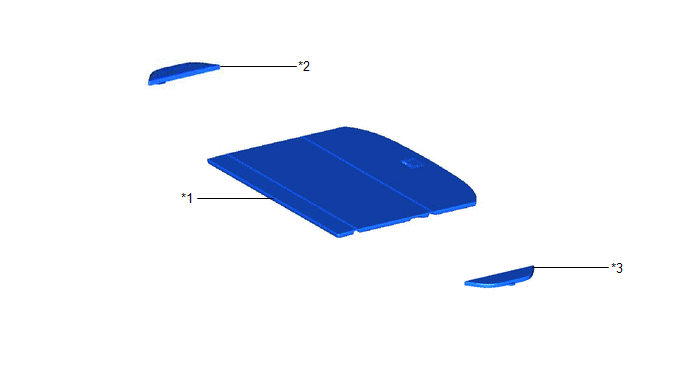
| *1 | DECK BOARD ASSEMBLY | *2 | DECK FLOOR BOX LH |
| *3 | DECK FLOOR BOX RH | - | - |
ILLUSTRATION
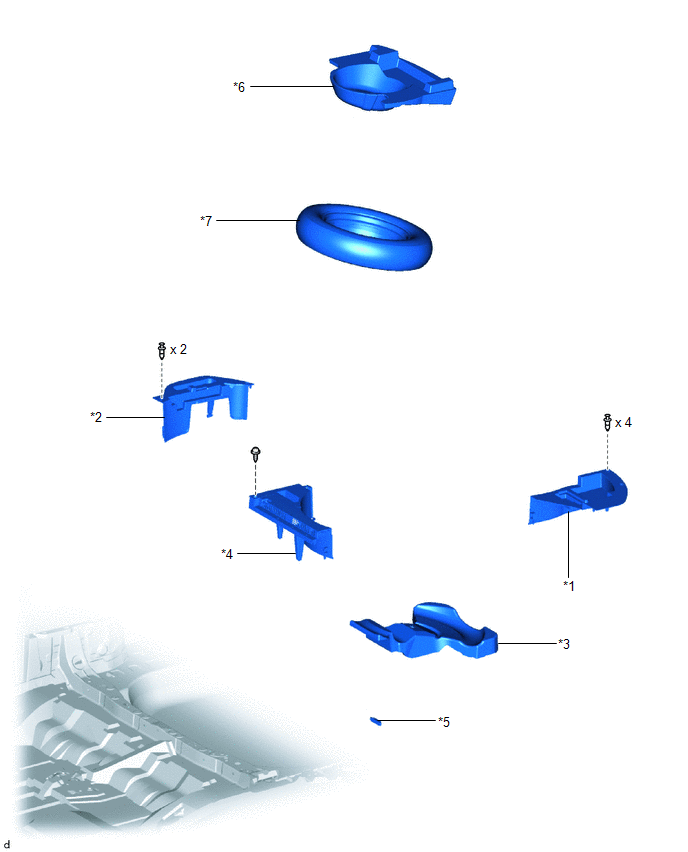
| *1 | DECK FLOOR BOX LH | *2 | DECK FLOOR BOX RH |
| *3 | NO. 1 SPARE WHEEL CARRIER | *4 | NO. 1 TOOL BOX SUB-ASSEMBLY |
| *5 | NO. 3 INDOOR ELECTRICAL KEY ANTENNA ASSEMBLY | *6 | REAR DECK FLOOR BOX |
| *7 | SPARE TIRE | - | - |
READ NEXT:
 Installation
INSTALLATION PROCEDURE 1. INSTALL NO. 3 INDOOR ELECTRICAL KEY ANTENNA ASSEMBLY NOTICE: Do not reuse dropped or damaged parts. (a) Connect the connector. (b) Attach the clamp to install the No. 3 indoo
Removal
REMOVAL PROCEDURE 1. REMOVE REAR SEAT ASSEMBLY (for Power Seat) Click here 2. REMOVE REAR SEAT ASSEMBLY (for Manual Seat) Click here 3. REMOVE TONNEAU COVER ASSEMBLY Click here 4. REMOVE DE
SEE MORE:
Operation Check
OPERATION CHECK CHECK SEAT HEATER (for Front) (a) Turn the power switch on (IG). (b) Check that the indicator illuminates and the surface of the front seat warms up, when the seat heater switch on the air conditioning control assembly is turned on. (c) Check that the front seat surface temperature c
Inspection
INSPECTION PROCEDURE 1. INSPECT TILT AND TELESCOPIC SWITCH (a) Measure the resistance according to the value(s) in the table below. Standard Resistance: Tester Connection Switch Condition Specified Condition 1 (VC) - 3 (MSW) Tilt up 342 to 378 Ω Tilt down 1890.5 to 2089.5 Î
© 2016-2026 Copyright www.lexunx.com
