
Lexus NX: Components
COMPONENTS
ILLUSTRATION
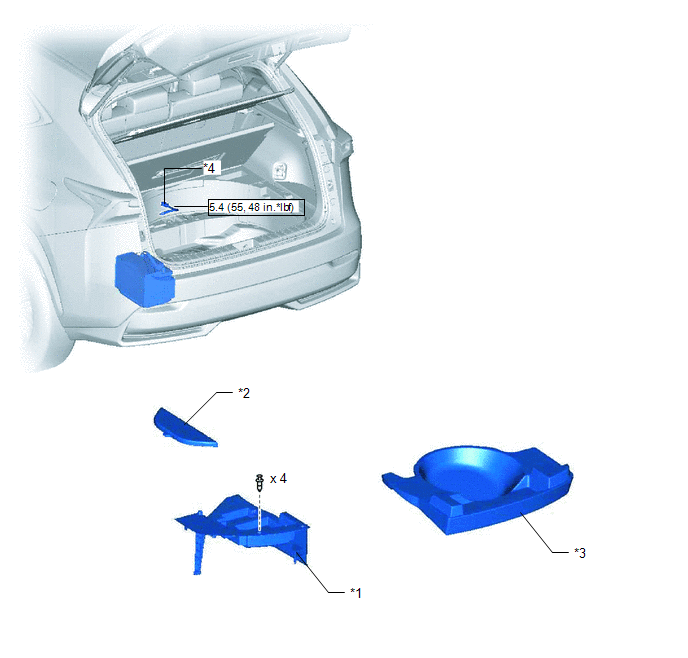
| *1 | DECK FLOOR BOX LH | *2 | NO. 3 DECK BOARD SUB-ASSEMBLY |
| *3 | REAR DECK FLOOR BOX | *4 | NEGATIVE AUXILIARY BATTERY TERMINAL |
 | N*m (kgf*cm, ft.*lbf): Specified torque | - | - |
ILLUSTRATION
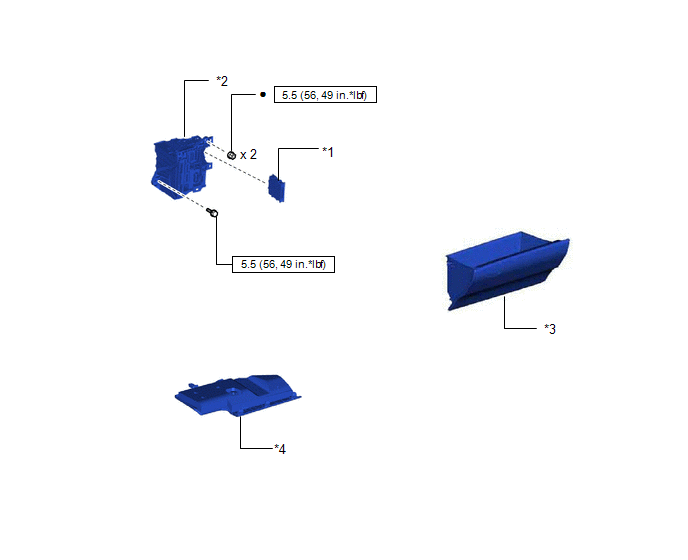
| *1 | CLEARANCE WARNING ECU ASSEMBLY | *2 | ECU INTEGRATION BOX RH |
| *3 | GLOVE COMPARTMENT DOOR ASSEMBLY | *4 | NO. 2 INSTRUMENT PANEL UNDER COVER SUB-ASSEMBLY |
| | N*m (kgf*cm, ft.*lbf): Specified torque | ● | Non-reusable part |
READ NEXT:
 Removal
REMOVAL PROCEDURE 1. PRECAUTION NOTICE: After the power switch is turned off, there may be a waiting time before disconnecting the negative (-) auxiliary battery terminal. Click here 2. REMOVE NO. 3
Installation
INSTALLATION PROCEDURE 1. INSTALL CLEARANCE WARNING ECU ASSEMBLY (a) Attach the 2 claws to install the clearance warning ECU assembly. 2. INSTALL ECU INTEGRATION BOX RH Click here 3. INSTALL NO. 2 I
SEE MORE:
Drive Motor "A" Position Sensor Circuit Range / Performance (P0A40-504)
DTC SUMMARY MALFUNCTION DESCRIPTION This DTC indicates that an overvoltage in the inverter has occurred. The cause of this malfunction may be one of the following: Area Main Malfunction Description Step Inverter low-voltage circuit The connectors are not connected properly 2 Resol
Removal
REMOVAL PROCEDURE 1. REMOVE CONSOLE ARMREST ASSEMBLY Click here 2. REMOVE UPPER REAR CONSOLE PANEL Click here 3. REMOVE UPPER NO. 2 CONSOLE PANEL GARNISH Click here 4. REMOVE UPPER NO. 1 CONSOLE PANEL GARNISH Click here 5. REMOVE INSTRUMENT SIDE PANEL LH Click here 6. REMOVE NO. 1 INS
© 2016-2026 Copyright www.lexunx.com
