Lexus NX: Disassembly
Lexus NX Service Manual / Vehicle Exterior / Exterior Panels / Trim / Rear Door Outside Moulding / Disassembly
DISASSEMBLY
CAUTION / NOTICE / HINT
HINT:
- Use the same procedure for the RH and LH sides.
- The procedure listed below is for the LH side.
PROCEDURE
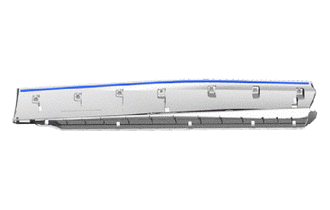
1. REMOVE REAR DOOR UPPER OUTSIDE MOULDING PAD
| (a) Remove the rear door upper outside moulding pad. |
|
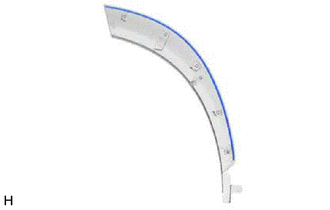
2. REMOVE REAR DOOR NO. 1 MOULDING PAD
| (a) Remove the rear door No. 1 moulding pad. |
|
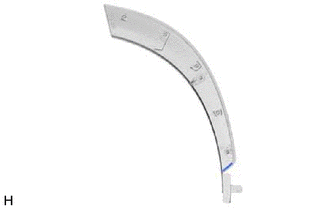
3. REMOVE REAR DOOR REAR OUTSIDE MOULDING PAD
| (a) Remove the rear door rear outside moulding pad. |
|
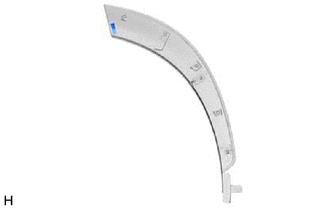
4. REMOVE NO. 2 MOULDING TAPE
| (a) Remove the No. 2 moulding tape. |
|
READ NEXT:
 Reassembly
REASSEMBLY CAUTION / NOTICE / HINT HINT:
Use the same procedure for the RH and LH sides.
The procedure listed below is for the LH side.
PROCEDURE 1. INSTALL NO. 2 MOULDING TAPE (a) When using
Components
COMPONENTS ILLUSTRATION *1 DECK FLOOR BOX LH *2 NO. 3 DECK BOARD SUB-ASSEMBLY *3 REAR DECK FLOOR BOX *4 NEGATIVE AUXILIARY BATTERY TERMINAL N*m (kgf*cm, ft.*lbf): Specified
SEE MORE:
Green Indicator Remains Off
DESCRIPTION After power switch on (IG), the DCM (telematics transceiver) will enter into self check mode. The manual (SOS) switch red indicator will illuminate for 2 seconds and turn off followed by the manual (SOS) switch green indicator illuminating and remaining on under normal operation. If neit
Back Camera Disconnected (C1622)
DESCRIPTION This DTC is stored if the radio receiver assembly judges that the signals or signal lines between the television camera assembly and the multi-display assembly are not normal as a result of its self check. DTC No. Detection Item DTC Detection Condition Trouble Area C1622 B
© 2016-2026 Copyright www.lexunx.com
