Lexus NX: Disassembly
DISASSEMBLY
CAUTION / NOTICE / HINT
HINT:
- Use the same procedure for the RH and LH sides.
- The procedure listed below is for the LH side.
PROCEDURE
1. REMOVE NO. 3 MOULDING TAPE
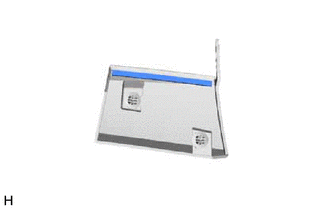
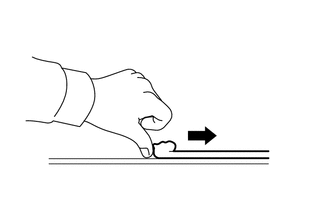
(a) Remove the No. 3 moulding tape.
HINT:
Do not pull on the No. 3 moulding tape. Instead, roll the tape up with your finger to remove it.
(b) Using non-residue solvent and a cloth, wipe off any No. 3 moulding tape (double-sided-tape) remaining on the side mudguard sub-assembly LH.
HINT:
If any No. 3 moulding tape (double-sided-tape) remains in the groove of the side mudguard LH, use a thin-bladed screwdriver to remove it.
READ NEXT:
 Reassembly
REASSEMBLY CAUTION / NOTICE / HINT HINT:
Use the same procedure for the RH and LH sides.
The procedure listed below is for the LH side.
PROCEDURE 1. INSTALL NO. 3 MOULDING TAPE (a) Clean the N
Installation
INSTALLATION CAUTION / NOTICE / HINT HINT:
Use the same procedure for the RH and LH sides.
The procedure listed below is for the LH side.
PROCEDURE 1. INSTALL SIDE MUDGUARD SUB-ASSEMBLY LH HIN
SEE MORE:
Diagnosis System
DIAGNOSIS SYSTEM DESCRIPTION (a) Seat heater system data and Diagnostic Trouble Codes (DTCs) can be read through the Data Link Connector 3 (DLC3) of the vehicle. When the system seems to be malfunctioning, use the Techstream to check for malfunctions and perform repairs. CHECK DLC3 (a) Check the DLC
Dtc Check / Clear
DTC CHECK / CLEAR CHECK DTC (CHECK USING Techstream) (a) Connect the Techstream to the DLC3. (b) Turn the power switch on (IG) and wait for 90 seconds. (c) Turn the Techstream on. (d) Enter the following menus: Body Electrical / Navigation System / Trouble Codes. Body Electrical > Navigation Syst
© 2016-2026 Copyright www.lexunx.com
