Lexus NX: Inspection
INSPECTION
PROCEDURE
1. INSPECT LUMBAR SUPPORT ADJUSTER ASSEMBLY LH
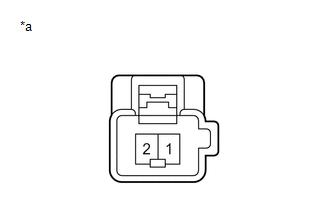
| (a) Check the operation of the lumbar support adjuster assembly LH. (1) Apply auxiliary battery voltage to the lumbar support adjuster assembly LH connector, and check that the lumbar support adjuster assembly LH operates smoothly as follows. OK:
If the result is not as specified, replace the lumbar support adjuster assembly LH. |
|
READ NEXT:
 Installation
INSTALLATION CAUTION / NOTICE / HINT CAUTION: Wear protective gloves. Sharp areas on the parts may injure your hands. PROCEDURE 1. INSTALL LUMBAR SUPPORT ADJUSTER ASSEMBLY LH (a) Attach the 2 hooks to
Components
COMPONENTS ILLUSTRATION *1 FRONT LOWER SEAT CUSHION SHIELD *2 FRONT LUMBAR POWER SEAT SWITCH *3 FRONT POWER SEAT SWITCH LH *4 FRONT SEAT CUSHION SHIELD LH *5 POWER SEAT SWITC
SEE MORE:
Precaution
PRECAUTION PRECAUTION FOR DISCONNECTING CABLE FROM NEGATIVE AUXILIARY BATTERY TERMINAL NOTICE: After the power switch is turned off, the radio receiver assembly records various types of memory and settings. As a result, after turning the power switch off, be sure to wait for the time specified in th
Inspection
INSPECTION PROCEDURE 1. INSPECT LEVEL WARNING SWITCH ASSEMBLY *a Component without harness connected (Level Warning Switch Assembly) HINT: The following check should be performed with the level warning switch assembly installed to the windshield washer jar assembly. (a) Fill the windshield
© 2016-2026 Copyright www.lexunx.com
