
Lexus NX: Performance Damper
Components
COMPONENTS
ILLUSTRATION
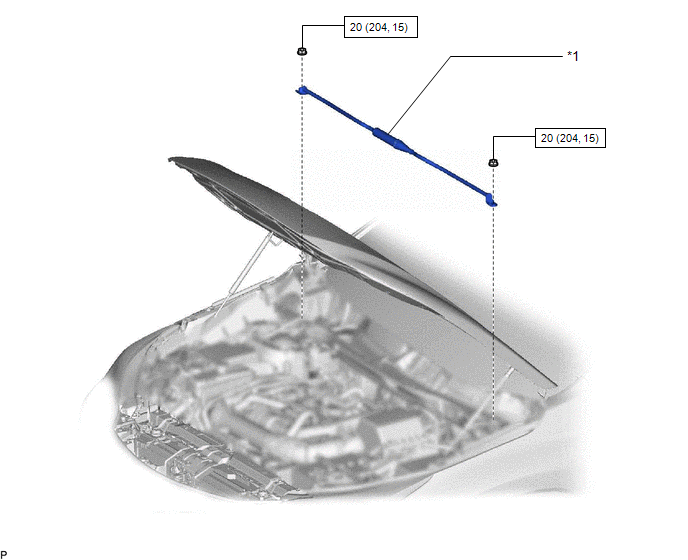
| *1 | SUSPENSION TOWER DAMPER | - | - |
.png) | N*m (kgf*cm, ft.*lbf): Specified torque | - | - |
Removal
REMOVAL
PROCEDURE
1. REMOVE WINDSHIELD WIPER MOTOR ASSEMBLY
Click here .gif)
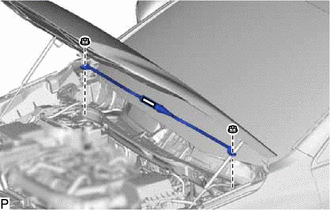
2. REMOVE SUSPENSION TOWER DAMPER
| (a) Remove the 2 nuts and the suspension tower damper from the vehicle. |
|
Inspection
INSPECTION
PROCEDURE
1. INSPECT SUSPENSION TOWER DAMPER
(a) Visually check the suspension tower damper and, if the rod is bent, a leak is found or the damper cannot be installed without extending or compressing it, replace it with a new one.
NOTICE:
Do not extend or compress the damper.
Installation
INSTALLATION
PROCEDURE
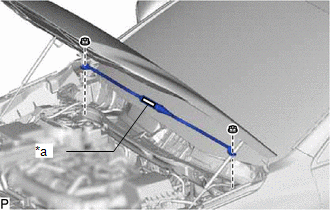
1. INSTALL SUSPENSION TOWER DAMPER
| (a) Install the suspension tower damper with the 2 nuts. Torque: 20 N·m {204 kgf·cm, 15 ft·lbf} NOTICE: Make sure to install the suspension tower damper with the label facing upright. |
|
2. INSTALL WINDSHIELD WIPER MOTOR ASSEMBLY
Click here .gif)
Disposal
DISPOSAL
PROCEDURE
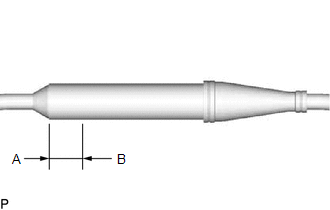
1. DISPOSE OF SUSPENSION TOWER DAMPER
| (a) Using a drill, make a hole in the cylinder between A and B shown in the illustration to discharge the gas inside. CAUTION: Always use proper safety equipment and be careful when drilling as shards of metal may fly about. HINT: The gas is colorless, odorless and non-poisonous. |
|
READ NEXT:
 Performance Rod
ComponentsCOMPONENTS ILLUSTRATION *1 SUSPENSION TOWER DAMPER - - N*m (kgf*cm, ft.*lbf): Specified torque - - RemovalREMOVAL PROCEDURE 1. REMOVE WINDSHIELD WIPER MOTOR ASSEMBL
Performance Damper
ComponentsCOMPONENTS ILLUSTRATION *1 SUSPENSION TOWER DAMPER - - N*m (kgf*cm, ft.*lbf): Specified torque - - RemovalREMOVAL PROCEDURE 1. REMOVE REAR FLOOR FINISH PLATE Click
SEE MORE:
Data List / Active Test
DATA LIST / ACTIVE TEST DATA LIST HINT: Using the Techstream to read the Data List allows the values or states of switches, sensors, actuators and other items to be read without removing any parts. This non-intrusive inspection can be very useful because intermittent conditions or signals may be dis
Inspection
INSPECTION PROCEDURE 1. INSPECT OUTER REAR VIEW MIRROR ASSEMBLY LH (a) Check the operation of the mirror surface. (1) Disconnect the outer rear view mirror assembly LH connector. *a Component without harness connected (Outer Rear View Mirror Assembly LH) (2) Apply auxiliar
