Lexus NX: Performance Damper
Components
COMPONENTS
ILLUSTRATION
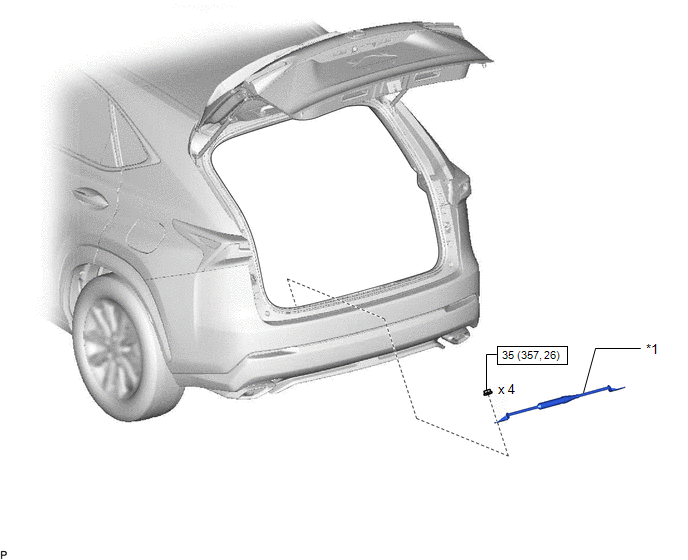
| *1 | SUSPENSION TOWER DAMPER | - | - |
.png) | N*m (kgf*cm, ft.*lbf): Specified torque | - | - |
Removal
REMOVAL
PROCEDURE
1. REMOVE REAR FLOOR FINISH PLATE
Click here .gif)
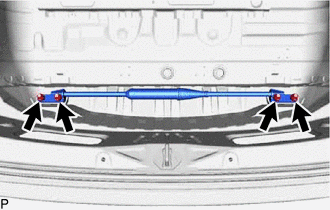
2. REMOVE SUSPENSION TOWER DAMPER
| (a) Remove the 4 nuts and the suspension tower damper from the vehicle. |
|
Inspection
INSPECTION
PROCEDURE
1. INSPECT SUSPENSION TOWER DAMPER
(a) Visually check the suspension tower damper and, if the rod is bent, a leak is found or the damper cannot be installed without extending or compressing it, replace it with a new one.
NOTICE:
Do not extend or compress the damper.
Installation
INSTALLATION
PROCEDURE
1. INSTALL SUSPENSION TOWER DAMPER
(a) Install the suspension tower damper with the 4 nuts.
Torque:
35 N·m {357 kgf·cm, 26 ft·lbf}
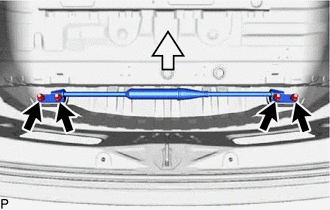
.png) | Front of Vehicle |
2. INSTALL REAR FLOOR FINISH PLATE
Click here .gif)
Disposal
DISPOSAL
PROCEDURE
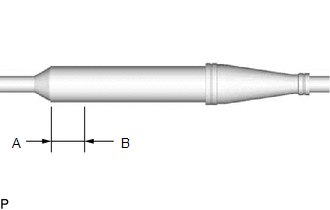
1. DISPOSE OF SUSPENSION TOWER DAMPER
| (a) Using a drill, make a hole in the cylinder between A and B shown in the illustration to discharge the gas inside. CAUTION: Always use proper safety equipment and be careful when drilling because shards of metal may fly about. HINT: The gas is colorless, odorless and non-poisonous. |
|
READ NEXT:
 Components
COMPONENTS ILLUSTRATION *1 REAR COIL SPRING LH *2 REAR HEIGHT CONTROL SENSOR SUB-ASSEMBLY LH *3 REAR LOWER COIL SPRING INSULATOR LH *4 REAR NO. 2 SUSPENSION ARM ASSEMBLY LH *5
Removal
REMOVAL CAUTION / NOTICE / HINT HINT:
Use the same procedure for the RH and LH sides.
The procedure listed below is for the LH side.
PROCEDURE 1. REMOVE REAR WHEEL Click here 2. REMOVE REAR
SEE MORE:
Entry Exterior Alarm and Answer-back Buzzer do not Sound
DESCRIPTION The smart access system with push-button start (for Entry Function) uses the wireless door lock buzzer to perform various vehicle exterior warnings. When the conditions of each warning are met, the certification ECU (smart key ECU assembly) sends a buzzer activation request signal to the
Rear Door Courtesy Switch
ComponentsCOMPONENTS ILLUSTRATION *1 REAR DOOR COURTESY LIGHT SWITCH ASSEMBLY - - N*m (kgf*cm, ft.*lbf): Specified torque - - RemovalREMOVAL CAUTION / NOTICE / HINT HINT:
Use the same procedure for the RH and LH sides.
The procedure listed below is for the LH side.
