Lexus NX: Rear Wheel House Plate
Components
COMPONENTS
ILLUSTRATION
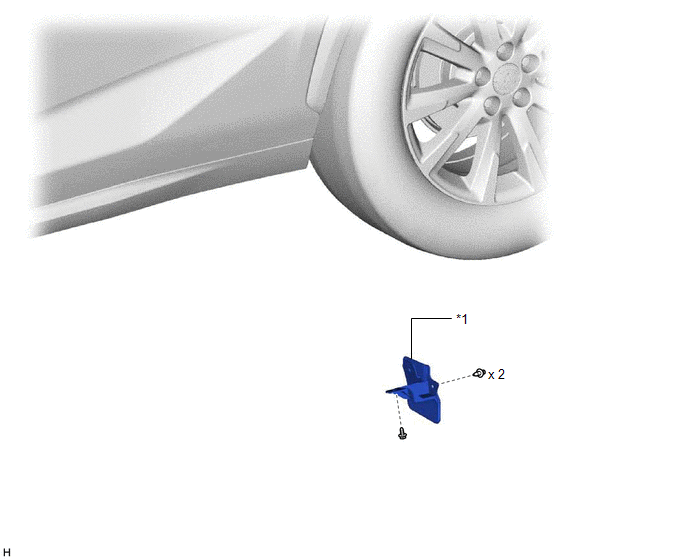
| *1 | REAR WHEEL FRONT HOUSE PLATE LH | - | - |
Removal
REMOVAL
CAUTION / NOTICE / HINT
HINT:
- Use the same procedure for the RH and LH sides.
- The procedure listed below is for the LH side.
PROCEDURE
1. REMOVE REAR WHEEL FRONT HOUSE PLATE LH
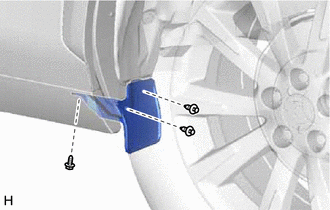
(a) Remove the 2 clips.
(b) Remove the screw and rear wheel house front plate LH.
Installation
INSTALLATION
CAUTION / NOTICE / HINT
HINT:
- Use the same procedure for the RH and LH sides.
- The procedure listed below is for the LH side.
PROCEDURE
1. INSTALL REAR WHEEL FRONT HOUSE PLATE LH
(a) Install the rear wheel house front plate LH with the screw.
(b) Install the 2 clips.
READ NEXT:
 Components
COMPONENTS ILLUSTRATION *A w/ Roof Rack - - *1 REAR ROOF DRIP SIDE FINISH MOULDING LH *2 ROOF DRIP SIDE FINISH MOULDING CLIP *3 ROOF DRIP SIDE FINISH MOULDING LH - -
Removal
REMOVAL CAUTION / NOTICE / HINT HINT:
Use the same procedure for the RH and LH sides.
The procedure listed below is for the LH side.
PROCEDURE 1. REMOVE ROOF RACK ASSEMBLY (w/ Roof Rack) Click
SEE MORE:
Installation
INSTALLATION CAUTION / NOTICE / HINT HINT:
Use the same procedure for the RH and LH sides.
The procedure listed below is for the LH side.
PROCEDURE 1. REPAIR INSTRUCTION Click here 2. INSTALL NO. 3 BLACK OUT TAPE LH HINT: When installing the No. 3 black out tape LH, heat the front door pan
USB Audio System Recognition/Play Error
DESCRIPTION When a USB device or "iPod" is connected to the USB jack of the No. 1 stereo jack adapter assembly, it must have playable files. The device must also communicate with and be recognized by the radio receiver assembly. This diagnosis procedure is for when a device is not recognized, or fil
© 2016-2026 Copyright www.lexunx.com
