Lexus NX: Removal
REMOVAL
CAUTION / NOTICE / HINT
HINT:
- Use the same procedure for the RH and LH sides.
- The procedures listed below are for the LH side.
PROCEDURE
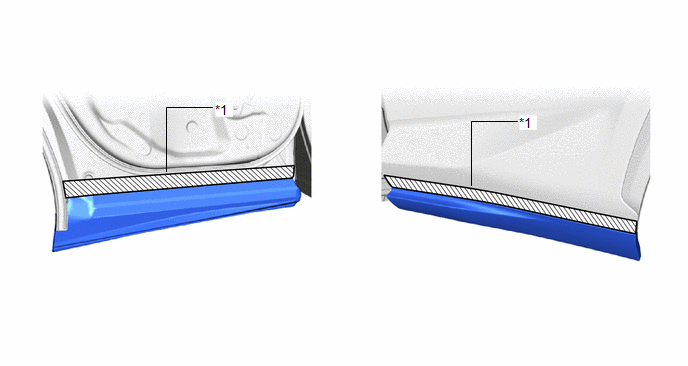
1. REMOVE REAR DOOR LOWER OUTSIDE MOULDING SUB-ASSEMBLY LH
HINT:
When removing the rear door lower outside moulding sub-assembly LH, heat the rear door panel and rear door lower outside moulding sub-assembly LH using a heat light.
Standard:
| Item | Temperature |
|---|---|
| Rear Door Panel | 40 to 60°C (104 to 140°F) |
| Rear Door Lower Outside moulding Sub-assembly LH | 20 to 30°C (68 to 86°F) |
NOTICE:
Do not heat the rear door panel and rear door lower outside moulding sub-assembly LH excessively.
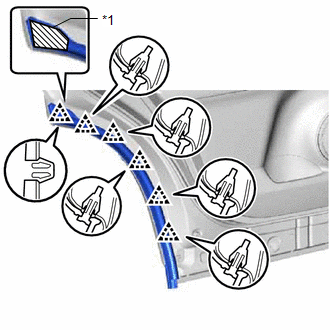
(a) Put protective tape around the rear door lower outside moulding sub-assembly LH.
| *1 | Protective Tape | - | - |
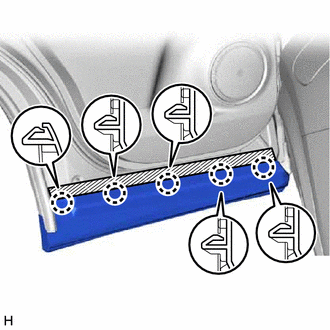
| (b) Using moulding remover D, detach the 5 claws. |
|
| (c) Remove the hole cover. |
|
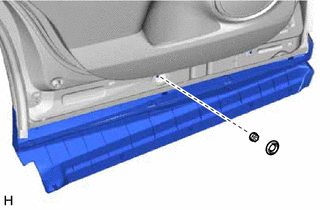
(d) Remove the nut.
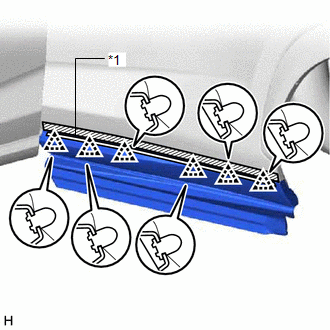
| (e) Using moulding remover D, detach the 6 clips and remove the rear door lower outside moulding sub-assembly LH. |
|
2. REMOVE REAR DOOR NO. 2 WEATHERSTRIP LH
| (a) Detach the 6 clips and remove the rear door No. 2 weatherstrip LH. |
|
3. REMOVE REAR DOOR REAR UPPER OUTSIDE MOULDING LH
HINT:
When removing the rear door rear upper outside moulding LH, heat the rear door panel and rear door lower outside moulding LH using a heat light.
Standard:
| Item | Temperature |
|---|---|
| Rear Door Panel | 40 to 60°C (104 to 140°F) |
| Rear Door Rear Upper Outside Moulding LH | 20 to 30°C (68 to 86°F) |
NOTICE:
Do not heat the rear door panel and rear door rear upper outside moulding LH excessively.
(a) Remove the clip.
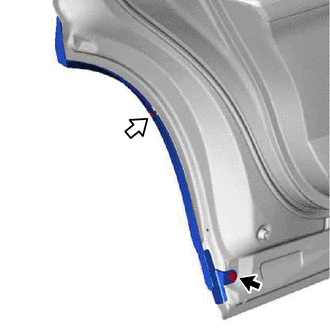
.png) | Bolt |
.png) | Clip |
(b) Remove the bolt.
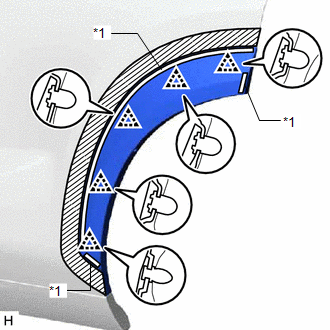
| (c) Put protective tape around the rear door rear upper outside moulding LH. |
|
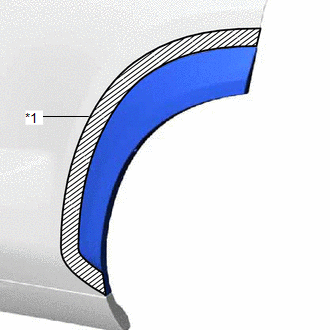
| (d) Detach the 5 clips and remove the rear door rear upper outside moulding LH |
|
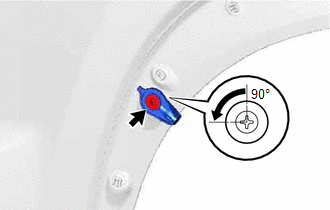
4. REMOVE OUTSIDE MOULDING RETAINER
| (a) Turn the clip 90° and remove the clip. |
|
(b) Detach the claw and remove the outside moulding retainer.
READ NEXT:
 Disassembly
DISASSEMBLY CAUTION / NOTICE / HINT HINT:
Use the same procedure for the RH and LH sides.
The procedure listed below is for the LH side.
PROCEDURE 1. REMOVE REAR DOOR UPPER OUTSIDE MOULDING PA
Reassembly
REASSEMBLY CAUTION / NOTICE / HINT HINT:
Use the same procedure for the RH and LH sides.
The procedure listed below is for the LH side.
PROCEDURE 1. INSTALL NO. 2 MOULDING TAPE (a) When using
SEE MORE:
Data List / Active Test
DATA LIST / ACTIVE TEST NOTICE: In the table below, the values listed under "Normal Condition" are reference values. Do not depend solely on these reference values when deciding whether a part is faulty or not. HINT: Using the Techstream to read the Data List allows the values or states of switches,
Inspection
INSPECTION PROCEDURE 1. INSPECT FRONT NO. 2 SPEAKER ASSEMBLY (a) Measure the resistance according to the value(s) in the table below. Standard Resistance: for 8 Speakers Tester Connection Condition Specified Condition 1 - 2 Always 4 Ω for 10 Speakers Tester Connection Con
