Lexus NX: Removal
REMOVAL
PROCEDURE
1. REMOVE DECK BOARD ASSEMBLY
Click here .gif)
2. REMOVE NO. 3 DECK BOARD SUB-ASSEMBLY
Click here
3. REMOVE REAR DECK FLOOR BOX (w/ Spare Tire)
Click here
4. REMOVE DECK FLOOR BOX LH (w/ Spare Tire)
Click here
5. PRECAUTION
CAUTION:
Be sure to read Precaution thoroughly before serving.
Click here
NOTICE:
After turning the power switch off, there may be a waiting time before disconnecting the negative (-) auxiliary battery terminal.
Click here
6. DISCONNECT CABLE FROM NEGATIVE AUXILIARY BATTERY TERMINAL
CAUTION:
- Wait at least 90 seconds after disconnecting the cable from the negative (-) auxiliary battery terminal to disable the SRS system.
- If the airbag deploys for any reason. it may cause a serious accident.
7. REMOVE MAP LIGHT ASSEMBLY
Click here
8. REMOVE THEFT WARNING ULTRASONIC SENSOR
| (a) Remove the 6 screws and disconnect the connector. |
|
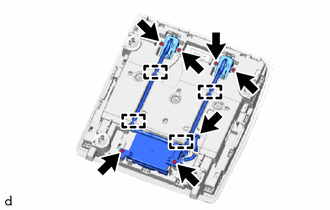
(b) Detach the 4 clamps and theft warning ultrasonic sensor.
READ NEXT:
 Installation
INSTALLATION PROCEDURE 1. INSTALL THEFT WARNING ULTRASONIC SENSOR (a) Attach the 4 clamps to install the theft warning ultrasonic sensor. (b) Install the 6 screws and connect the connector. 2. INSTALL
Security Horn Assembly
ComponentsCOMPONENTS ILLUSTRATION *1 SECURITY HORN ASSEMBLY - - N*m (kgf*cm, ft.*lbf): Specified torque - - RemovalREMOVAL PROCEDURE 1. REMOVE SECURITY HORN ASSEMBLY (a) R
SEE MORE:
Data List / Active Test
DATA LIST / ACTIVE TEST HINT: Using the Techstream to perform Active Tests allows relays, VSVs, actuators and other items to be operated without removing any parts. This non-intrusive functional inspection can be very useful because intermittent operation may be discovered before parts or wiring is
Diagnosis System
DIAGNOSIS SYSTEM DESCRIPTION (a) The DCM (telematics transceiver) control the vehicle safety connect system functions. Safety connect system data and Diagnostic Trouble Codes (DTCs) can be read through the vehicle Data Link Connector 3 (DLC3). In some cases, a malfunction may be occurring in the saf
© 2016-2026 Copyright www.lexunx.com
