Lexus NX: Components
COMPONENTS
ILLUSTRATION
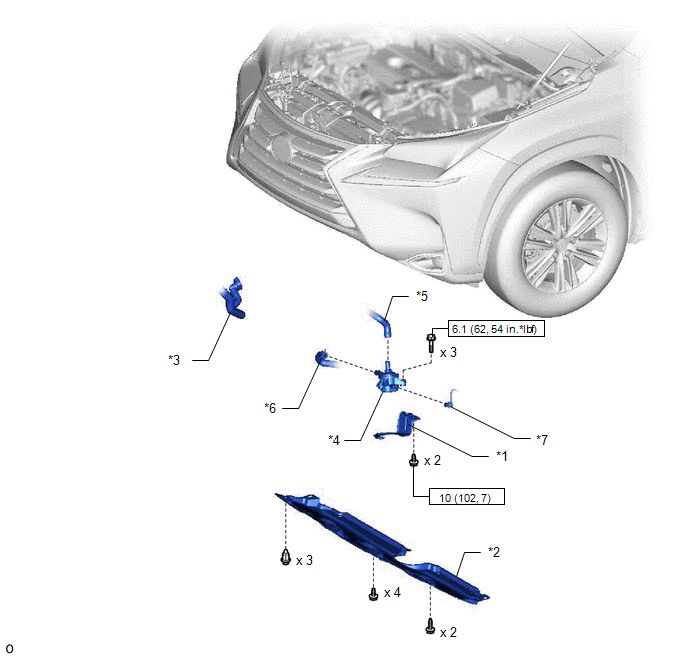
| *1 | HV WATER PUMP BRACKET SUB-ASSEMBLY | *2 | NO. 1 ENGINE UNDER COVER ASSEMBLY |
| *3 | NO. 2 INVERTER COOLING HOSE ASSEMBLY | *4 | WATER PUMP WITH MOTOR |
| *5 | NO. 2 INVERTER COOLING HOSE | *6 | NO. 3 INVERTER COOLING HOSE |
| *7 | WATER PUMP WITH MOTOR CONNECTOR | - | - |
.png) | N*m (kgf*cm, ft.*lbf): Specified torque | - | - |
READ NEXT:
 Removal
REMOVAL PROCEDURE 1. REMOVE NO. 1 ENGINE UNDER COVER ASSEMBLY Click here 2. DRAIN COOLANT (for Inverter Coolant) Click here 3. REMOVE UPPER RADIATOR SUPPORT SUB-ASSEMBLY Click here 4. DISCONNE
Installation
INSTALLATION PROCEDURE 1. INSTALL HV WATER PUMP BRACKET SUB-ASSEMBLY (a) Temporarily install the HV water pump bracket sub-assembly to the inverter bracket with bolt A. *a Bolt A
SEE MORE:
Diagnosis System
DIAGNOSIS SYSTEM DIAGNOSIS MODE FUNCTION (a) w/ Lane Centering Function: When a malfunction occurs in the lane tracing assist system system, the LTA indicator light illuminates yellow and a message is displayed on the multi-information display. Warning Message Details DTC/RoB LTA Indicator
Reassembly
REASSEMBLY CAUTION / NOTICE / HINT HINT:
Use the same procedure for the RH and LH sides.
The procedure listed below is for the LH side.
PROCEDURE 1. INSTALL OUTER MIRROR RETRACTOR LH (a) Install a new frame sub-assembly with the 2 screws. (b) Wind vinyl tape around the harness
© 2016-2026 Copyright www.lexunx.com
