Lexus NX: Components
COMPONENTS
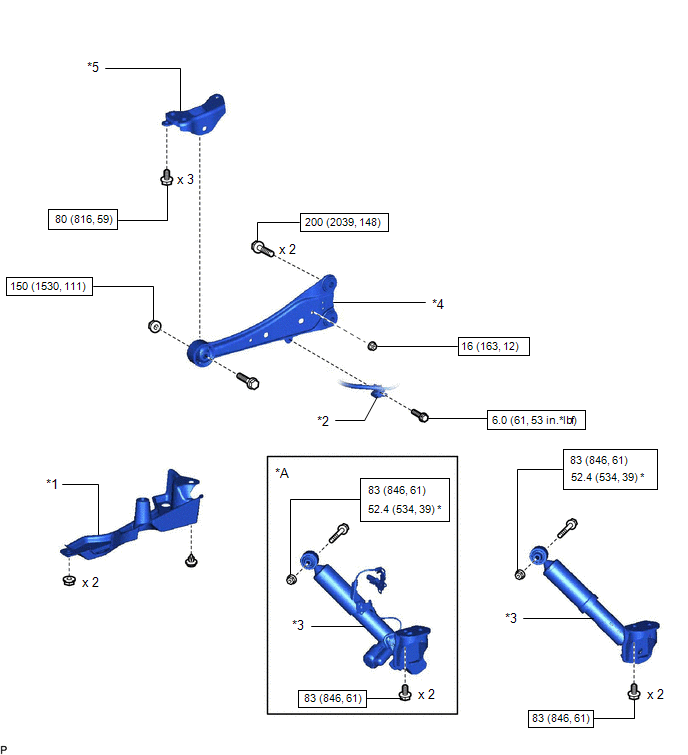
ILLUSTRATION
| *A | w/ AVS | - | - |
| *1 | NO. 1 FLOOR UNDER COVER | *2 | PARKING BRAKE WIRE ASSEMBLY |
| *3 | REAR SHOCK ABSORBER ASSEMBLY LH | *4 | REAR TRAILING ARM ASSEMBLY LH |
| *5 | REAR SUSPENSION ARM BRACKET LH | - | - |
.png) | N*m (kgf*cm, ft.*lbf): Specified torque | * | For use with ball joint lock nut wrench |
READ NEXT:
 Removal
REMOVAL CAUTION / NOTICE / HINT HINT:
Use the same procedure for the RH and LH sides.
The procedure listed below is for the LH side.
PROCEDURE 1. REMOVE REAR WHEEL Click here 2. DISCONNECT R
Installation
INSTALLATION CAUTION / NOTICE / HINT HINT:
Use the same procedure for the RH and LH sides.
The procedure listed below is for the LH side.
PROCEDURE 1. TEMPORARILY INSTALL REAR TRAILING ARM ASS
SEE MORE:
Disassembly
DISASSEMBLY CAUTION / NOTICE / HINT CAUTION: Wear protective gloves. Sharp areas on the parts may injure your hands. HINT:
Use the same procedure for the RH and LH sides.
The procedure listed below is for the LH side.
PROCEDURE 1. REMOVE FRONT SEAT INNER BELT ASSEMBLY LH (for Driver Side) Cl
Master Module Horizontal Axis Misalignment (C1AC1)
DESCRIPTION This DTC is stored when the angle of the blind spot monitor sensor LH deviates more than the allowable range from the horizontal axis. HINT: If a drum tester such as a speedometer tester, brake/speedometer combination tester or chassis dynamometer is used with the blind spot monitor main
© 2016-2026 Copyright www.lexunx.com
