Lexus NX: Disassembly
DISASSEMBLY
CAUTION / NOTICE / HINT
CAUTION:
Wear protective gloves. Sharp areas on the parts may injure your hands.
HINT:
- Use the same procedure for the RH and LH sides.
- The procedure listed below is for the LH side.
PROCEDURE
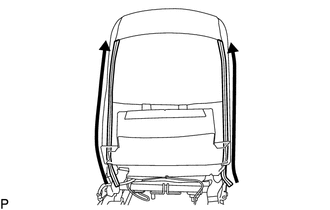
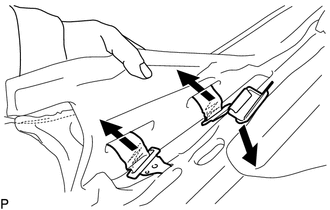
1. REMOVE FRONT SEAT INNER BELT ASSEMBLY LH (for Driver Side)
Click here .gif)
2. REMOVE FRONT SEAT INNER BELT ASSEMBLY RH (for Front Passenger Side)
Click here
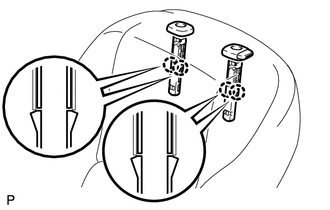
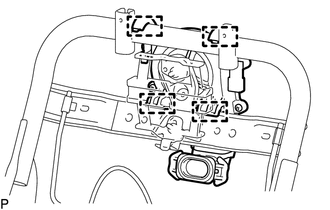
3. REMOVE SEAT ADJUSTER COVER CAP LH
| (a) Remove the 2 seat adjuster cover caps from the front seat adjuster assembly LH. |
|
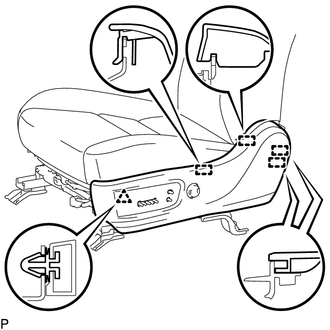
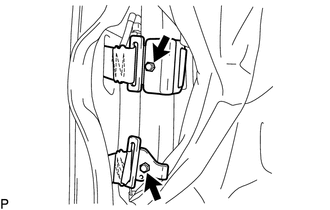
4. REMOVE FRONT LOWER SEAT CUSHION SHIELD
| (a) Remove the screw. |
|
(b) Detach the claw A.
(c) Detach the clip, 2 claws B and guide, and then remove the front lower seat cushion shield.
5. REMOVE POWER SEAT SWITCH KNOB LH
| (a) Using moulding remover A, detach the 2 claws to remove the power seat switch knob LH. |
|
6. REMOVE POWER SEAT SWITCH KNOB LH
| (a) Using moulding remover A, detach the 2 claws to remove the power seat switch knob LH. |
|
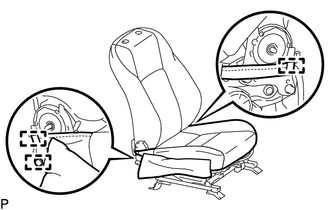
7. REMOVE FRONT SEAT CUSHION SHIELD LH
| (a) Detach the 2 hooks to disconnect the 2 rubber bands. |
|
| (b) Using moulding remover A, detach the claw. |
|
| (c) Detach the clip and 4 guides to remove the front seat cushion shield LH. |
|
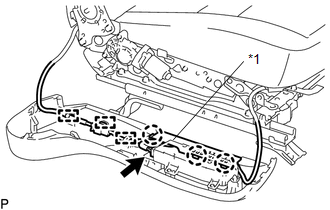
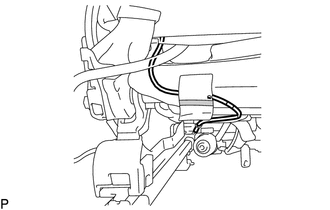
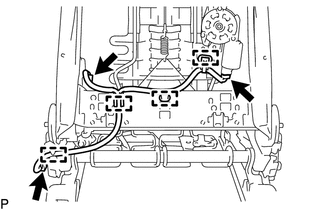
| (d) for Driver Side, w/o Memory: (1) Detach the 3 claws to open the wire harness cover. (2) Detach the 3 clamps to disconnect the wire harness. (3) Disconnect the 2 connectors. |
|
| (e) for Driver Side, w/ Memory: (1) Detach the 3 claws to open the wire harness cover. (2) Detach the 3 clamps to disconnect the wire harness. (3) Disconnect the 3 connectors. |
|
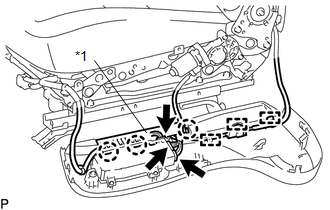
| (f) for Front Passenger Side: (1) Detach the 3 claws to open the wire harness cover. (2) Detach the 3 clamps to disconnect the wire harness. (3) Disconnect the connector. |
|
8. REMOVE FRONT POWER SEAT SWITCH LH
Click here
9. REMOVE FRONT LUMBAR POWER SEAT SWITCH
Click here
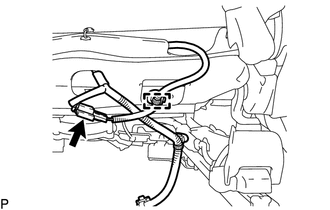
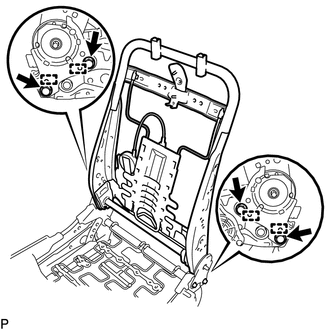
10. REMOVE FRONT INNER SEAT CUSHION SHIELD LH
| (a) Using moulding remover A, detach the claw. |
|
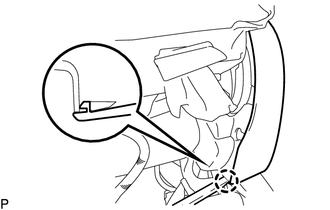
| (b) Detach the claw and 3 guides to remove the front inner seat cushion shield LH. |
|
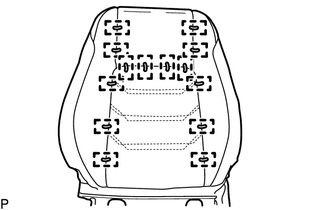
11. REMOVE SEPARATE TYPE FRONT SEAT CUSHION COVER WITH PAD LH
(a) Detach the fastening tape to disconnect the front seat side airbag wire harness.
 | Fastening Tape |
(b) w/ Seat Heater System:
| (1) Disconnect the connector. |
|
(2) Detach the clamp to disconnect the seat heater wire harness.
| (3) Disconnect the connector. |
|
(4) Detach the 3 clamps to disconnect the seat heater wire harness.
| (c) Detach the 3 hooks. |
|
| (d) Detach the 10 hooks and remove the separate type front seat cushion cover with pad LH. |
|
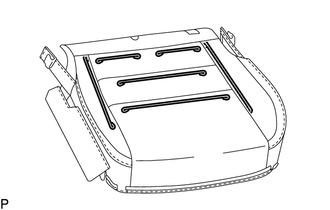
12. REMOVE SEPARATE TYPE FRONT SEAT CUSHION COVER LH
| (a) Remove the 2 hog rings. |
|
| (b) Remove the 14 hog rings. |
|
| (c) Slide the seat cover wire. HINT: Use the same procedure for both seat cover wires. |
|
| (d) Remove the 4 hog rings to remove the separate type front seat cushion cover LH from the separate type front seat cushion pad LH. |
|
13. REMOVE SEAT COVER WIRE
| (a) Remove the seat cover wire. |
|
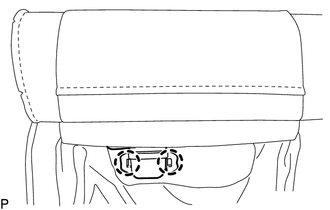
14. REMOVE FRONT SEAT HEADREST SUPPORT
(a) Detach the 2 pieces of fastening tape and pull out the 2 fasteners.
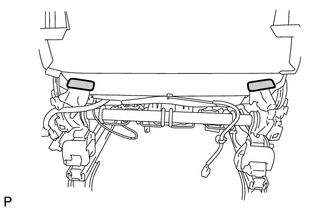
| | Fastening Tape |
| (b) Remove the 5 hog rings. |
|
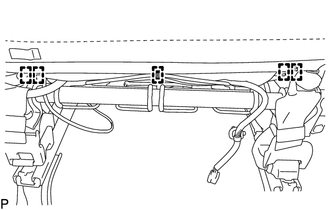
| (c) Open the 2 fasteners. |
|
| (d) Detach the 4 claws to remove the 2 front seat headrest supports. |
|
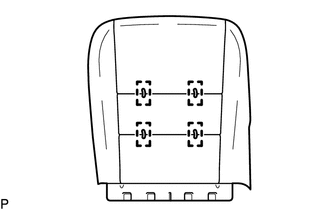
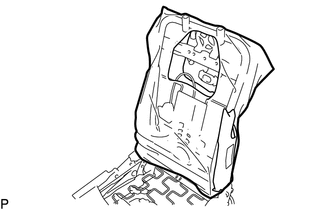
15. REMOVE SEPARATE TYPE FRONT SEATBACK COVER WITH PAD
| (a) Remove the 2 nuts to disconnect the 3 seatback cover brackets. |
|
| (b) w/ Climate Control Seat System: (1) Detach the 2 claws to disconnect the duct of the seatback climate control blower. |
|
(c) Remove the separate type front seatback cover with pad.
16. REMOVE SEPARATE TYPE FRONT SEATBACK COVER LH
| (a) Pass the 3 seatback cover brackets through the 3 holes of the separate type front seatback pad. |
|
| (b) Remove the 14 hog rings to remove the separate type front seatback cover LH from the separate type front seatback pad LH. |
|
17. REMOVE SEAT COVER WIRE
(a) Remove the seat cover wire.

18. REMOVE SEATBACK FELT
| (a) Remove the seatback felt from the separate type front seatback spring assembly LH. |
|
19. REMOVE FRONT SEAT AIRBAG ASSEMBLY LH
Click here
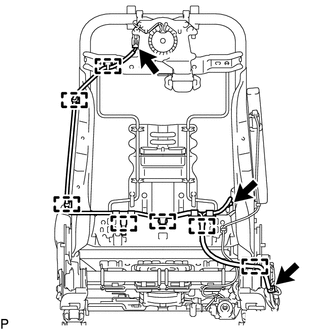
20. REMOVE FRONT NO. 2 SEAT WIRE LH (for Driver Side)
(a) w/ Climate Control Seat System:
| (1) Disconnect the 4 connectors. |
|
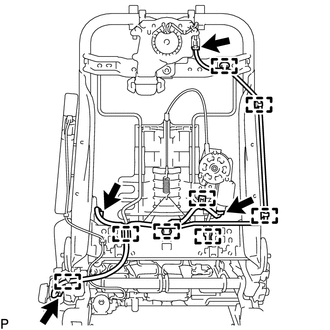
(2) Detach the 8 clamps to remove the front No. 2 seat wire LH.
| (b) w/o Climate Control Seat System: (1) Disconnect the 3 connectors. (2) Detach the 4 clamps to remove the front No. 2 seat wire LH. |
|
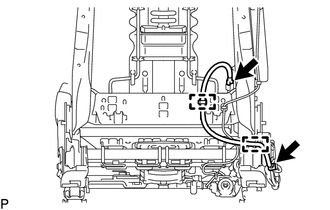
21. REMOVE FRONT NO. 2 SEAT WIRE RH (for Front Passenger Side)
(a) w/ Climate Control Seat System:
| (1) Disconnect the 3 connectors. |
|
(2) Detach the 7 clamps to remove the front No. 2 seat wire RH.
| (b) w/o Climate Control Seat System: (1) Disconnect the 2 connectors. (2) Detach the 2 clamps to remove the front No. 2 seat wire RH. |
|
22. REMOVE SEATBACK CLIMATE CONTROL BLOWER LH (w/ Climate Control Seat System)
| (a) Using a clip remover, remove the clip. |
|
| (b) Detach the 4 hooks to remove the seatback climate control blower LH. |
|
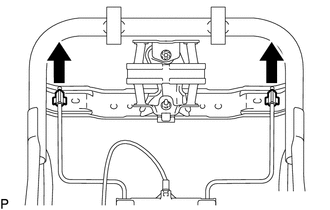
23. REMOVE SEPARATE TYPE FRONT SEATBACK SPRING ASSEMBLY LH
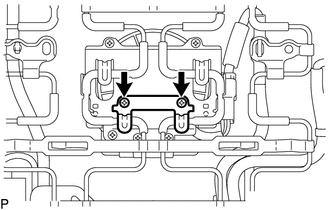
| (a) Remove the 4 bolts. |
|
(b) Detach the 4 guides to remove the separate type front seatback spring assembly LH from the front seat adjuster assembly LH.
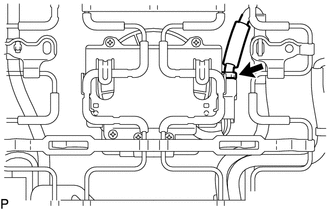
24. REMOVE FRONT NO. 1 SEATBACK HOOK
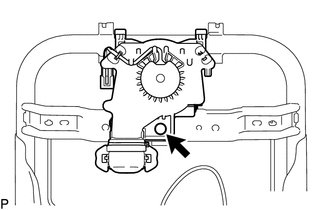
| (a) Detach the 2 claws. |
|

| (b) Remove the 2 front No. 1 seatback hooks from the lumbar support adjuster assembly LH. |
|
25. REMOVE FRONT SEATBACK EDGE PROTECTOR
| (a) Detach the 2 claws and 4 guides to remove the 2 front seatback edge protectors. |
|

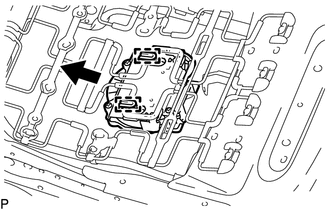
26. REMOVE LUMBAR SUPPORT ADJUSTER ASSEMBLY LH
Click here
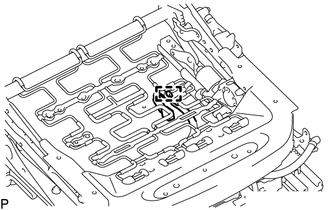
27. REMOVE FRONT SEATBACK SPRING SUB-ASSEMBLY RH (for Front Passenger Side)
| (a) Detach the 2 hooks to remove the front seatback spring sub-assembly RH from the front seatback frame sub-assembly RH. |
|
28. REMOVE FRONT SEAT CUSHION AIRBAG ASSEMBLY RH (for Front Passenger Side)
Click here
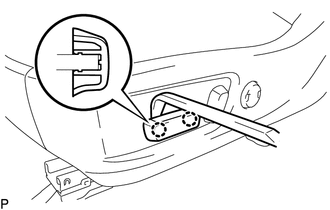
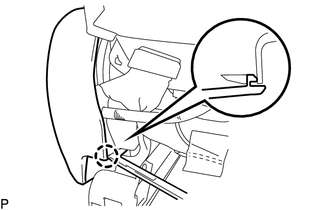
29. REMOVE FRONT LOWER SEAT CUSHION SHIELD LH
| (a) Remove the clip A. |
|
(b) Detach the hook in the direction indicated by the arrow in the illustration.
(c) Detach the clip B to remove the front lower seat cushion shield LH.
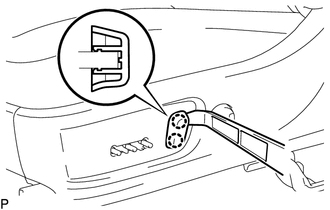
30. REMOVE FRONT LOWER SEAT CUSHION SHIELD RH
| (a) Remove the screw. |
|
(b) Detach the hook in the direction indicated by the arrow in the illustration.
(c) Detach the clip to remove the front lower seat cushion shield RH.
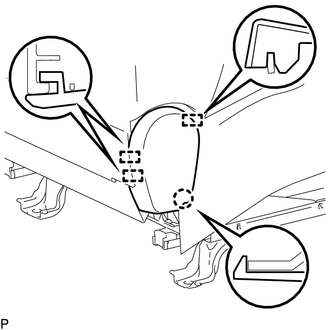
31. REMOVE FRONT SEAT CUSHION EDGE PROTECTOR LH
| (a) Detach the clamp and guide to remove the front seat cushion edge protector LH. |
|
32. REMOVE FRONT SEAT CUSHION EDGE PROTECTOR RH
HINT:
Use the same procedure described for the LH side.
33. REMOVE SEAT CUSHION CLIMATE CONTROL DUCT LH (w/ Climate Control Seat System)
| (a) Detach the 2 claws to remove the seat cushion climate control duct LH from the seat cushion climate control blower assembly LH. |
|
34. REMOVE SEAT CUSHION CLIMATE CONTROL BRACKET LH (w/ Climate Control Seat System)
| (a) Using a T20 "TORX" socket wrench, remove the 2 "TORX" screws and seat cushion climate control bracket LH. |
|
35. REMOVE SEAT CUSHION CLIMATE CONTROL BLOWER ASSEMBLY LH (w/ Climate Control Seat System)
| (a) Disconnect the connector. |
|
| (b) Detach the 2 hooks to remove the seat cushion climate control blower assembly LH. |
|
36. REMOVE SEAT POSITION AIRBAG SENSOR (for Driver Side)
Click here
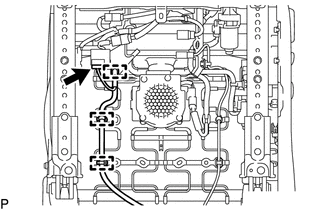
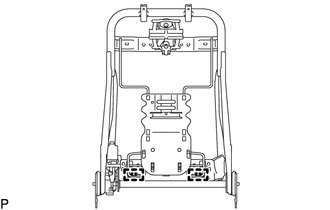
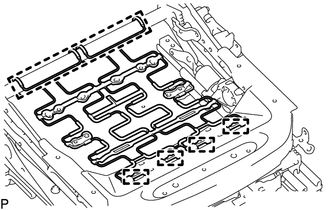
37. REMOVE FRONT SEAT CUSHION SPRING SUB-ASSEMBLY LH
| (a) w/ Climate Control Seat System: (1) Detach the clamp to disconnect the wire harness. |
|
| (b) Detach the 6 hooks to remove the front seat cushion spring sub-assembly LH from the front seat adjuster assembly LH. |
|
38. REMOVE SEAT HEATER CONTROL SUB-ASSEMBLY LH (w/ Seat Heater System)
| (a) Disconnect the connector. |
|
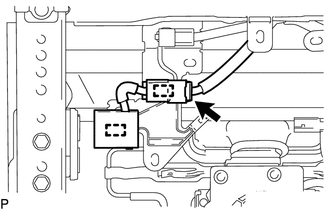
(b) Detach the 2 clamps to remove the seat heater control sub-assembly LH.
39. REMOVE OCCUPANT DETECTION ECU (for Front Passenger Side)
Click here
40. REMOVE FRONT SEAT WIRE RH (for Front Passenger Side)
| (a) Disconnect the 2 connectors. |
|

(b) Detach the 5 clamps to remove the front seat wire RH.
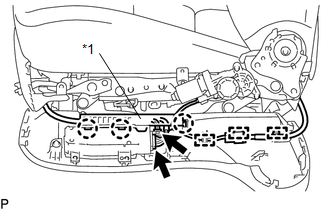
41. REMOVE FRONT SEAT WIRE LH (for Driver Side)
| (a) Disconnect the 3 connectors. |
|
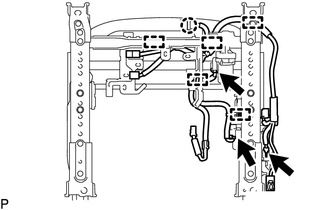
(b) Detach the claw to disconnect the connector.
(c) Detach the 5 clamps to remove the front seat wire LH.
42. REMOVE FRONT SEAT WIRE RH (for Front Passenger Side)
| (a) Disconnect the 3 connectors. |
|
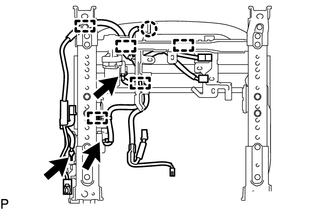
(b) Detach the claw to disconnect the connector.
(c) Detach the 5 clamps to remove the front seat wire RH.
READ NEXT:
 Inspection
INSPECTION PROCEDURE 1. INSPECT FRONT SEAT ADJUSTER ASSEMBLY LH (w/o Memory) (a) Check the operation of the slide motor. (1) Apply auxiliary battery voltage to the slide motor connector, and check
Reassembly
REASSEMBLY CAUTION / NOTICE / HINT CAUTION: Wear protective gloves. Sharp areas on the parts may injure your hands. HINT:
Use the same procedure for the RH and LH sides.
The procedure listed belo
Installation
INSTALLATION CAUTION / NOTICE / HINT CAUTION: Wear protective gloves. Sharp areas on the parts may injure your hands. HINT:
Use the same procedure for the RH and LH sides.
The procedure listed be
SEE MORE:
Data List / Active Test
DATA LIST / ACTIVE TEST DATA LIST HINT: Using the Techstream to read the Data List allows the values or states of switches, sensors, actuators and other items to be read without removing any parts. This non-intrusive inspection can be very useful because intermittent conditions or signals may be dis
Components
COMPONENTS ILLUSTRATION *1 TRANSMITTER BATTERY *2 DOOR CONTROL TRANSMITTER HOUSING SET *3 TRANSMITTER BATTERY HOLDER *4 MECHANICAL KEY *5 ELECTRICAL TRANSMITTER SUB-ASSEMBLY - - ILLUSTRATION *1 TRANSMITTER (CARD KEY) BATTERY *2 TRANSMITTER BATTERY HOUSING C
