Lexus NX: Components
COMPONENTS
ILLUSTRATION
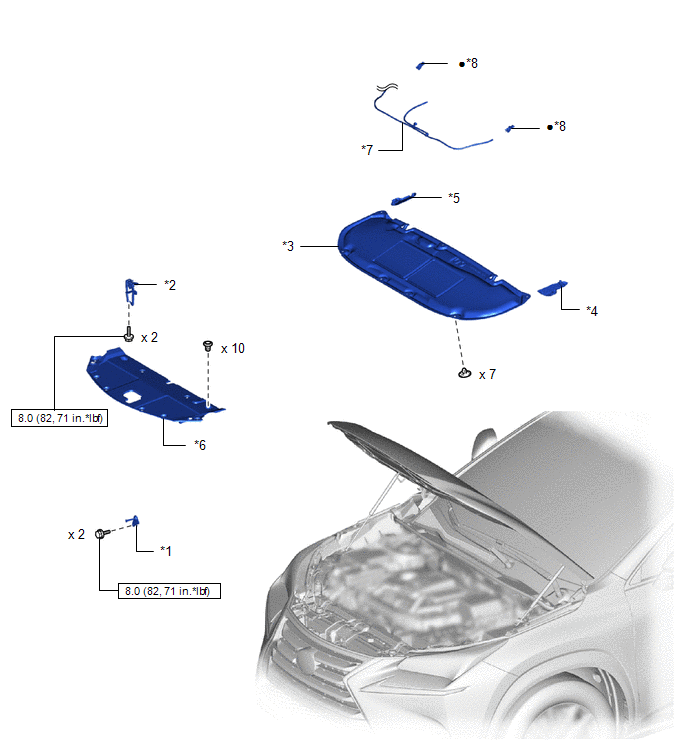
| *1 | ENGINE HOOD LOCK STRIKER ASSEMBLY | *2 | HOOD AUXILIARY CATCH HOOK ASSEMBLY |
| *3 | HOOD INSULATOR | *4 | HOOD TO FRONT FENDER SEAL LH |
| *5 | HOOD TO FRONT FENDER SEAL RH | *6 | RADIATOR SUPPORT OPENING COVER |
| *7 | WASHER HOSE ASSEMBLY | *8 | WASHER NOZZLE SUB-ASSEMBLY |
.png) | N*m (kgf*cm, ft.*lbf): Specified torque | ● | Non-reusable part |
READ NEXT:
 On-vehicle Inspection
ON-VEHICLE INSPECTION PROCEDURE 1. INSPECT HOOD SUB-ASSEMBLY (a) Check that the clearance measurements of areas A to E are within the standard ranges. Standard Clearance: Area Specified Conditi
Disassembly
DISASSEMBLY PROCEDURE 1. REMOVE HOOD INSULATOR (a) Using a clip remover, remove the 7 clips. (b) Detach the 2 guides and remove the hood insulator. 2. REMOVE HOOD TO FRONT FENDER SEAL L
Adjustment
ADJUSTMENT CAUTION / NOTICE / HINT HINT:
Centering bolts are used to mount the hood hinge to the vehicle body and hood. The hood cannot be adjusted with the centering bolts on. Substitute the cente
SEE MORE:
Initialization
INITIALIZATION INITIALIZE MULTIPLEX NETWORK DOOR ECU NOTICE: Initialization of the multiplex network door ECU (back door initial position learning) is necessary if the following work procedures are performed while the back door is open.
The cable to the negative (-) auxiliary battery terminal is
Installation
INSTALLATION CAUTION / NOTICE / HINT NOTICE:
When replacing the windshield glass of a vehicle equipped with a forward recognition camera, make sure to use a Lexus genuine part. If a non-Lexus genuine part is used, the forward recognition camera may not be able to be installed due to a missing bra
© 2016-2026 Copyright www.lexunx.com
