Lexus NX: Components
COMPONENTS
ILLUSTRATION
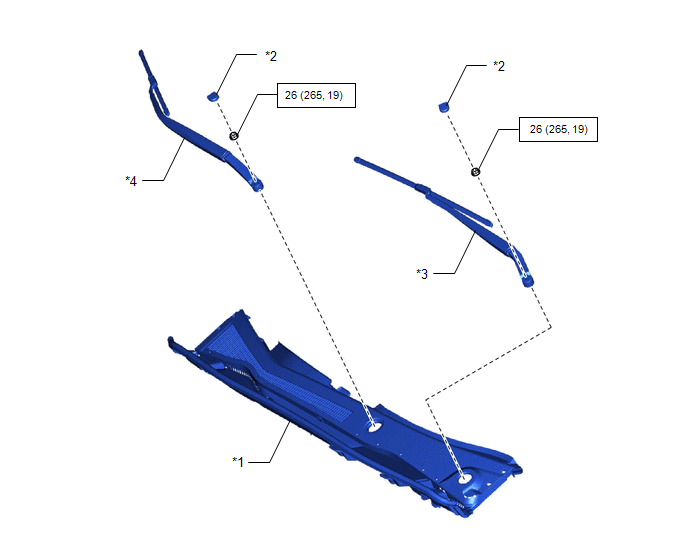
| *1 | COWL TOP VENTILATOR LOUVER SUB-ASSEMBLY | *2 | FRONT WIPER ARM HEAD CAP |
| *3 | WINDSHIELD WIPER ARM AND BLADE ASSEMBLY LH | *4 | WINDSHIELD WIPER ARM AND BLADE ASSEMBLY RH |
.png) | N*m (kgf*cm, ft.*lbf): Specified torque | - | - |
ILLUSTRATION
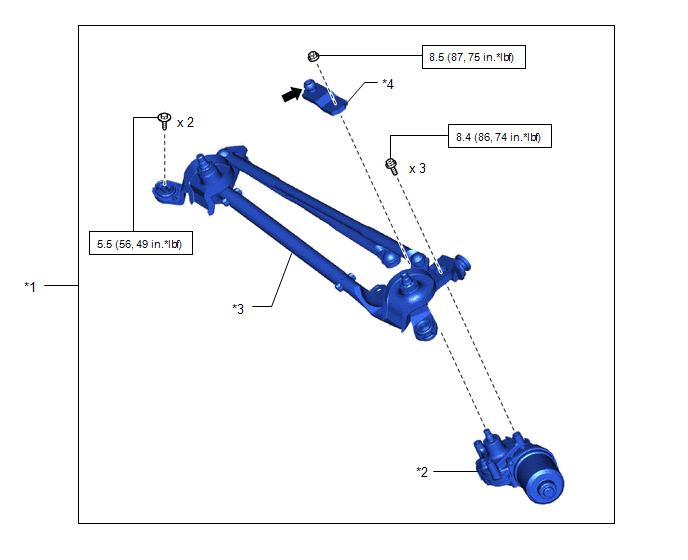
| *1 | WINDSHIELD WIPER MOTOR AND LINK ASSEMBLY | *2 | WINDSHIELD WIPER MOTOR ASSEMBLY |
| *3 | WINDSHIELD WIPER LINK ASSEMBLY | *4 | WINDSHIELD WIPER MOTOR CRANK |
| | N*m (kgf*cm, ft.*lbf): Specified torque | .png) | MP grease |
READ NEXT:
 On-vehicle Inspection
ON-VEHICLE INSPECTION PROCEDURE 1. INSPECT WINDSHIELD WIPER MOTOR ASSEMBLY (a) for LH Side: (1) Check the stop (park) position. *1 Ceramic Dot *2 Louver Lip Edge *a 34 mm
Inspection
INSPECTION CAUTION / NOTICE / HINT CAUTION: Make sure that fingers or articles of clothing do not get caught in moving parts when performing this test. PROCEDURE 1. INSPECT WINDSHIELD WIPER MOTOR ASSE
Removal
REMOVAL PROCEDURE 1. REMOVE FRONT WIPER ARM HEAD CAP (a) Using a screwdriver, detach the 3 claws and remove the front wiper arm head cap. HINT:
Tape the screwdriver tip before use.
Use the sam
SEE MORE:
Cooling System
DESCRIPTION The cause of the malfunction may be the cooling system. Check whether the grille is blocked, whether coolant is leaking, the HV radiator fan operating condition and whether coolant has frozen. Related Parts Check Area Inspection Step Grille blockage, coolant amount, coolant ho
Rear Door RH ECU Communication Stop (B2323)
DESCRIPTION This DTC is output when LIN communication between the rear power window regulator motor assembly RH and main body ECU (multiplex network body ECU) stops for 10 seconds or more. DTC No. Detection Item DTC Detection Condition Trouble Area B2323 Rear Door RH ECU Communication
© 2016-2026 Copyright www.lexunx.com
